
Creating Validations
This topic describes how to create validations. It is divided into:
- Validation Types
- Organising Validations Using Categories
- Creating a New Validation
- Using the Formula Editor
- Creating a Validation Message
- Useful Keyboard Shortcuts
Validation Types
There are three validation types: Block, Error and Warning.
Block Validation Rules
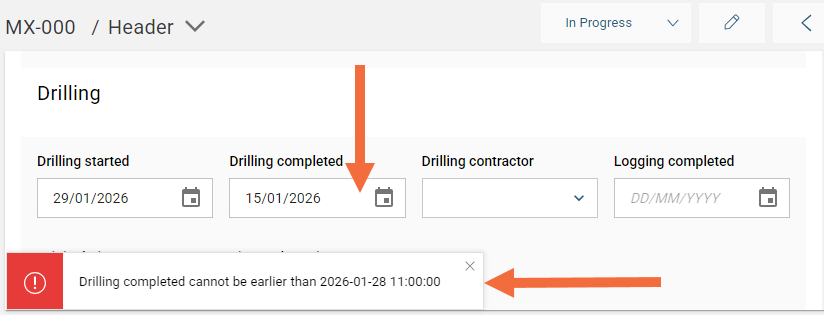
A block validation rule prevents the incorrect data from being entered. A block rule will not allow the incorrect data to be saved; instead, an error message will be displayed.
In this example, the Drilling completed date is earlier than the Drilling started date:
Error Validation Rules
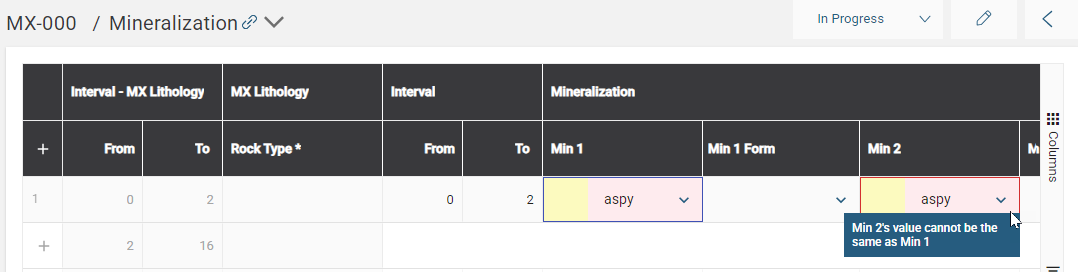
An error validation rule will colour the cell red. When the cursor is held over the cell, the error message will be displayed. The logger will not be blocked from continuing to log data, but the cell will be marked with an error until it is corrected.
Warning Validation Rules
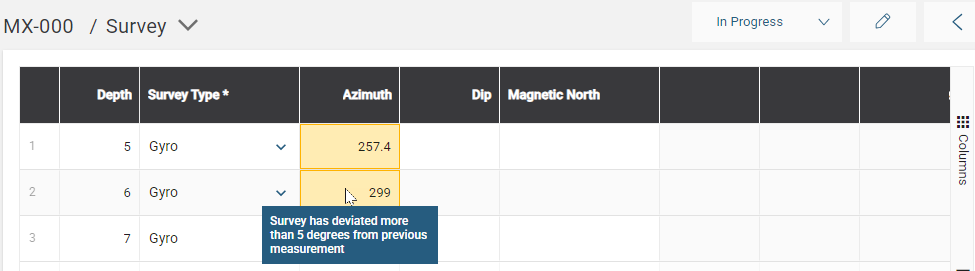
A warning validation rule will colour the cell orange. When the cursor is held over the cell, the warning message will be displayed. The logger will not be blocked from continuing to log data, but the cell will be marked with a warning until it is corrected.
Organising Validations Using Categories
Before you create a validation, you must first create one or more categories. Categories organize the validation rules into groups that, over time, can be helpful in organising your site.
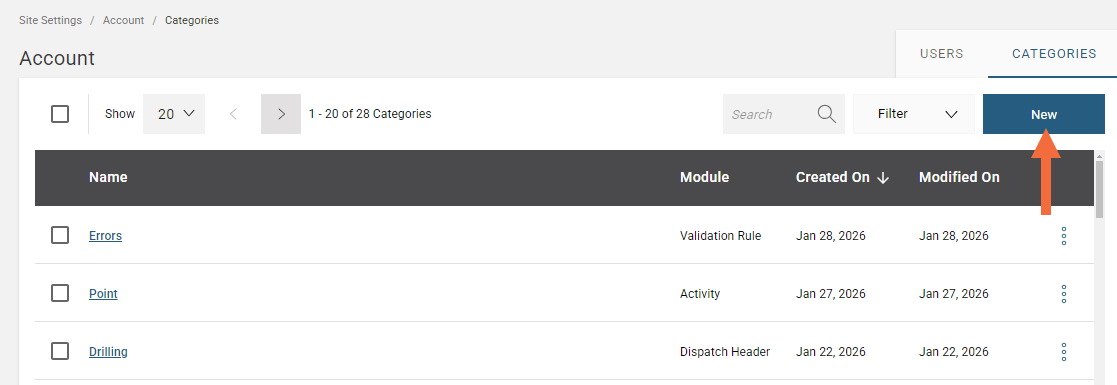
To create a new category go to Site Settings > Account > Categories and click New.
In the Add Category window, give your category a name and select Validation Rule from the Module menu.
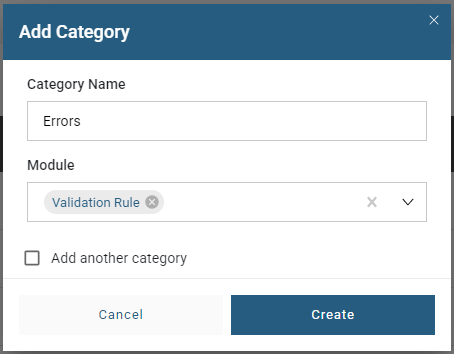
Select Add another category if there are additional categories to create.
Click Create; the newly added category will be available as an option in creating a new validation.
Creating a New Validation
To create a new validation, click New in the Validation Rules list view:

For the new validation rule, provide general details:
- Give your validation a unique Name.
- MX Deposit will automatically assign a Code, however this can be changed.
- Provide an optional Description to help you to know at a quick glance what this validation is for.
- Choose what Category you want it to be in. If the category you want is not listed, you can create a new one. See Organising Validations Using Categories for more information on how to do this.
- Select a Validation Type.
- Choose the Validation Scope that the validation will apply to. This can apply to either tables, headers, or both.
- Choose the Collar States to Validation. You can choose one or more options.
Click Create Validation Rule to move onto the Validation Rule Details.
Click Edit to open the Formula Editor.

Using the Formula Editor
The formula editor is made up of two parts: The side panel (1) that contains a library of Inputs and Functions. Use these to build the Rule Logic in the Formula Creator (2).
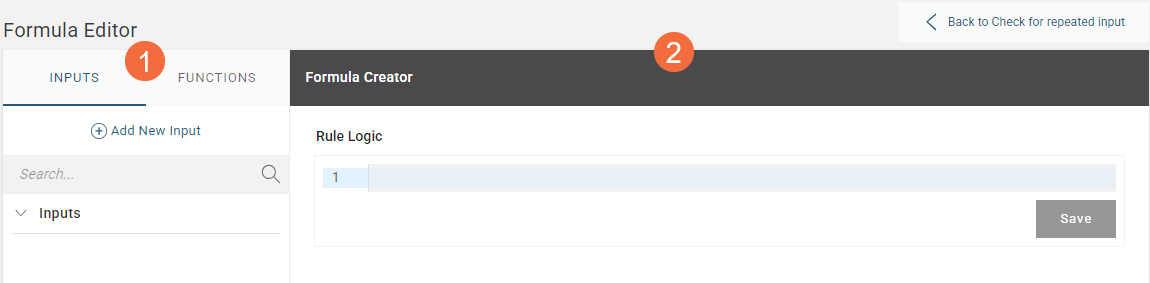
When creating a new validation rule, there are no Inputs available as these need to be created for each new validation rule. These are the generic variables that will be mapped in the table or header at a later stage.
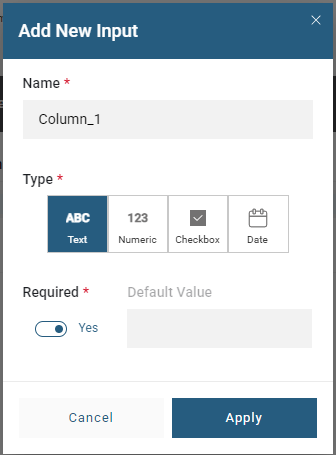
To create an input select Add New Input. Give it a Name and choose the input Type. On this example, the input Name is Column_1 and the chosen input Type is Text as it will be used in a validation where one text column type is going to be validated against another text column type.
The option to add a new input will not be available if the validation is already used elsewhere in MX Deposit. If this is the case, remove the validation from the table or header to enable the Add New Input option.
When adding an input, you can specify whether each of the inputs is required or not required. To do this, enable Required for any input that must have a value.
- If Required is set to yes, tables and headers must have values before the validation will run.
- If Required is set to no, the validation will use the default value when validating that row.
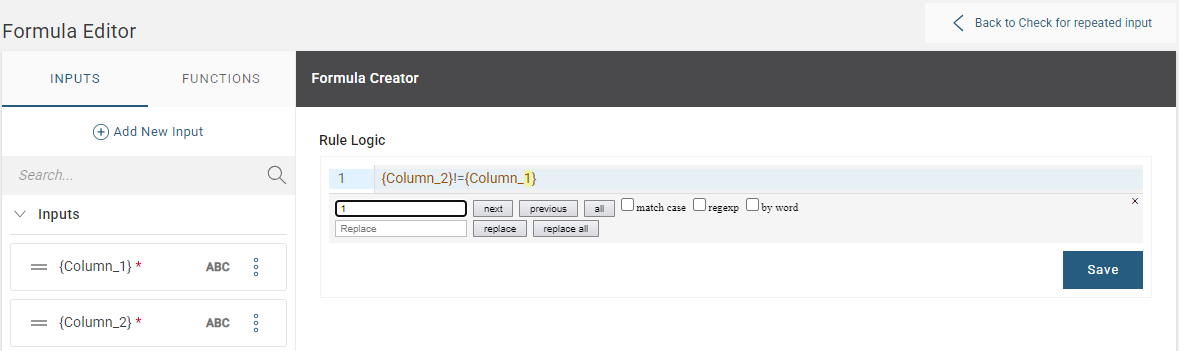
Click Apply and the new input will be available for you to use in your formula expression.
Functions are the mathematical operators and other calculation elements that are available to use. For a detailed list of all the functions available in creating a validation rule expressions see the Functions topic in the Catalogue of Operators, Functions and Inputs.
Formula Building Basics
- You can either type the expression directly or build it from the Inputs and Functions panel
- Use single quotes ' ' to identify text strings
- Functions and inputs are case sensitive
- Parentheses / round brackets ( ) are used as part of the BEDMAS standard order of operation
- Curly brackets { } are used to reference an input
- Square brackets [ ] are used as nested parentheses for the ifThen conditional function
Tips for Building an Expression
To bring up the find and replace window, use the keyboard shortcut Ctrl+F for PCs or Command+F for Macs.
When you have a long formula, you may need to scroll across your screen to see the complete formula, as is the case here:
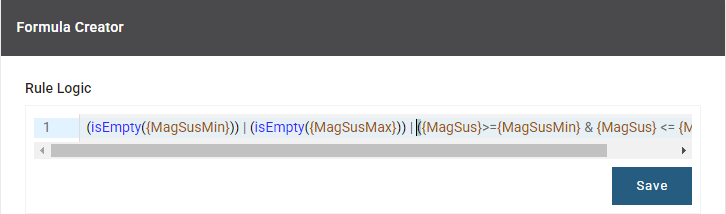
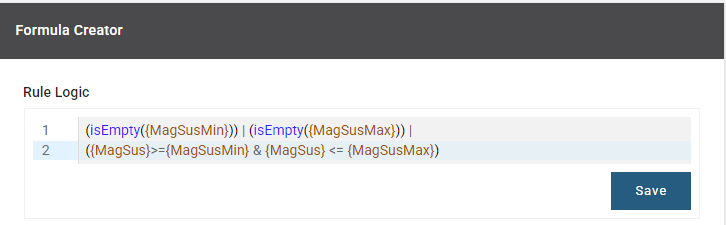
To avoid this, you can enter a new line for ease of viewing at logical separation points in the formula expression. However, doing so is not required.
Creating a Validation Message
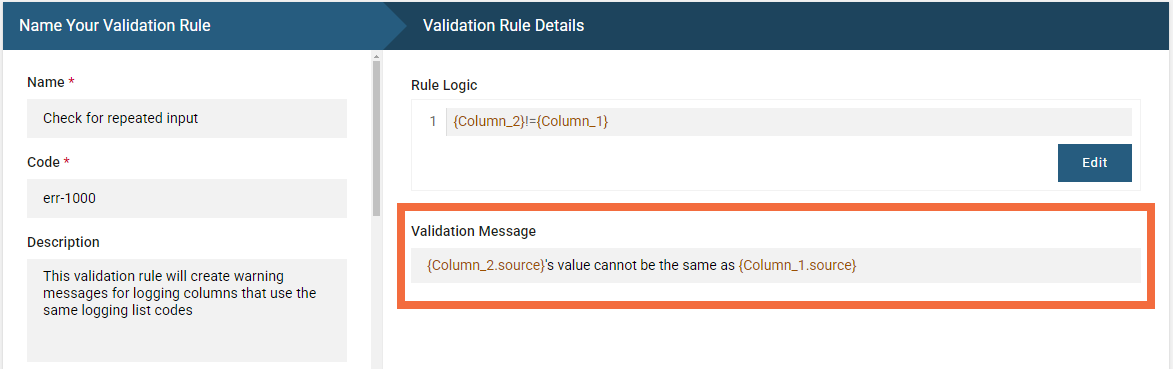
You can enter the Validation Message once the validation rule is built. This is the message that is displayed after data is logged that triggers the validation error.
You can use the inputs, created in the previous step, in the validation message. This will mean that the validation message will dynamically update based on what the input is mapped to. Here, the validation message uses the source of the input, in this case the source is the column name:
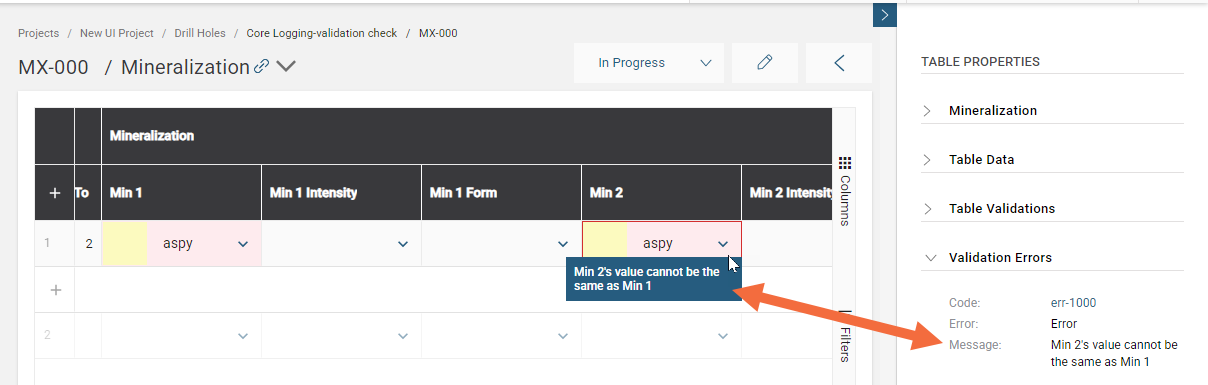
The result is that when an error is triggered, the validation message uses the column name:
Useful Keyboard Shortcuts
| Keys - PC | Keys - Mac | Action |
|---|---|---|
| Ctrl+F | Command+F | Find - brings up the Find and Replace window |
| Ctrl+G | Command+G | Find next |
| Shift+Ctrl+G | Shift+Command+G | Find previous |
| Shift+Ctrl+F | Command+Alt+F | Replace |
| Shift+Ctrl+R | Shift+Command+Alt+F | Replace all |
| Ctrl+A | Command+A | Selects all content of the editor |
| Ctrl+C | Command+C | Copy selection |
| Ctrl+V | Command+V | Paste |
| Ctrl+D | Command+D | Deletes the whole line under the cursor including the new line at the end |
| Ctrl+Z | Command+Z | Undo the last change |
| Ctrl+Y | Command+Y | Redo the last undone change |
| Ctrl+Home | Command+Home | Move the cursor to the start of the formula expression |
| Ctrl+End | Command+End | Move the cursor to the end of the formula expression |
| Ctrl+Backspace | Alt+Backspace | Delete to the left of the group before the cursor |
| Ctrl+Delete | Ctrl+Alt+Backspace | Delete to the start of the group after the cursor |
| Tab | Tab | Insert a tab at the cursor |