Introduction to the MX Deposit Mobile Apps
This topic describes how to work in the MX Deposit mobile apps. It is divided into:
- Signing In to MX Deposit
- Selecting a Project and Activity
- Working Offline or Online
- Assigning and Unassigning Drill Holes
- Other Drill Hole Screen Options
The examples used in this topic are for drilling activities. However, the same concepts apply to point activities.
Signing In to MX Deposit
Sign in to one of the MX Deposit mobile apps using your Seequent ID.
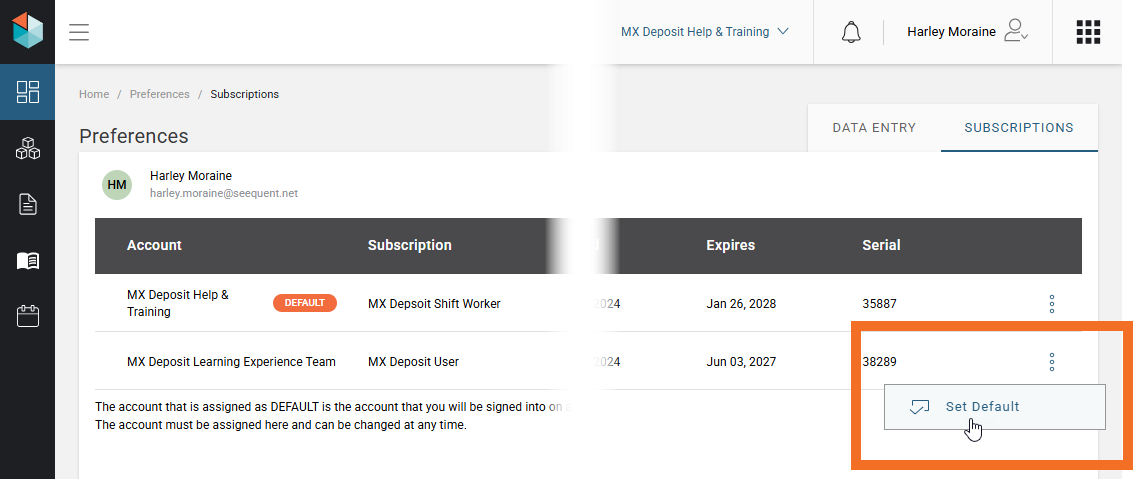
If you have access to more than one MX Deposit account, what account you are signed into via one of the mobile apps depends on which account is set at the default.
To check which subscription is set at the default, visit app.mxdeposit.net using your web browser and sign in with your Seequent ID. Then:
- Choose Preferences from the user ID menu:

- Click the Subscriptions tab.
- If you need to change the default account, you can do so from the overflow menu:
Selecting a Project and Activity
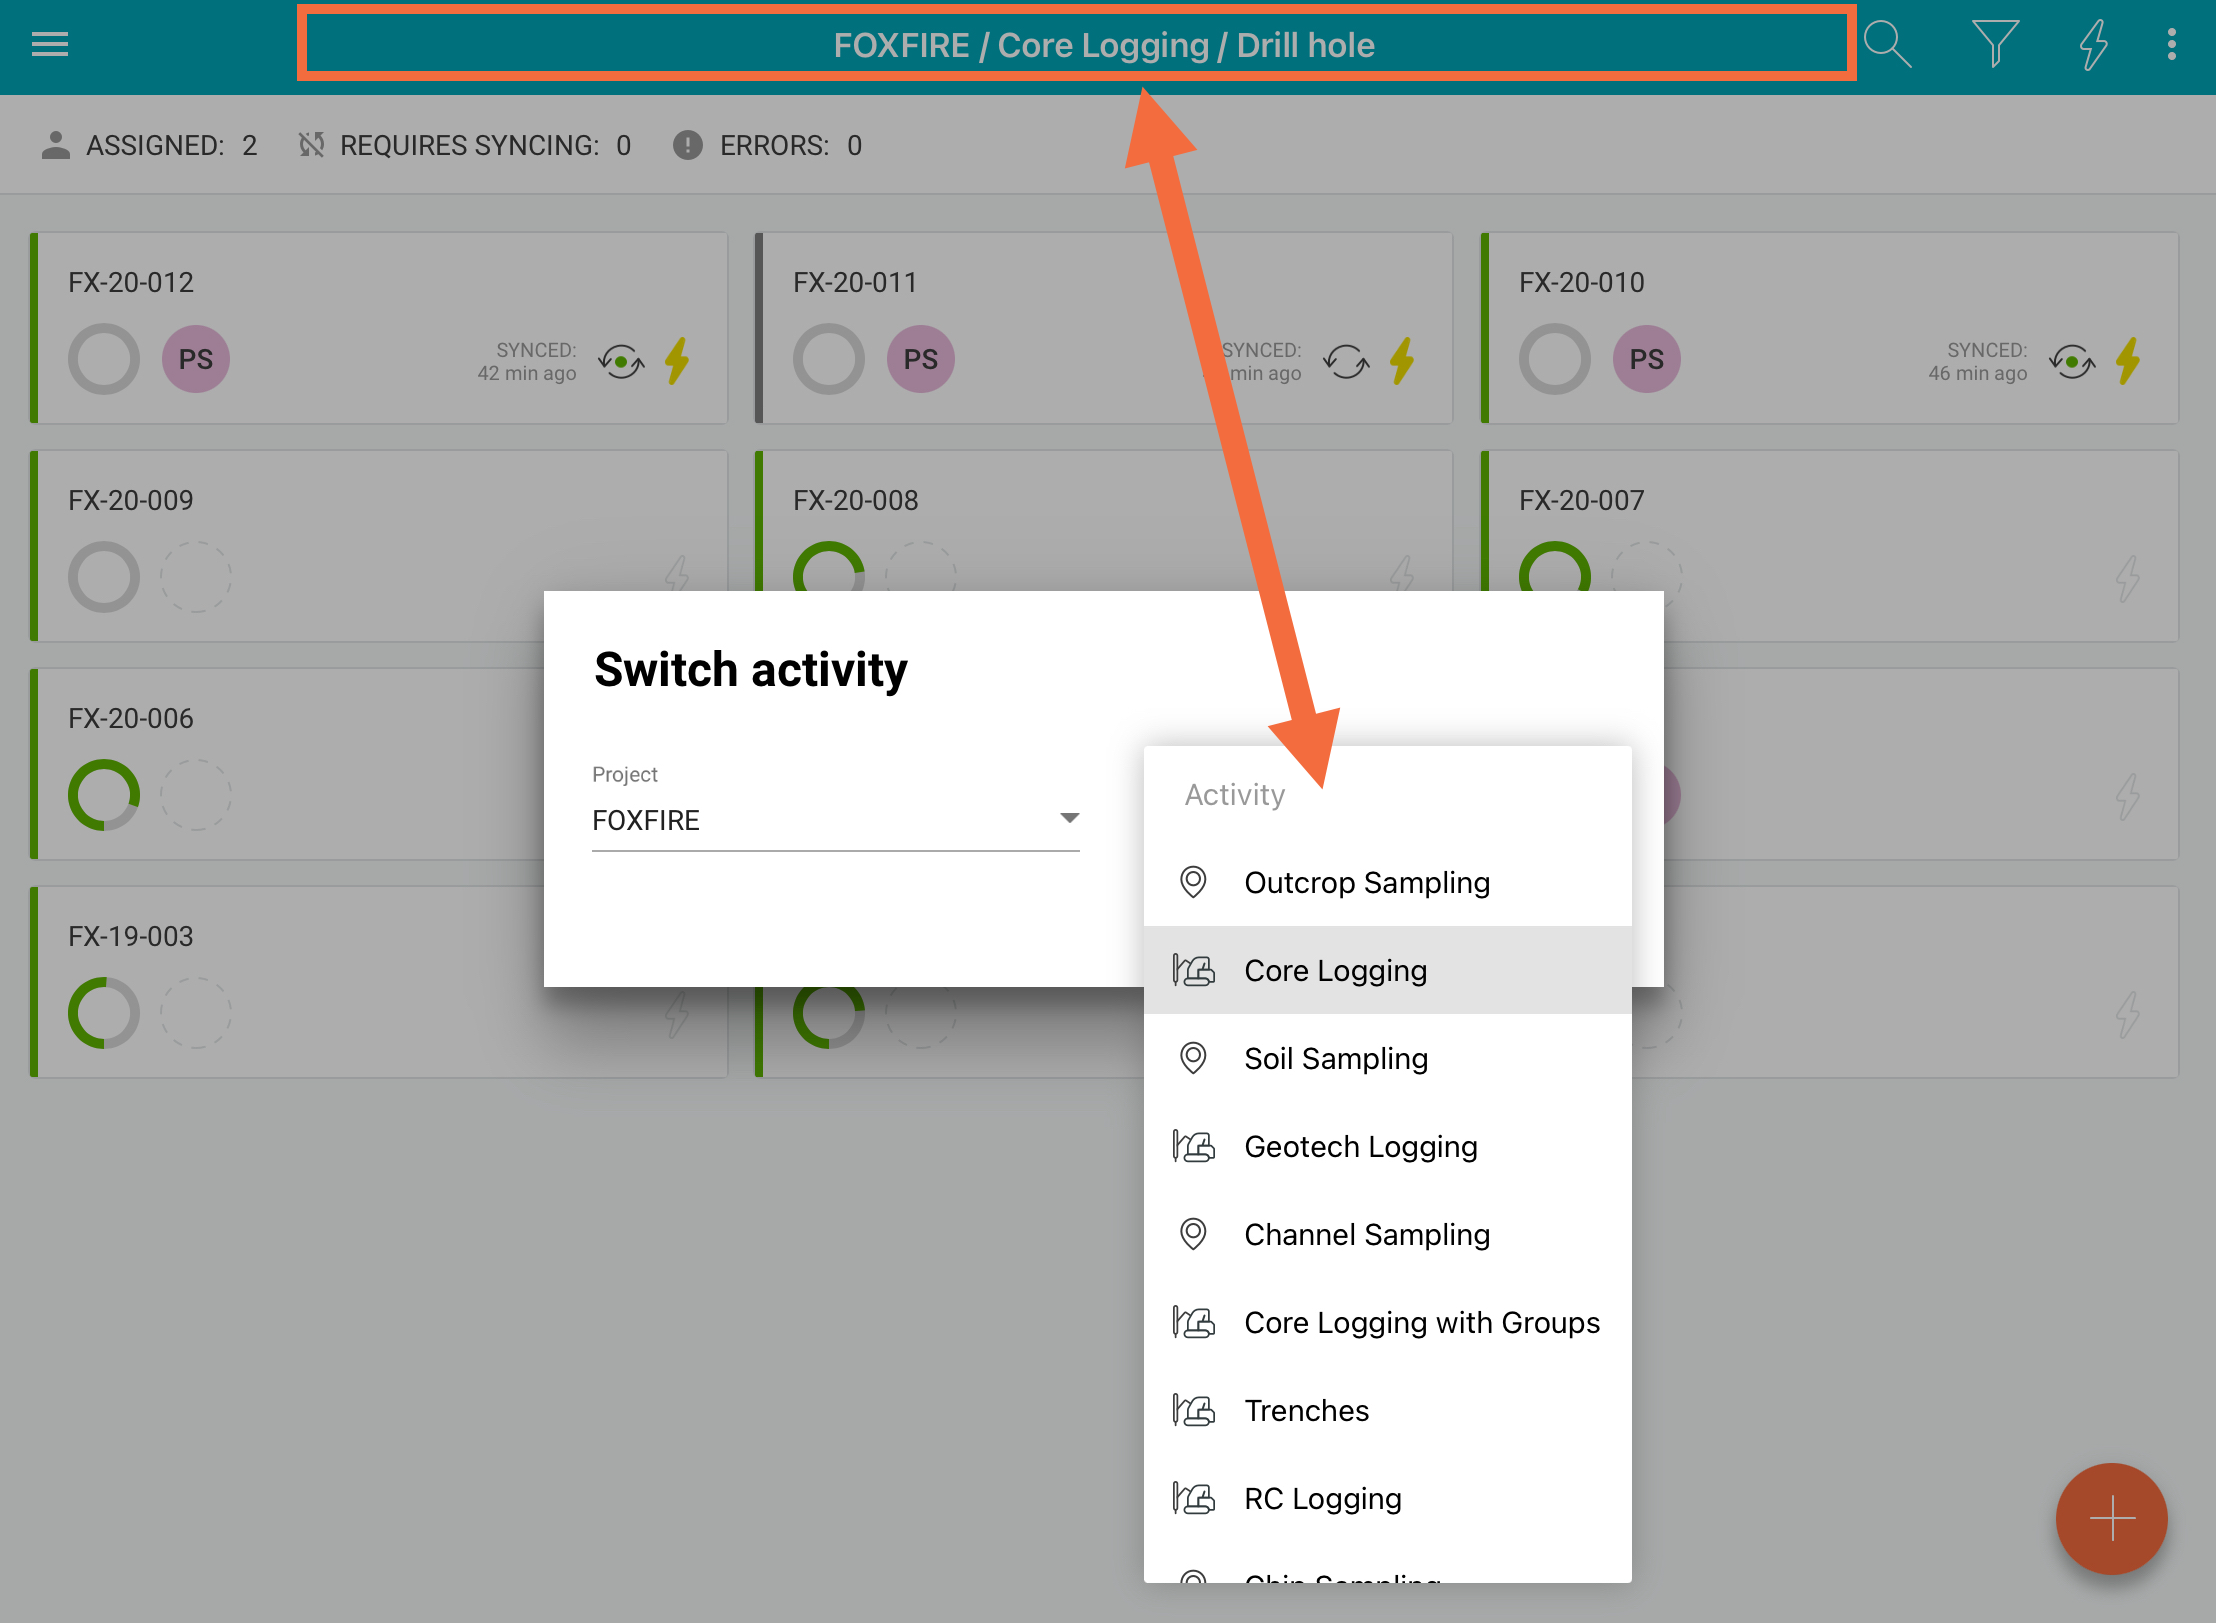
When you first sign into the MX Deposit mobile app, you'll be prompted to select your project and activity.
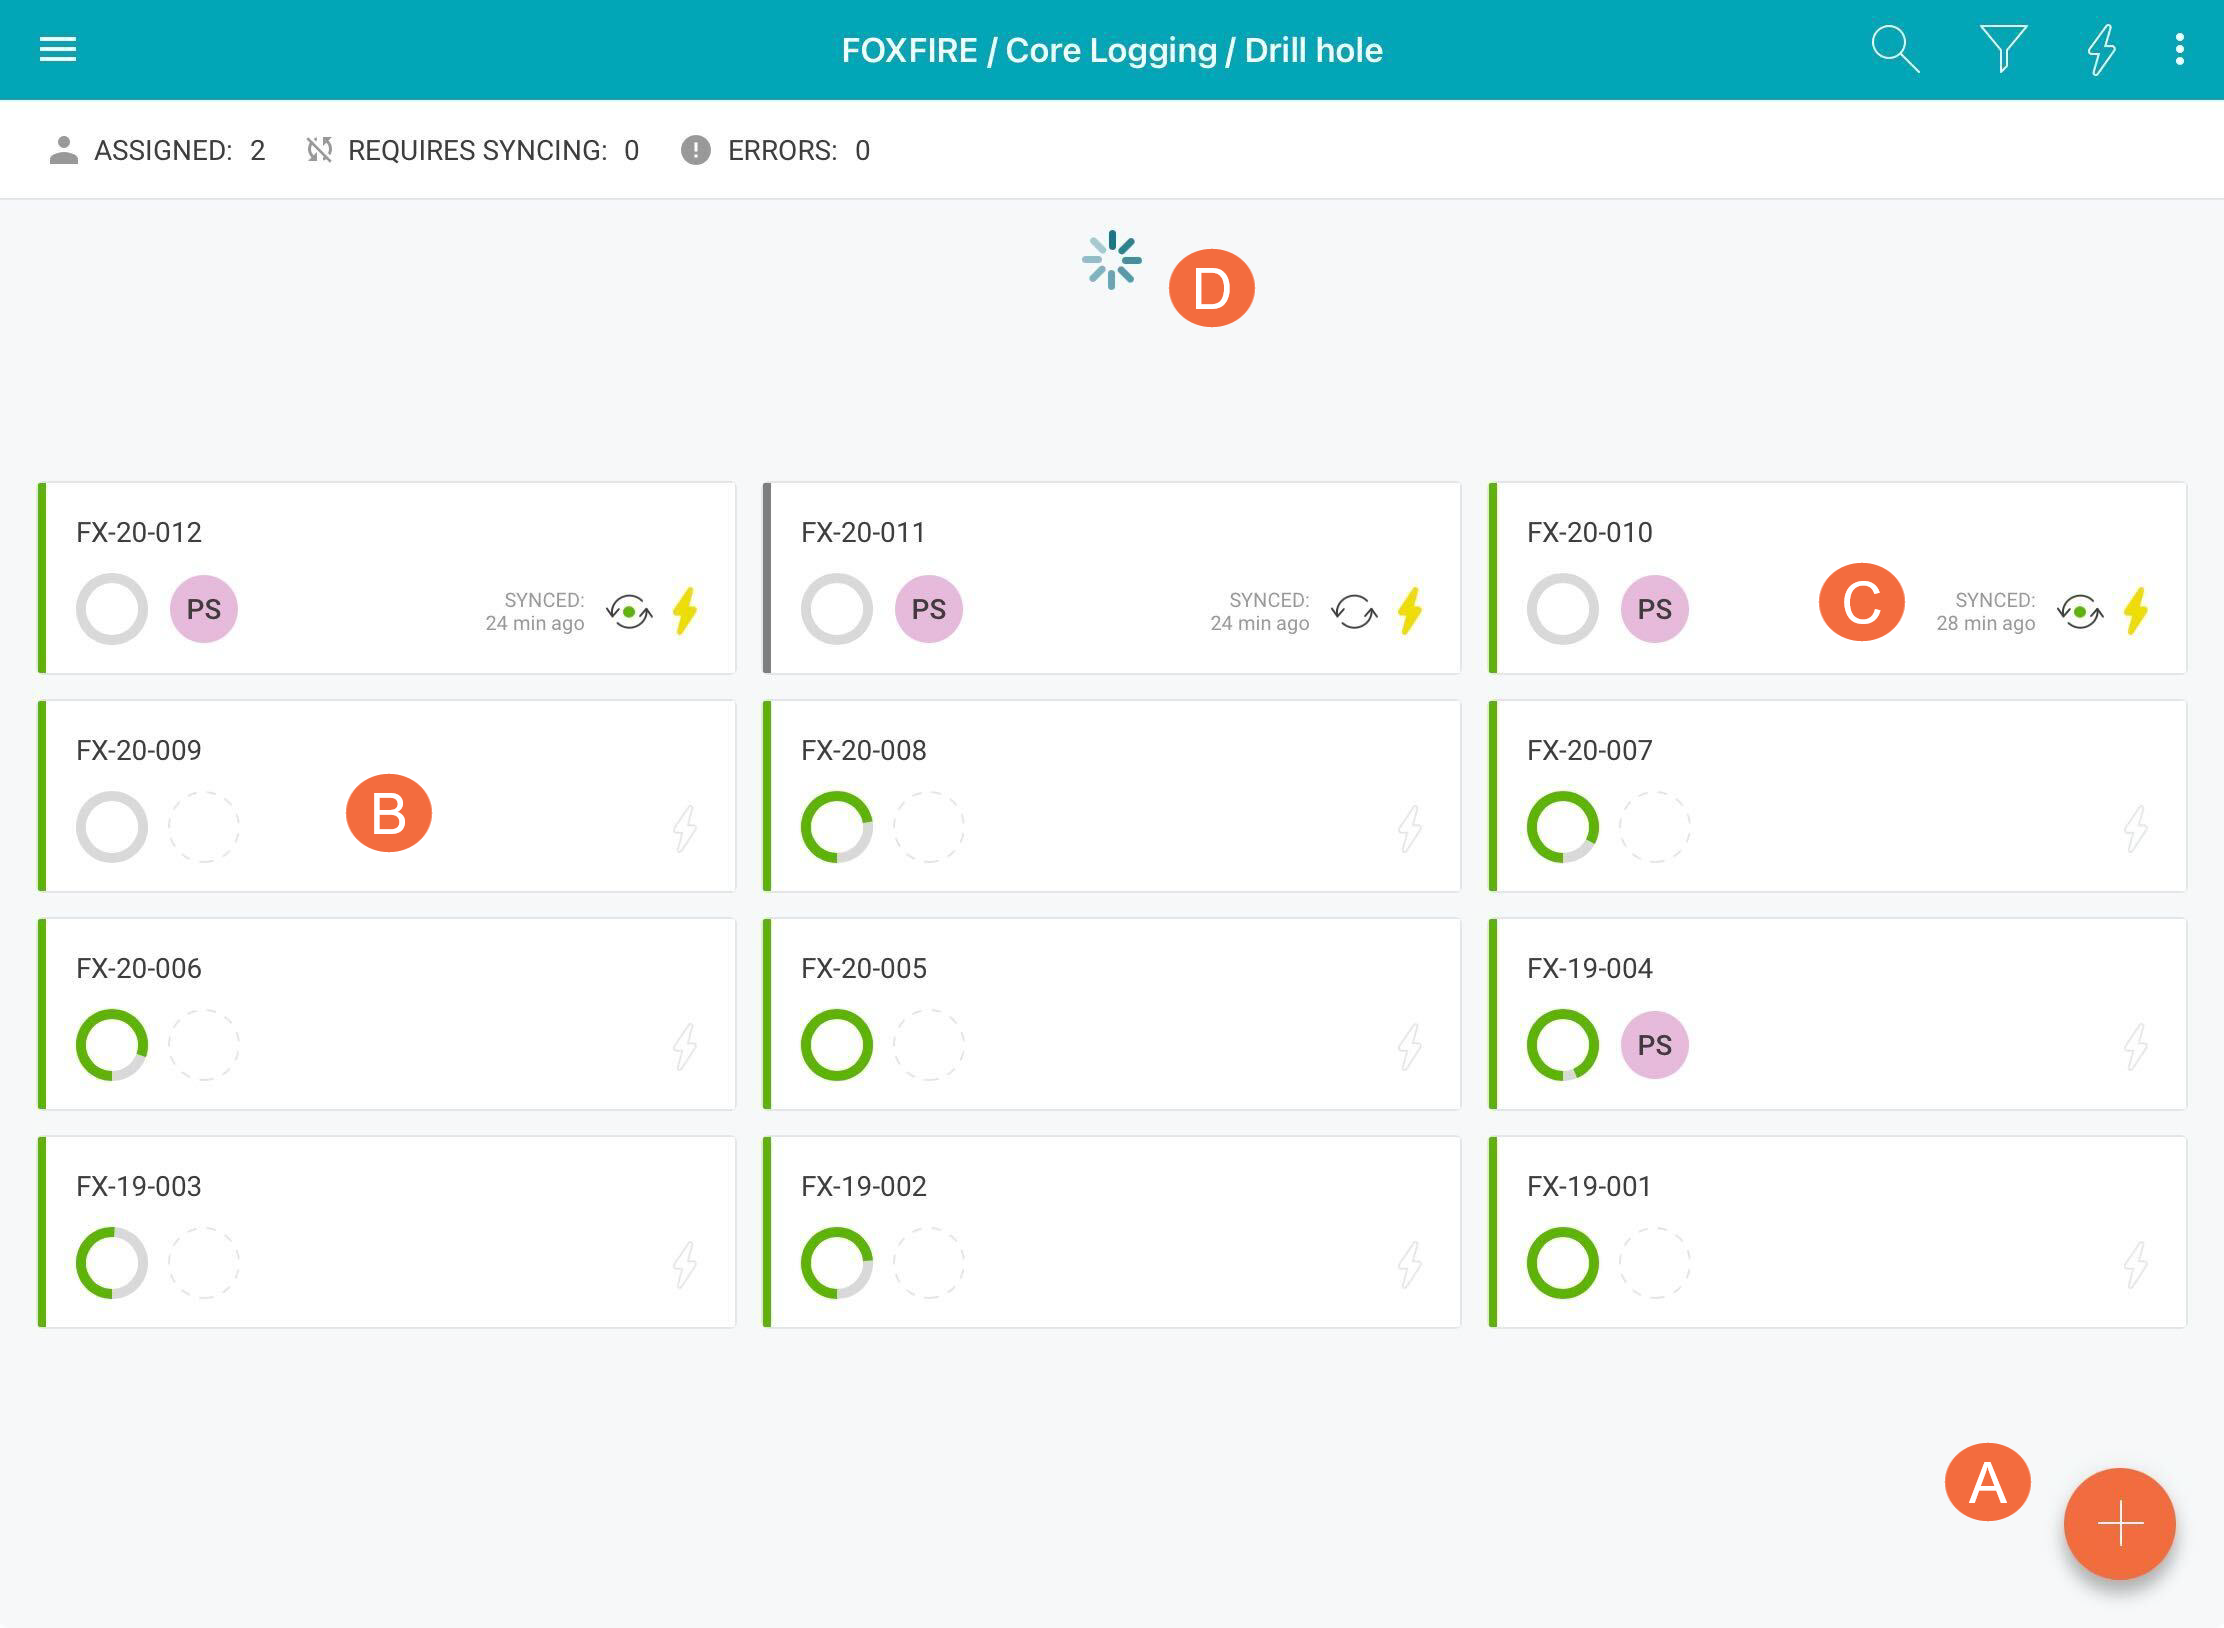
Once you have done so, all the drill holes in the selected activity will be displayed. Any drill holes that have been assigned to a team member will have an icon that shows that person’s initials:

To begin working, you need to assign yourself one or more drill holes. This is described in Assigning and Unassigning Drill Holes below.
To switch to another project or activity, tap anywhere in the middle of the menu bar. You can then select a new project or activity from the drop down menu.
Working Offline or Online
You can work in the mobile app even with no internet connection, but the default is to be working online.
Working online means that your data is synced with the server as you work. If, however, you need to work offline, first make sure you have assigned yourself the drill holes you will be working on, as described in Assigning and Unassigning Drill Holes below.
Once your assigned drill holes have been synced, tap the online/offline button at the top of the screen:

Assigning and Unassigning Drill Holes
Assigning a drill hole ensures that nobody else can edit it while you're working on it. It also saves the data for the drill hole locally on your device so you can work offline, if necessary.
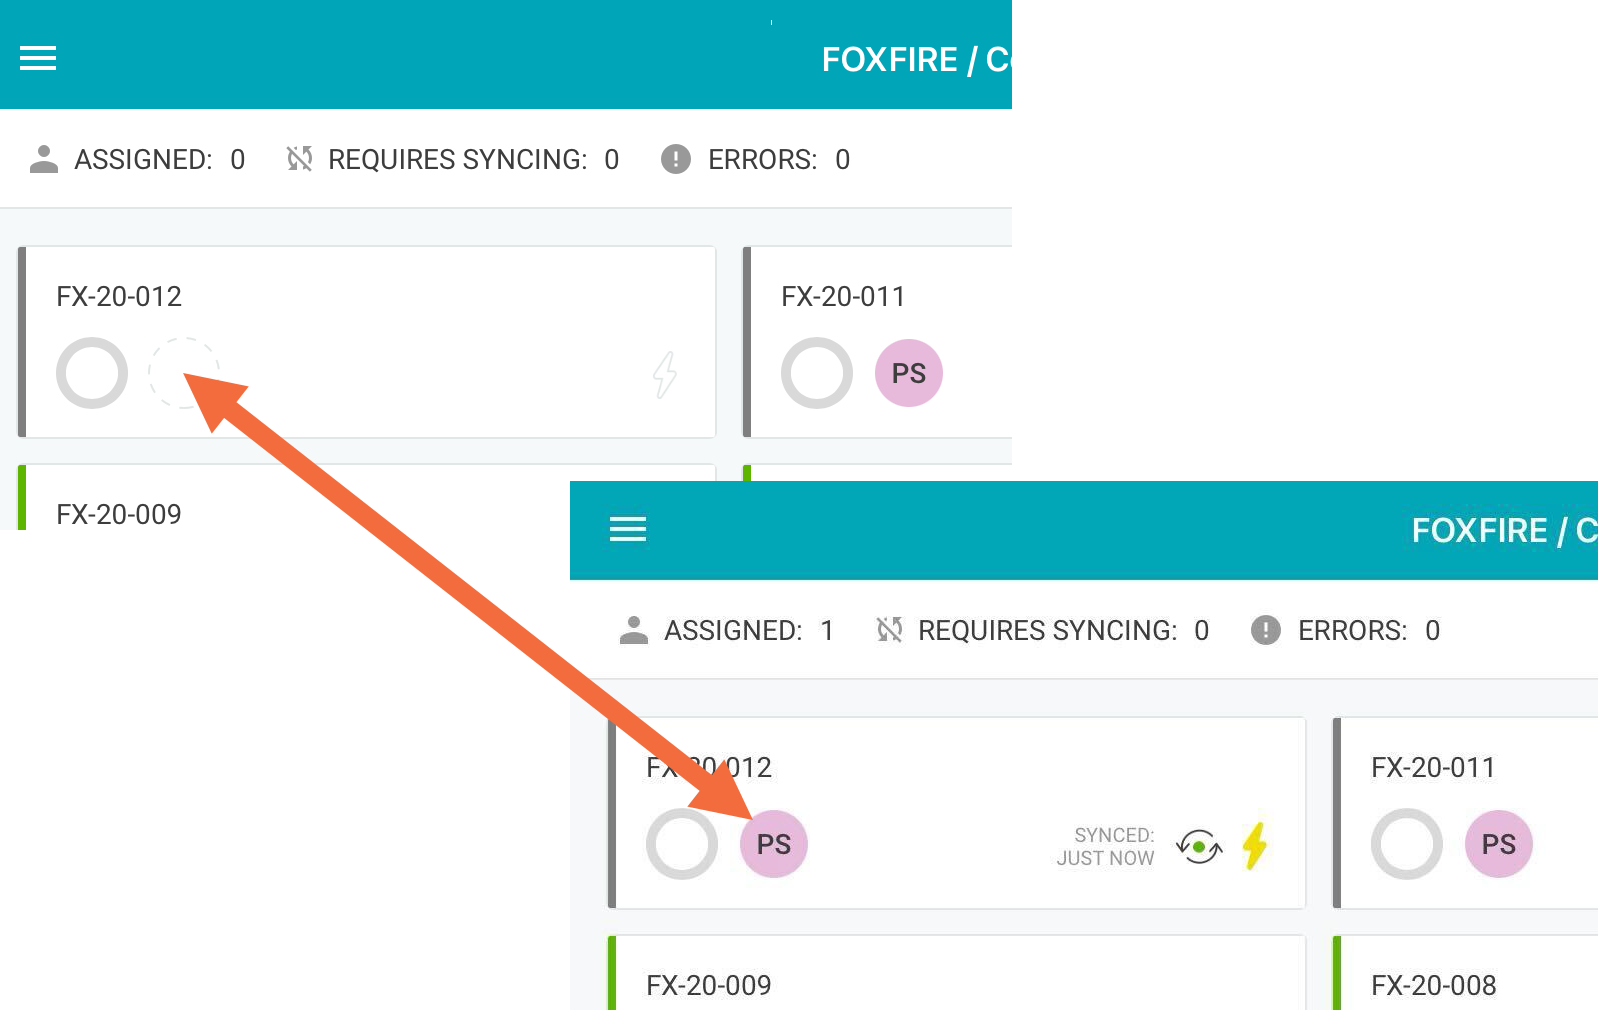
Before you assign a drill hole to yourself, check that you have an internet connection and that you are online.
In the drill holes screen, tap on the dashed circle for the drill hole you want to assign to yourself. Your initials should appear in place of the dashed circle, and the app will then download the files for the drill hole. You are now ready to work offline, if you need to.
You can unassign a drill hole in the same way.
If you need to assign many drill holes at once, you can assign all available holes currently visible on the drill hole page, including all that you need to scroll to see. If you only want to assign some of the drill holes, use the filter and search functions to narrow down the list.
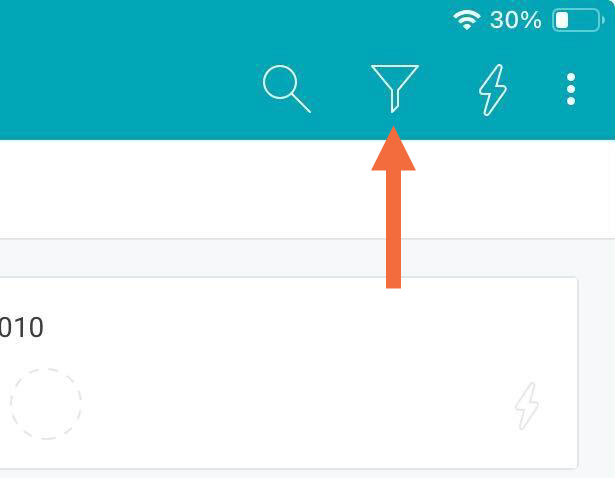
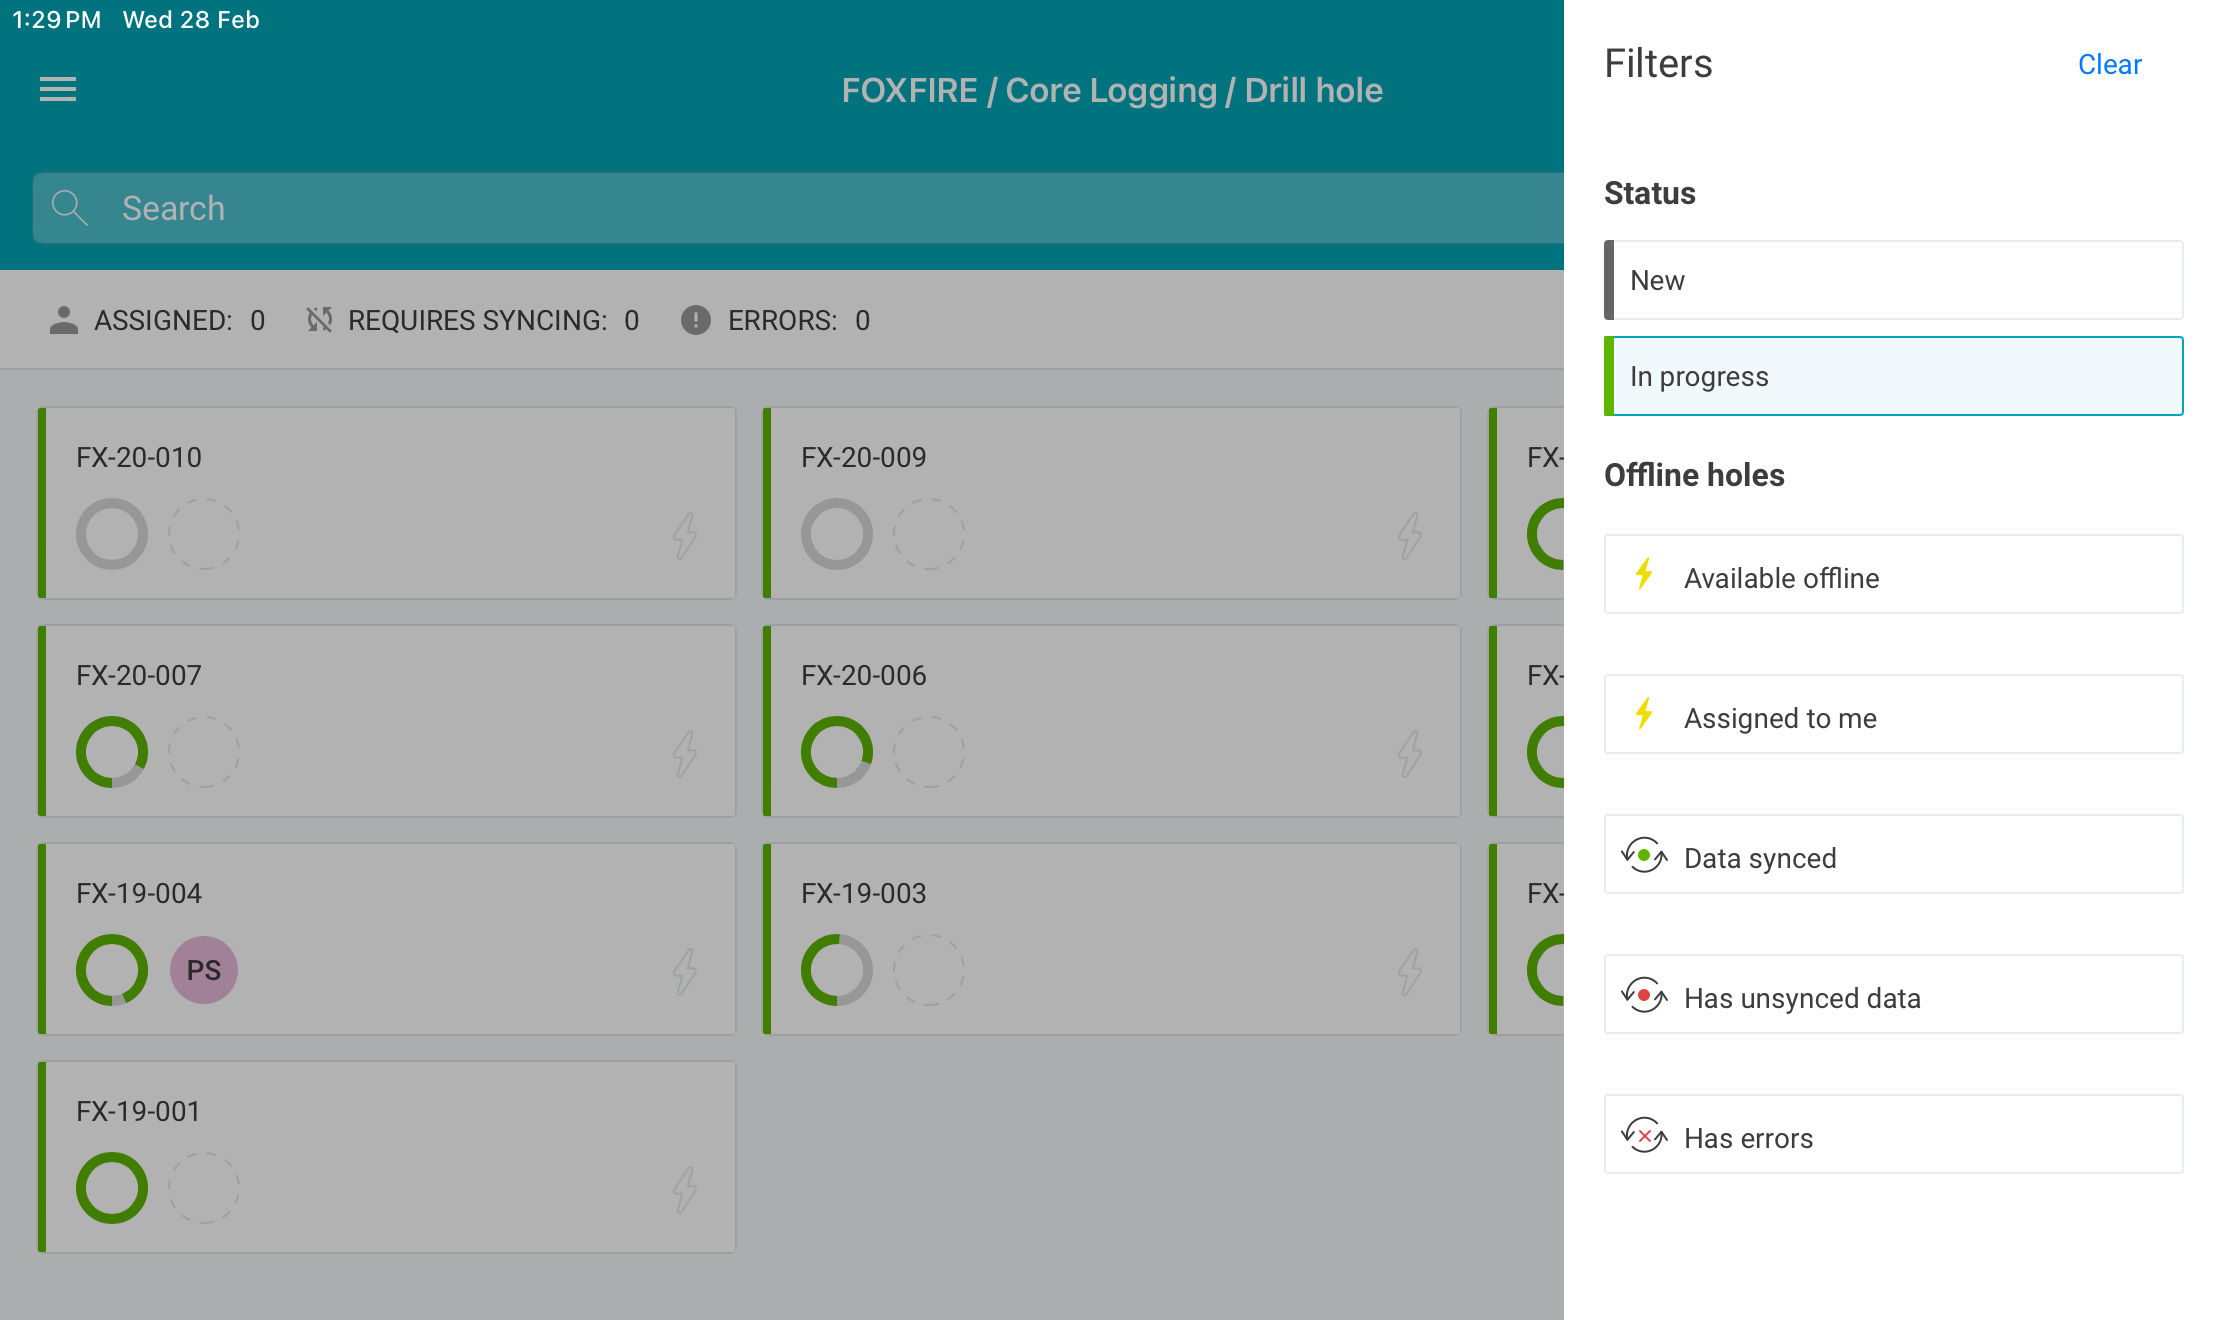
To filter the list of drill holes, tap the Filters button:
Next, select the options you want to filter on:
Another option is to use the Search bar:

Once you have filtered or searched for the drill holes you want to assign to yourself, tap on the overflow button:
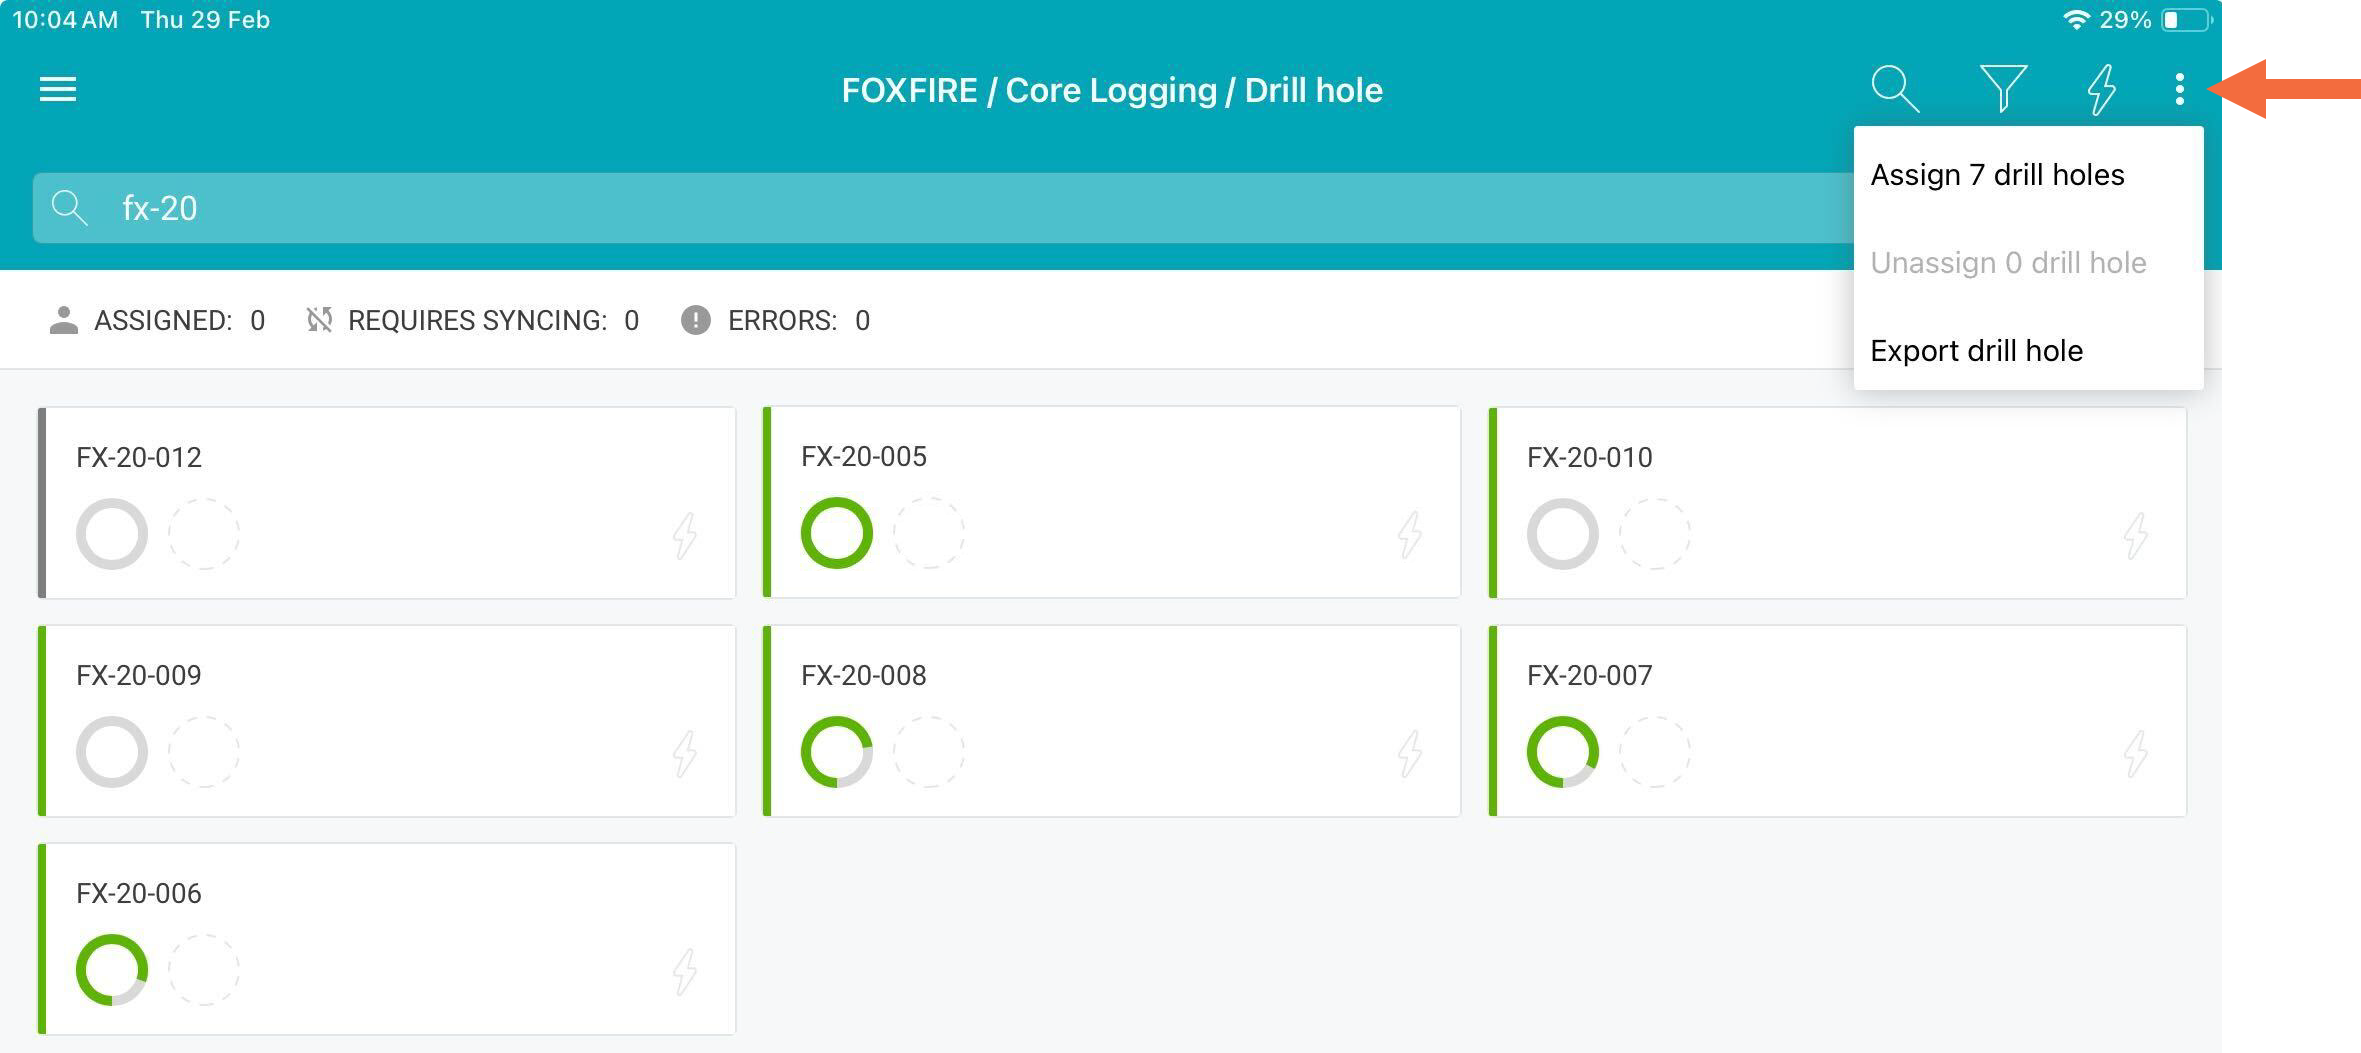
In the example above, we now have the option to Assign 7 drill holes.
You can unassign multiple drill holes in the same way.
Other Drill Hole Screen Options
In the drill hole screen, you can also:
- Add a new drill hole. Click the button at the bottom of the screen (A).
- Delete a new drill hole. A drill hole created in offline mode that has never been synced with the server (B) can be deleted. Long press on the drill hole you want to delete. You will be asked to confirm your choice.
- Sync drill holes to the main database. To sync a drill hole assigned to you to with main database, make sure you are online. Then tap the sync button for that drill hole. If the sync fails for some reason, long press on the drill hole until the option appears to Retry sync.
- Refresh the page. If there have been new drill holes added by other users or if any configuration changes made to any of the logging sheets, you will need to refresh the drill holes screen in order for the changes to load. Drag down (D) on the drill holes screen to refresh.