
Modify Display Settings
Use the Display tab to modify the axes labels, background colour, and other display parameters in the 3D, Voxel, or Geosurface Viewer window.
See below for answers for:
-
How do you change the Background Colour?
-
How do you change the Axes and Labels Colour?
-
How do you change the Labels Font?
-
How do you specify the X, Y, and Z Axis Labels and Increments?
-
How do you add or remove a Box around your 3D view?
-
How do you add or remove the Axes around your 3D view?
-
How do you add or remove an Orientation Compass in your 3D view?
-
How do you add or remove a Navigation Cursor in your 3D view?
To change the background colour in your 3D view:
The Background box enables you to specify the background colour in your 3D view.
-
Click inside the Background box to display the Colour dialog. Using this tool, you can select a colour from the Basic colours table or by clicking the Define Custom Colours>> button you can specify a custom colour. The background colour will be automatically applied to your 3D view.
To change the axes and labels colour in your 3D view:
The Axes and labels box enables you to specify the text colour in your 3D view.
-
Click inside the Axes and labels box to display the Colour dialog. Using this tool, you can select a colour from the Basic colours table or by clicking the Define Custom Colours>> button, you can specify a custom colour. The axes and labels colour will be automatically applied to your 3D view.
To change the labels font in your 3D view:
The Font drop-down list enables you to specify the text font for the axes and labels in your 3D view.
-
Using the Font drop-down list, select the font type for the labels. The font will be automatically applied to the text in your 3D view.
To specify labels and increments for the X, Y, and Z axis :
Click inside any of the axis text boxes to edit the current axis title. The axis label will be redrawn on your map with the new axis title.
- Click on [Set Increments] to change the label interval value for the X, Y, or Z axis. Each modified axis label will be redrawn with the new increment. Note that if the new increment is smaller than the default (original) value, the labels font will be adjusted.
To add or remove a box around your 3D view:
The Box check box enables you to draw rectangular box edges around the 3D volume being rendered.
-
Select the Box check box to add, or uncheck to remove, a rectangular box around the 3D volume being rendered. The change will be automatically applied to the 3D view.
To add or remove the axes around your 3D view:
The Axes check box enables you to draw the X, Y, Z axes around the 3D volume being rendered.
-
Select the Axes check box to add, or uncheck to remove, the X, Y and Z axes on the 3D view. The change will be automatically applied to the 3D view.
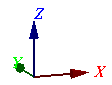
To add or remove an orientation compass in your 3D view:
The Orientation compass check box enables you to display a compass to help you orientate while working within the 3D view.
-
Select the Orientation compass check box to add, or uncheck to remove, an orientation compass from the bottom left corner of your 3D view. The change will be automatically applied to the 3D view.
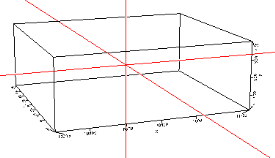
To add or remove a navigation cursor in your 3D view:
The Navigation cursor check box enables you to display a navigation cursor that highlights the centre point of your current view.
-
Select the Navigation cursor check box to add, or uncheck to remove, the navigation cursor when you click the left mouse button in the 3D view.
Click the OK button to close the dialog and keep the changes or press Cancel to exit the dialog and revert to your previous 3D view settings.
Got a question? Visit the Seequent forums or Seequent support
© 2023 Seequent, The Bentley Subsurface Company
Privacy | Terms of Use