
Getting Started
Once Leapfrog Works is installed, there are some first steps to carry out before you begin working with projects. This topic describes those first steps and is divided into:
Once you have carried out these first steps, see An Overview of Leapfrog Works for a description of the different parts of the Leapfrog Works main window and Concepts for information that is important to helping you get the most out of Leapfrog Works.
Signing In With Seequent ID
To use Leapfrog, you need a Seequent ID and the correct permissions.
If you do not have a Seequent ID, you can sign up for one by launching Leapfrog Works and clicking the Register button in the window that opens in your default browser.
To find out more about different permissions, visit the Leapfrog Pricing & Subscription Options page.
Once you have a Seequent ID and the correct permissions, launch Leapfrog Works. A window will launch in your computer’s default browser prompting you to sign in using your Seequent ID. Enter your email address, then click the Next button. You will then be prompted to enter your password.
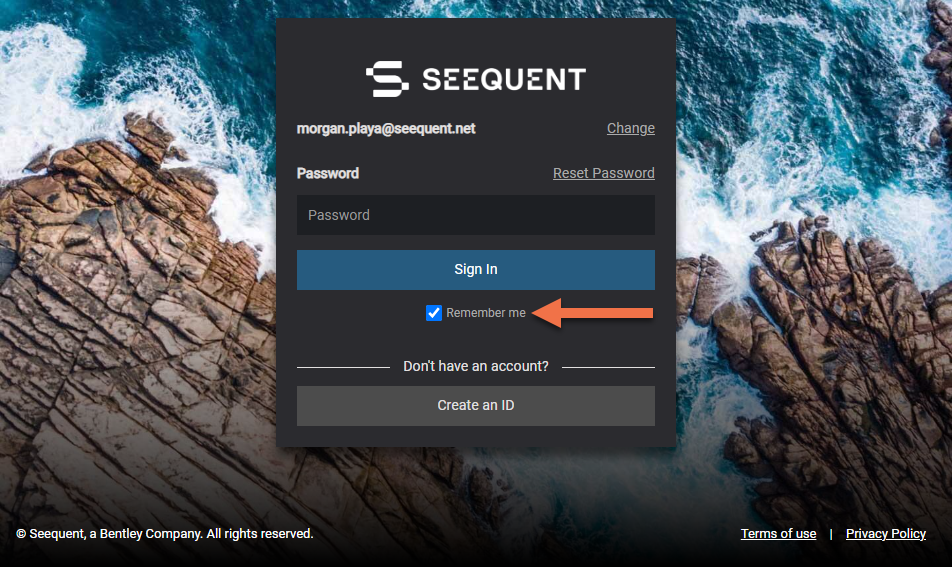
The Remember me setting is useful if do not wish to re-enter your Seequent ID and password each time you launch Leapfrog Works. If you sign out, however, you will have to enter your credentials once again, even when Remember me has been enabled.
Once you have entered your password, click Sign In. You will be prompted to launch Seequent Connector, which is a system tray application that handles the authentication and authorisation required to run Leapfrog Works. The entitlements page will then be opened in your browser.
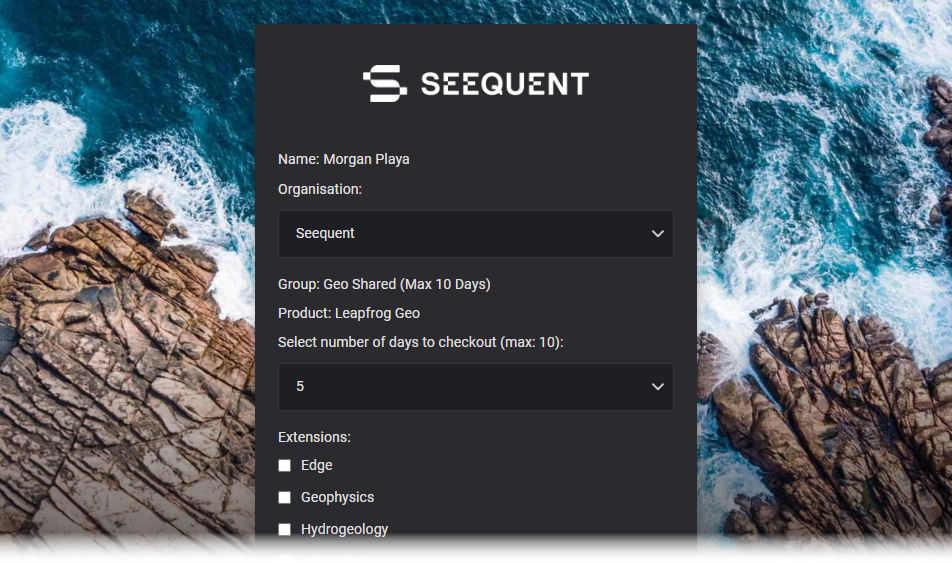
You can:
- Select your group, if your organisation has a number of different groups.
- Select what extensions you wish to use. Some Leapfrog Works features are only available with an extension.
- Select how long you wish to check out a seat, if your organisation is set up to check out seats on a day-by-day basis.
You can also select your own user name as the Organisation, which entitles you use Leapfrog Viewer to open scene files without having entitlements for Leapfrog Works:
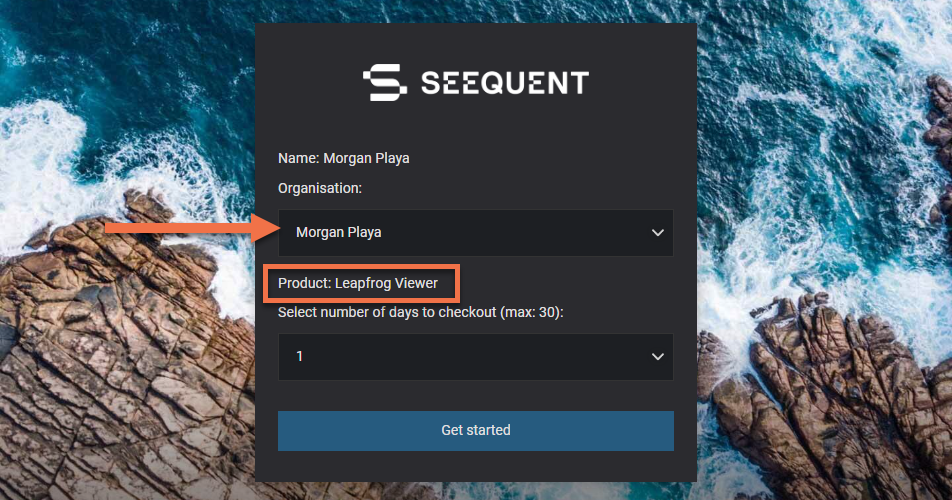
Select your options, then click the Get Started button and follow the prompts.
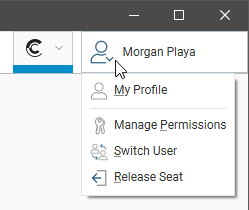
Once you have signed in to Leapfrog Works using your Seequent ID, the Seequent ID menu in the upper right-hand corner of the main window is used to manage your MySeequent identity, along with Seequent Connector:
If you are offline, options that require an internet connection will be greyed out:
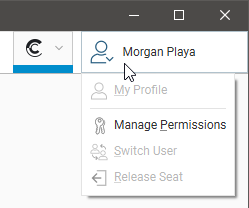
You can continue working in Leapfrog Works while you are offline until your session expires. To see when this is, click on the Seequent ID menu and select Manage Permission. The window that appears will display the time and date when your session will expire.
If your organisation shares Leapfrog Works seats between users, you can release your seat for other Leapfrog Works users in your organisation when you have finished working with Leapfrog Works. Select the Release Seat option from the Seequent ID menu or simply close Leapfrog Works or select Quit from the Leapfrog Works menu. Choose Release Seat when you are prompted.
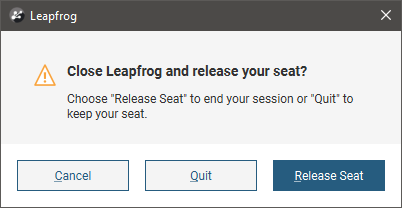
The Quit option retains your seat and the next time you launch Leapfrog Works, you will not have to sign in using your Seequent ID, nor will you have to select your entitlements.
Graphics and Drivers
Many laptop computers come with two graphics options: low-powered graphics integrated into the CPU and a high-performance dedicated graphics option (a GPU). To save power, often the laptop’s default setting is to run programs using the slower integrated graphics option. However, selecting high-performance graphics options is very important to Leapfrog Works’s performance. If you have a dedicated graphics option, you should be using it. It’s also important to have the most up-to-date drivers to make the most of your computer’s capabilities.
To determine what graphics capabilities your computer has:
1. From the Leapfrog Works menu, select About.
2. Click on the System Info tab.
Under the Summary, you will see the following details:
- Graphics in use by shows the graphics option being used. Note that Leapfrog Works uses only the option indicated; if there are two options available, Leapfrog Works does not use both simultaneously.
- All available graphics hardware lists the options available. If there are two options listed, you will want Leapfrog Works to use the dedicated graphics option rather than the slower integrated graphics.
- Driver date shows the date at which the driver was last updated for each graphics option.
If your graphics drivers are out of date, it is recommended that they be updated prior to switching the graphics in use by Leapfrog Works. You can find detailed information on setting up your graphics correctly for Leapfrog Works on MySeequent.
You may need to know your installation path. The default installation path for Leapfrog version 2023.2 is: C:\Program Files\Seequent\Leapfrog 2023.2\bin\Leapfrog.exe.
Running the Graphics Test
Leapfrog Works can run in one of three acceleration modes. These modes are selected by clicking on the button at the bottom of the main window:

See 3D Acceleration Mode in Settings for more information on these settings.
A newer computer will run in Full Acceleration mode without issues. However, if you are running Leapfrog Works on a computer that is more than five years old, it is a good idea to run the graphics test to test your computer’s graphics capabilities.
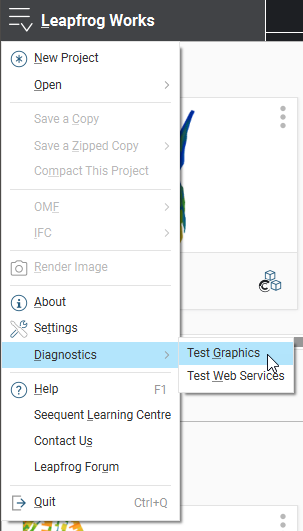
To start the test, open Leapfrog Works and select Test Graphics from the Leapfrog Works > Diagnostics menu:
The graphics test displays a series of image pairs that test your computer’s capabilities for the currently selected acceleration mode. For each pair, compare the images:
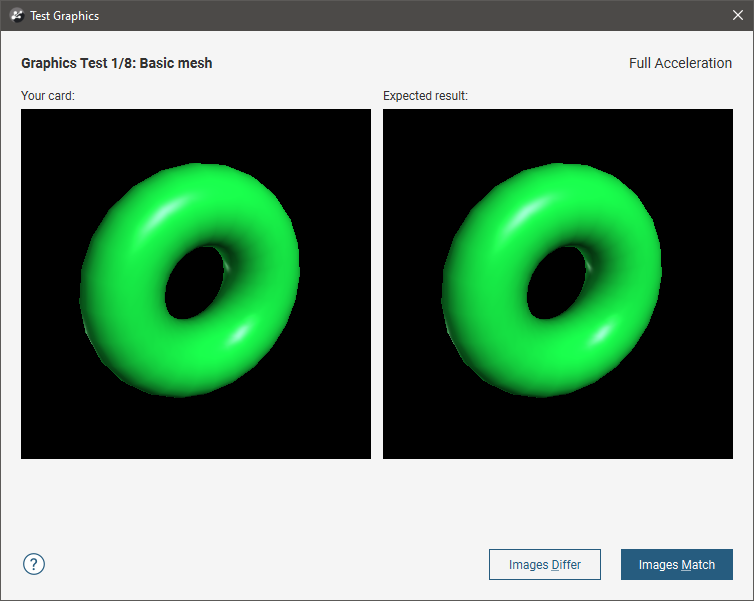
Even if the differences are slight, click the Images Differ button. If the images match, click the Images Match button. The next test will be displayed.
At the conclusion of the test, the result is displayed. If one or more tests have failed, information about solving problems will be displayed.
If you click on Save Report, you will be prompted to save the file on your computer.
If the test has failed, try switching to a different acceleration mode and running the test again. If possible, avoid using Software Rendering as it can be very slow.
If you cannot resolve the problem, save a copy of the graphics test report and contact technical support as described in Getting Support. Be sure to include information about your system copied from the About > System Info tab.
Got a question? Visit the Seequent forums or Seequent support
© 2023 Seequent, The Bentley Subsurface Company