
Scene Settings
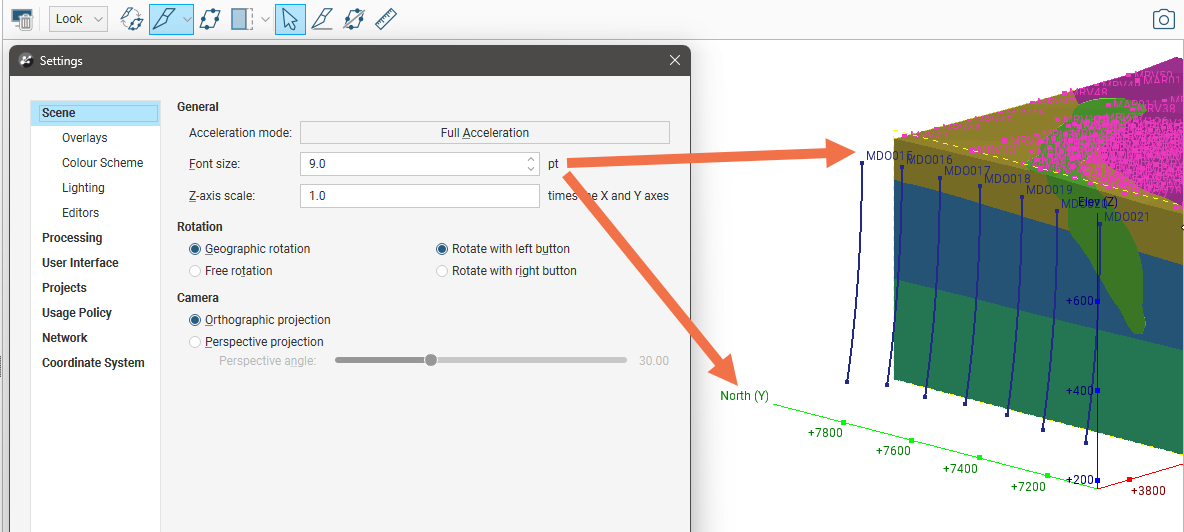
The settings in the Scene tab of the Settings window change scene display and navigation settings. This topic describes the settings in the main Scene tab. It is divided into:
Changes you make to these settings are previewed in the scene so you can easily experiment to see what overlays you prefer. To confirm changes, click the Close button. Click Revert to return to the settings in place when the Settings window was first opened.
Separate topics describe the scene settings in the Overlay, Colour Scheme, Lighting and Editors tabs. See:
3D Acceleration Mode
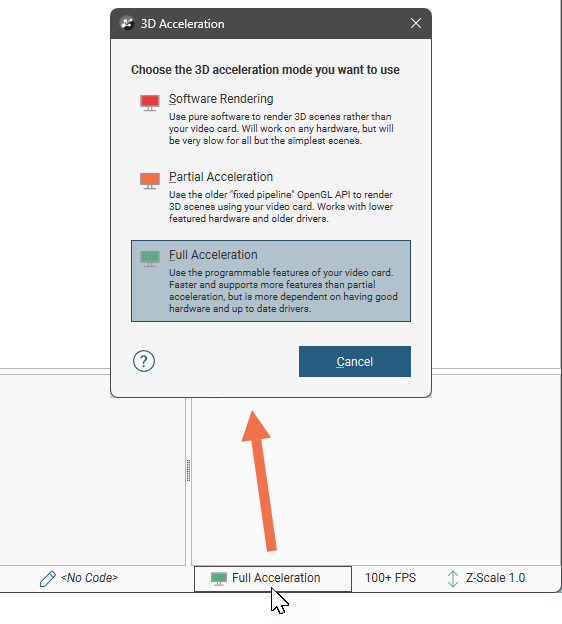
Leapfrog Works can run in one of three acceleration modes. Click the Acceleration mode button in the Settings > Scene window to use a different mode. The modes available are:
- Software Rendering uses software only, for maximum compatibility with any hardware. This option can be very slow displaying all but the simplest scenes, and is provided as a fall-back if display issues cannot be resolved with either of the other two options.
- Partial Acceleration uses hardware acceleration that has been provided on graphics cards for many generations. In this mode, Leapfrog Works renders scenes using “fixed function pipeline” hardware acceleration features that have been superseded in modern graphics cards by programmable shaders, but this legacy capability is widely supported and offers performance advantages over software rendering. Using Partial Acceleration can sometimes fix anomalies or problems encountered in Full Acceleration mode that may be due to bugs in old drivers, and it should work with even old or lower-featured hardware.
- Full Acceleration is the best option, assuming you have good hardware and up-to-date drivers. Because it makes use of programmable shaders provided by modern graphics cards, it is the fastest of the three modes and uses your available graphics memory more efficiently. It is the mode you should use, if your system supports it.
First, try using Full Acceleration and see how it renders scenes. If you seem to be having issues with how data is displayed in the scene, see Running the Graphics Test for information on testing your computer’s graphics capabilities. Note that especially when graphics cards are new on the market, there may be a number of driver versions released to address anomalies, so the use of a recent driver version is important. If using a laptop with dual graphics cards, use it with the power supply connected, and select the Performance Graphics option over the Power Saving option.
If that doesn’t resolve the graphics problems, then try Partial Acceleration mode. If possible, avoid using Software Rendering as it can be very slow.
If your current hardware is unable to support Full Acceleration mode, it may be worth considering upgrading your graphics card. Medium- to high-end home PC and gaming graphics cards are sufficient. High-end workstation grade cards also work very well, but you will also be paying for further capabilities that are not utilised by Leapfrog Works.
The acceleration mode can also be changed by clicking the button at the bottom of the Leapfrog Works main window:
Font Size
This setting is the size of text used to display information in the scene such as collar IDs and numeric and category data:
The Font size is also used for the screen grid and axes, if displayed.
Z Axis Scale
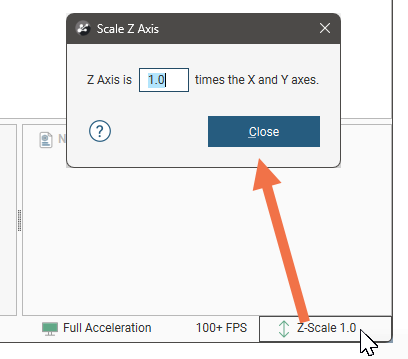
The Z-axis scale setting lets you set a value greater than 1.0 for the z-axis relative to the x- and y-axes. This is useful when the area under study is very planar and extends over a wide area. In such cases, scaling the z-axis can accentuate the distribution of data along the z-axis. If you have a project open when you change this setting, the change will be reflected in the scene so you can experiment with different values before choosing the one that best accentuates the distribution of data.
The z-axis setting can also be changed by clicking the Z-Scale button at the bottom of the Leapfrog Works main window. The Scale Z Axis window will appear:
Note that each project saves the z-axis scaling setting when the project is closed. In addition, when saving scenes (see Saved Scenes), the z-axis scale is saved as part of the scene.
Rotation Settings
The Geographic rotation and Free rotation settings determine whether or not the model displayed in the scene window can be “rolled”. With the Geographic rotation option, the azimuth and elevation can be varied, but the z-axis is constrained to be vertical. With the Free rotation option, however, the rotation of the model is not fixed to any axis and the model can be freely rolled around any axis. Select the option you prefer. When Leapfrog Works is installed, Geographic rotation is set as the default option as it is the most commonly used.
The Rotate with left button and Rotate with right button settings determine how the mouse is used to rotate the scene:
- When Rotate with left button is selected, you can rotate the scene by holding down the left mouse button and dragging in the scene. Clicking and holding the right mouse button zooms in and out of the scene.
- When Rotate with right button is selected, holding down the right mouse button and dragging rotates the scene. However, zooming and rotating functions are not swapped. Instead, the left mouse button can only be used for clicking on different objects in the scene. Select this option if you tend to accidentally move the scene when you intend to click.
Camera Settings
The Orthographic projection and Perspective projection settings determine the view of the model in the scene window.
If Perspective projection is selected, you can change the Perspective angle using the slider. This is similar to adjusting the zoom setting on a camera. Higher angles make nearby objects larger and more distant objects smaller. Lower angles will compress the scene. Experiment with the settings to see the effect on objects in the scene.
Select the option you prefer.