
Importing Data Tables
Importing data tables into Leapfrog Energy involves selecting the files to import and then mapping the data columns in the files to the format Leapfrog Energy expects. The data columns Leapfrog Energy expects differs for different data types, and you can find more information about the expected format in the help for each data type. See:
- Importing Drilling Data
- Importing Points Data
- Geophysical Data
- Importing Planar Structural Data
- Importing Lineations
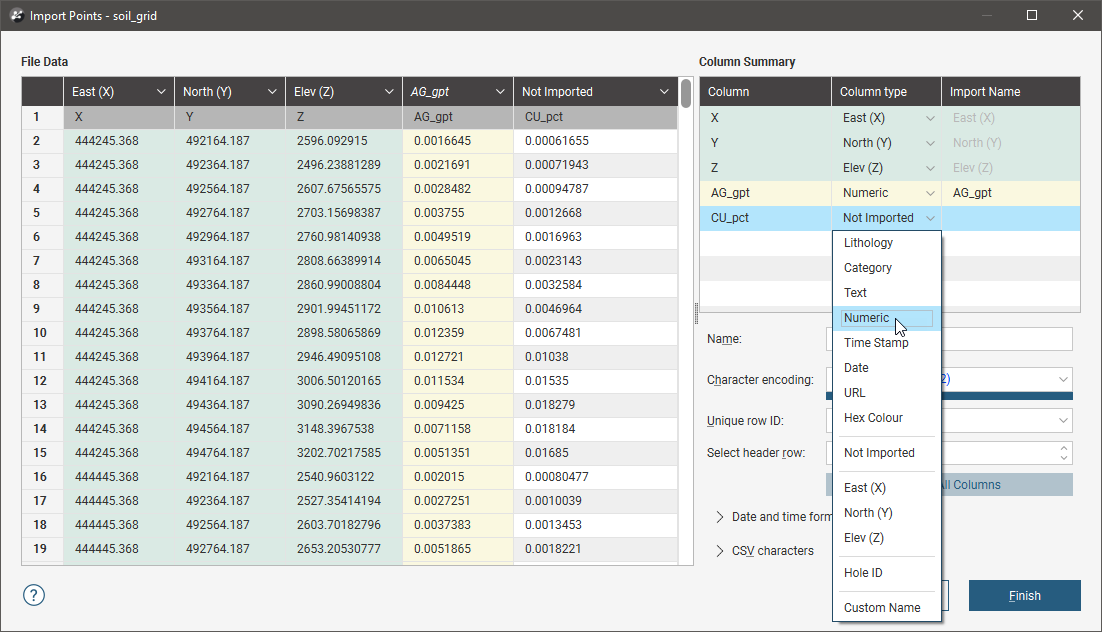
Once you have selected the file or files to be imported, Leapfrog Energy prompts you to map the columns in the file to the expected format. For example, here we are importing a set of points. File Data shows a snapshot of the data in the file. The Column Summary shows what columns are in the file and how Leapfrog Energy will map these columns, unless you make changes in this window.
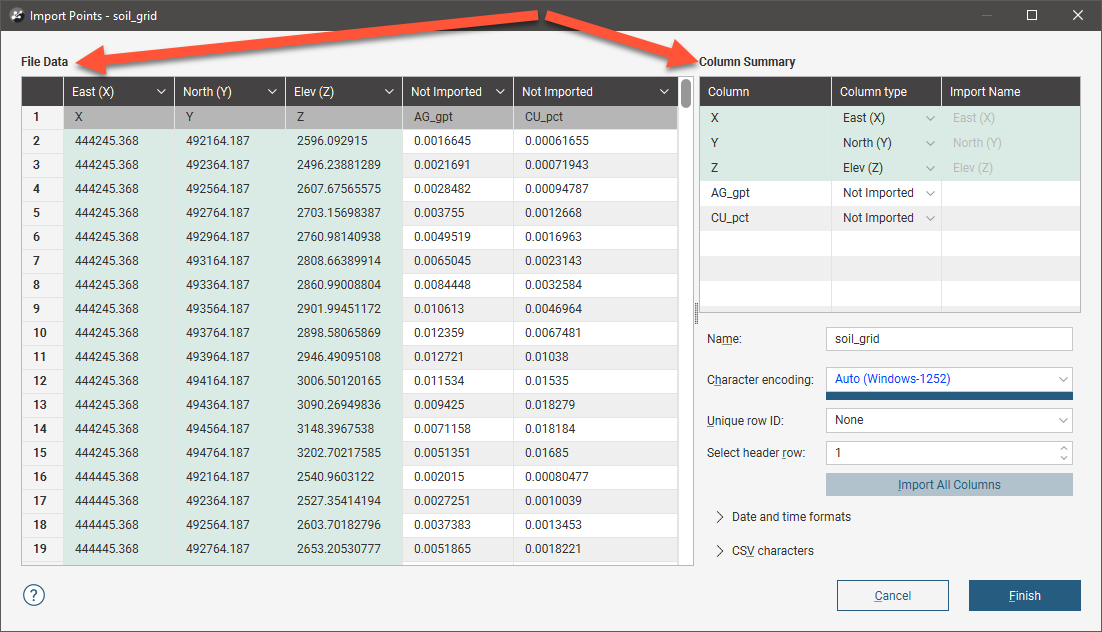
The fields below the Column Summary allow you to change settings such as the character encoding and date and time formats.
The dark header row shows how each column will be mapped in Leapfrog Energy and the row labelled 1 is the first row in the file. In this example, the first row of the file is the X, Y, Z, AG_gpt, CU_pct row.
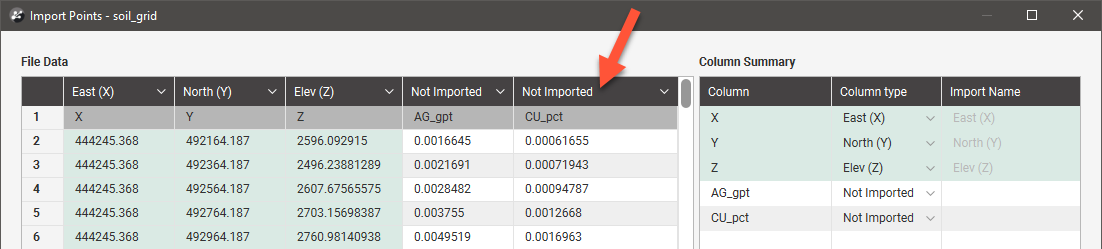
For this file, columns X, Y and Z in the file have been mapped in Leapfrog Energy to columns East (X), North (Y) and Elev (Z). These are shown in green.
The AG_gpt and Cu_pct columns are currently marked as Not Imported.
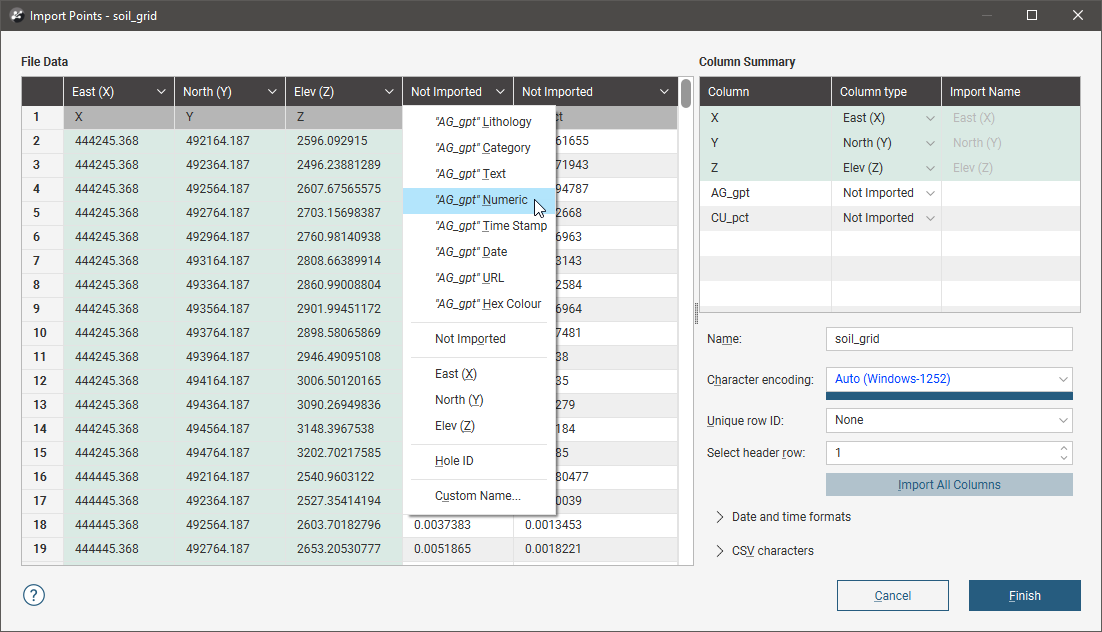
Each type of table being imported will have different column assignments available, but all table types will display:
- The categories columns can be assigned to (top of the list)
- The option to not import the column
- The required columns, which in this example are East (X), North (Y) and Elev (Z)
- Any optional columns, which in this example is the Hole ID column
- The option to select a custom name
You can see the options available for importing columns by clicking on the column header. Here the AG_gpt column will be set to be a numeric data column:
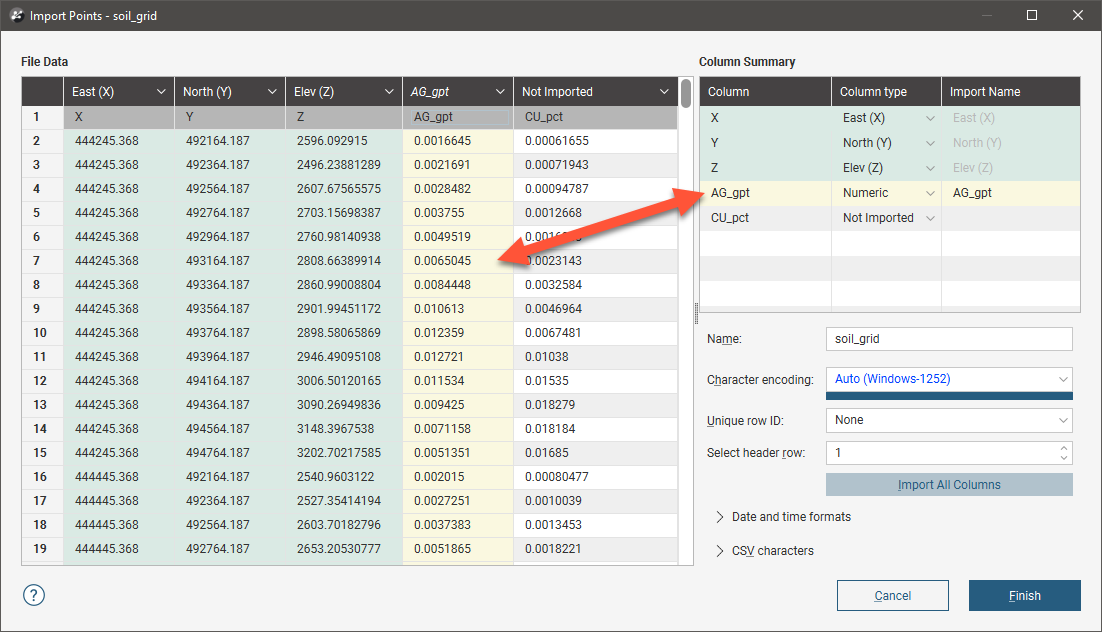
Note that both the File Data table and the Column Summary have been updated, with the new column assignment indicated in yellow:
If you choose not to import a column, you can do so later using the Import Column option, which is described in Importing Additional Columns to a Data Table in the Updating Tables topic.
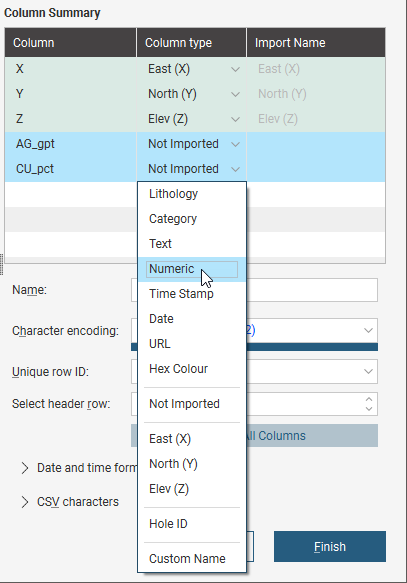
When setting import options for a column you can also work with the Column Summary. Here the Cu_pct column will be set to be a numeric data column:
In the Column Summary, you can use the Shift key and the Ctrl key to select multiple columns, then change their Column type with one selection:
If you wish to import all columns, click on the Import All Columns button, then check that all columns have been correctly mapped.
You can select a column for import, then use it as a Unique Row ID. This can specify the column being used in other data systems to uniquely identify rows in a table. The column must not contain duplicate values. If a Unique Row ID is specified, Leapfrog Energy will use this column to match rows when appending columns or reloading tables.
If the data contains date and time information and the date and time format is not detected, click on Date and Time Formats to reveal more information:
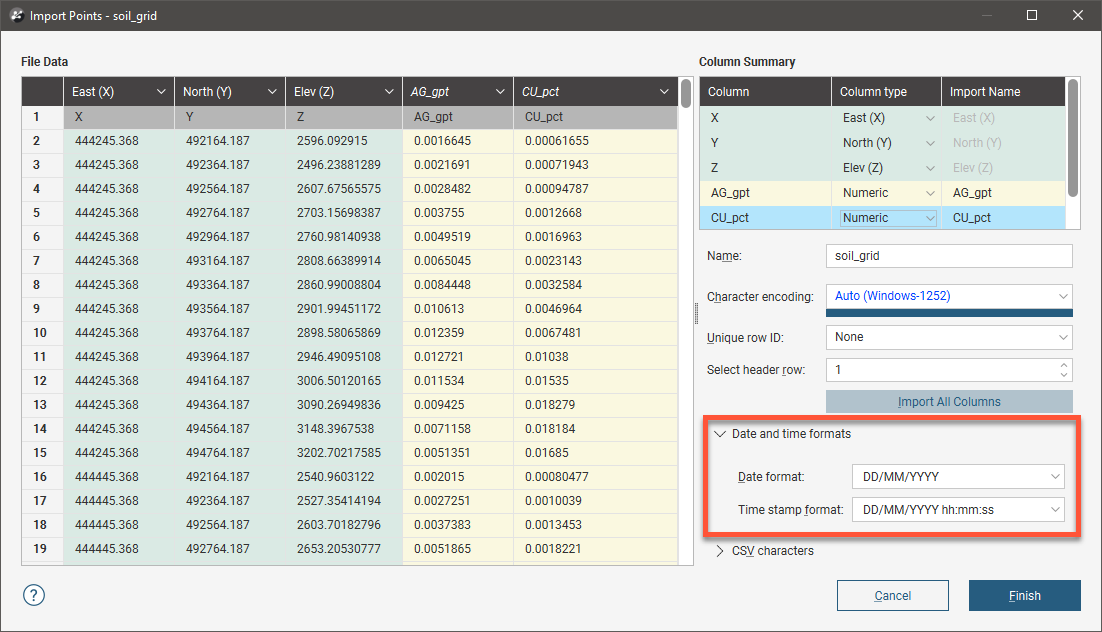
If the date and time format you wish to use is not among the options, you can create a custom format.
For *.csv files that use characters other than the comma as the separator, you can specify the delimiter, comment leader, quote and decimal characters in the Import window. Click on CSV characters to enter the characters used in the data files:
