Creating a workspace
Creating a workspace gives you a place in your organisation where you can store data and share it with other team members. When you create a workspace, you are automatically the owner of that workspace, although who you can invite to your workspace depends on your role in your Seequent Evo organisation:
- If you are a standard user, you can add anyone who is already a member of the organisation to your workspace.
- If you are an admin, you can also invite new members to the organisation and add them to your workspace.
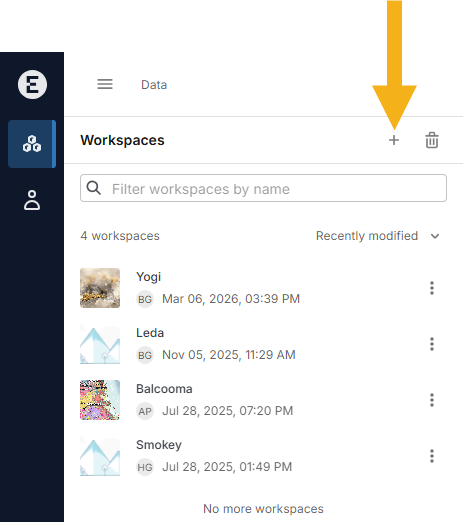
To start creating a workspace, click on Data in the sidebar, then click the ![]() button at the top of the workspaces list:
button at the top of the workspaces list:
Defining a workspace involves three steps:
Most settings are optional and can be changed after the workspace has been created. You can do this by clicking on a workspace, then on its Settings tab.
Specifying workspace details
The first step is to enter information about the workspace, including a name and description. You can add a thumbnail, if you wish. Adding a thumbnail can make it easier for team members to find your workspace in the list, especially if they belong to a lot of workspaces.
You don’t need to specify a Coordinate Reference System (CRS), but doing so unambiguously identifies the coordinate system that should be used when adding data to the workspace.
To set a CRS, click EPSG (A). You can then search (B) for the system you wish to use:
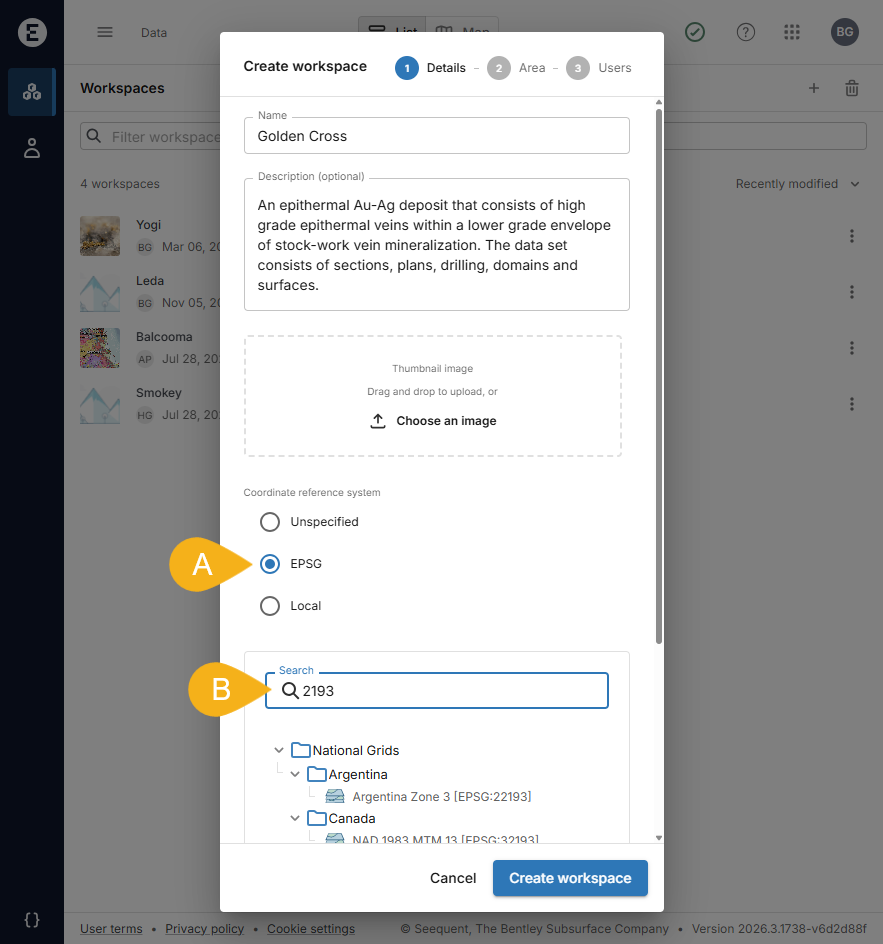
If the CRS you wish to use is not listed, choose Local and provide the well-known text representation for the coordinate reference system being used.
Click Create Workspace to move on to the next step.
Defining the workspace bounding box
This step is optional; if you do not wish to set a bounding box for the workspace, click Skip to move on to assigning users.
You can set the bounding box by:
- Drawing on the map. Zoom in on the map to near where you wish to locate your workspace, then click on the draw button (A). Click on the map and release the mouse to add the first corner of the bounding box, then move the mouse to create the bounding box. Click to complete the region selection.
- Specifying coordinates. Enter the information required in the minimum/maximum latitude and longitude fields (B).
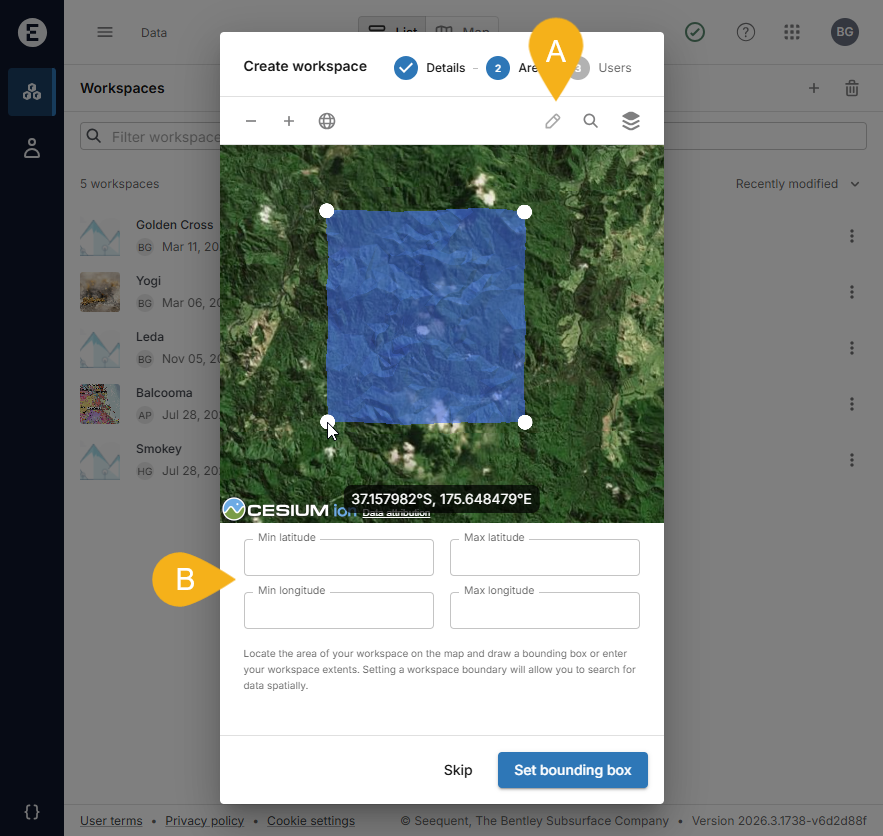
Once you have finished, click Set bounding box to start assigning users.
Assigning users
Because you have created the workspace, you are automatically made the workspace’s owner. This means you can assign anyone who already belongs to your organisation to the workspace at the owner, editor or viewer level. For more information on these permission levels, see the Workspace permissions topic.
To assign a user to the workspace, enter their email address, then choose what permissions you want them to have.
If you want to assign multiple users to your workspace, it is a good idea to group them according to the permission levels you wish them to have. Then enter the email addresses and select their permission level.
Finally, click Invite.
If a user you have entered does not belong to your instance, you will receive an error message. If you want to assign someone who is not yet part of your instance to a workspace and you are not an admin, you need to contact one of your instance’s admins to do this for you. Click on Users in the sidebar to see the list of your instance’s users. Admins appear with the role Evo Admin. Once the new user has been invited to the organisation, you will be able to assign them to your workspace.
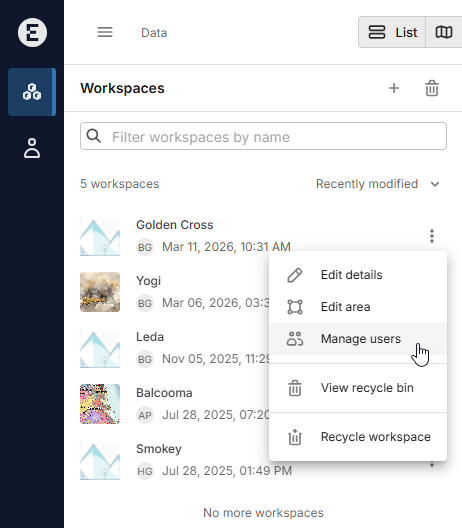
Assigning users to your workspace when you first create it is optional; if you do not wish to do so at this stage, simply click the View workspace button to open the new workspace. You can always assign users later by choosing Manage users from the workspace’s overflow menu: