
Seequent Evo help centre
Seequent Evo is a geoscience data and compute platform. Its open APIs support connected workflows and enhance decision-making. Evo’s collaborative workspaces provide a platform for team collaboration.
The Evo portal at evo.seequent.com is Seequent Evo’s environment for discovering, analysing and visualising geoscience data in context. In the Seequent Evo help centre, you will find information to help you get started with the Evo portal, along with help for Evo applications such as the 3D Viewer, BlockSync and Driver.
The rest of this topic introduces the Evo portal and how to navigate workspaces and search for data. It is divided into:
- Signing in to the Evo portal
- Navigating in the Evo portal
- Using the global search
- Exploring workspaces
- Using the map
- Viewing users
In the rest of this topic, reference is made to Evo instances, workspaces, workspace permissions and user roles. These important concepts and how they relate to one another are explained in more detail in the Introduction to instances, workspaces and user roles topic.
Signing in to the Evo portal
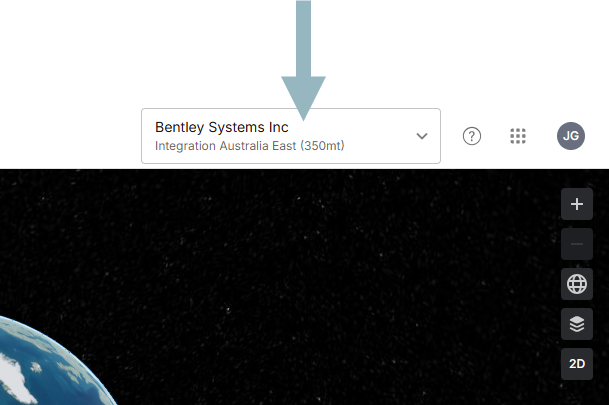
To get started with the Seequent Evo platform, visit evo.seequent.com and sign in using your Bentley account. If you have access to more than one Evo instance, you will be prompted to choose which one to sign in to.
Once you have signed in, you can switch between instances without having to sign in again. Do this by clicking your user ID in the menu and choosing the instance you wish to work in:
Navigating in the Evo portal
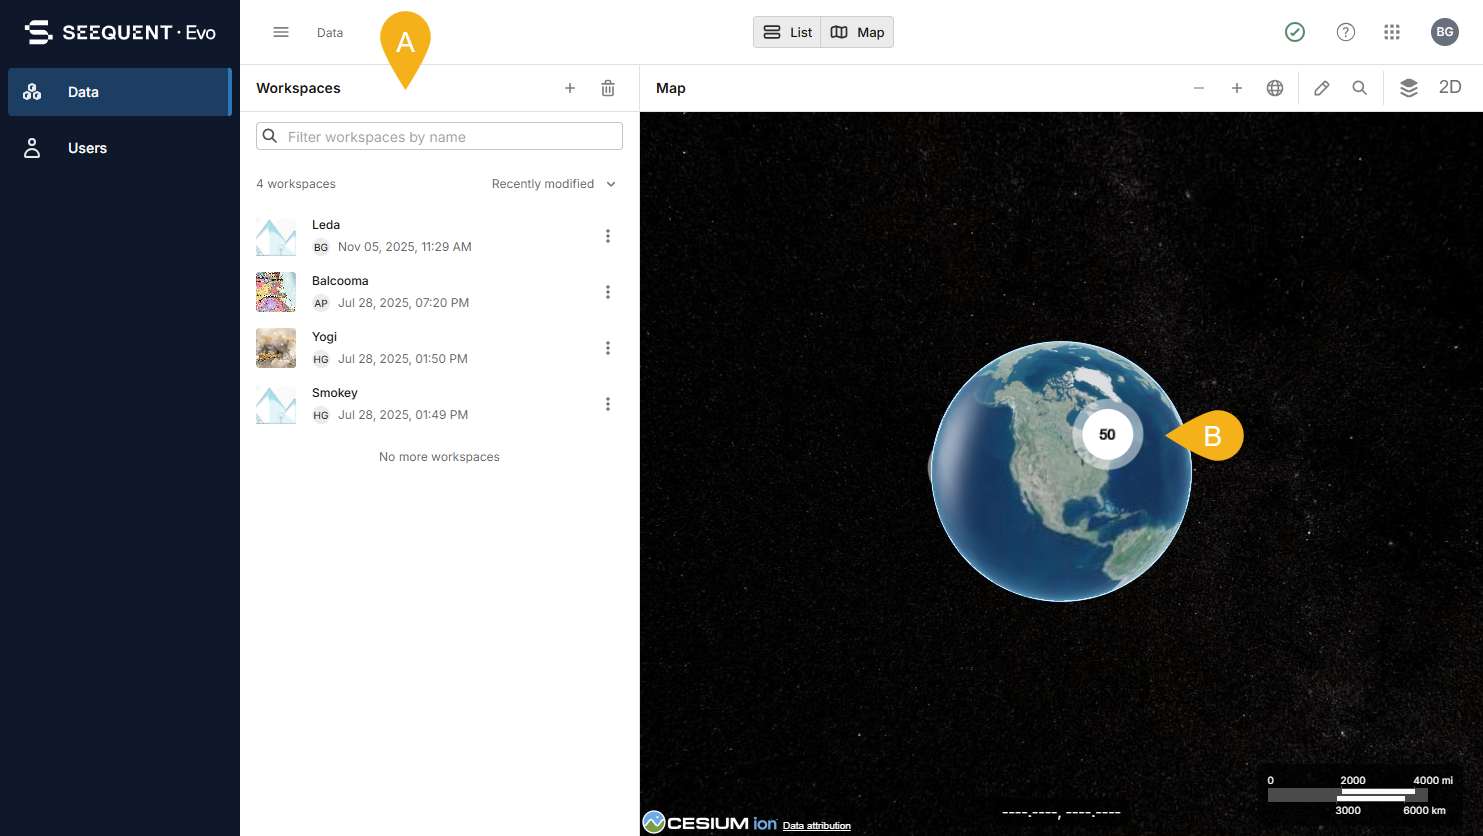
Once you have signed in to the Evo portal, a page is displayed that is split into two main parts, a list of workspaces you have permissions for (A) and a map showing the locations of geoscience objects stored in those workspaces (B). The sidebar (C) is for switching between viewing data and users.
Click the button to collapse the sidebar so that it uses less space:
You can customise this page to suit how you are working by:
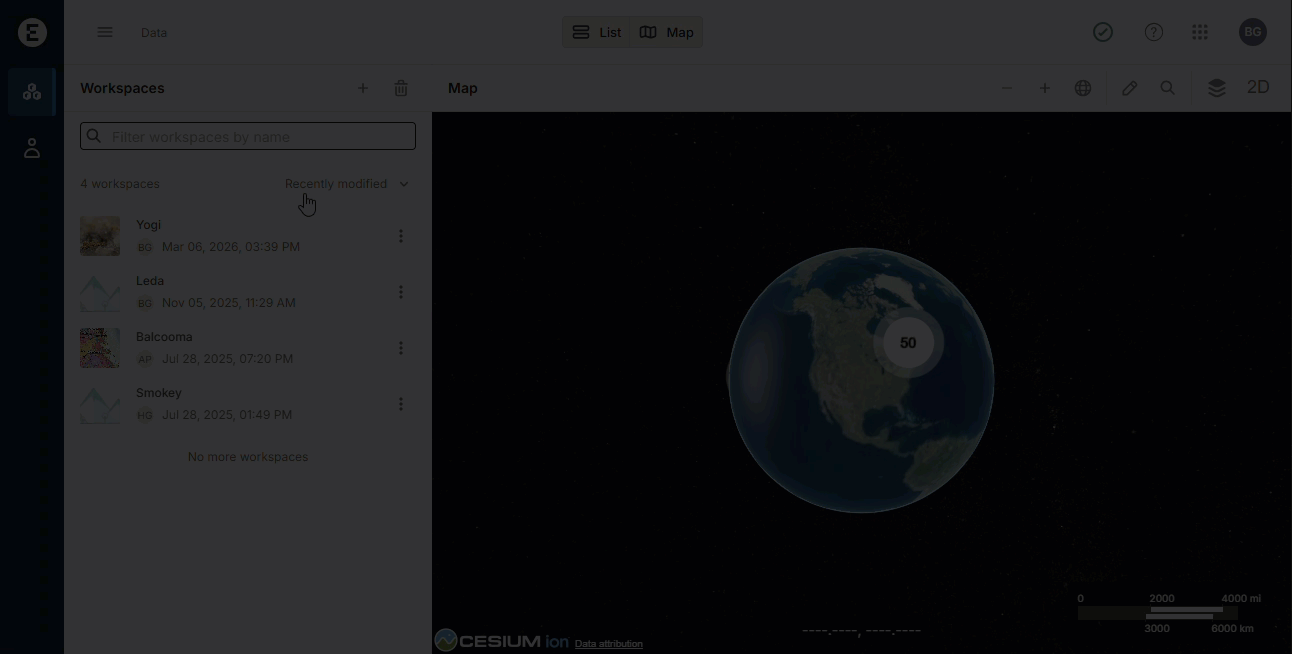
- Resizing the workspaces list and the map to provide more screen space for either view. To do this, click and hold on the divider and drag.
- Working in just one view. To do this, choose either List or Map from the menu.
Clicking Split restores the combined workspaces/map view.
Using the global search
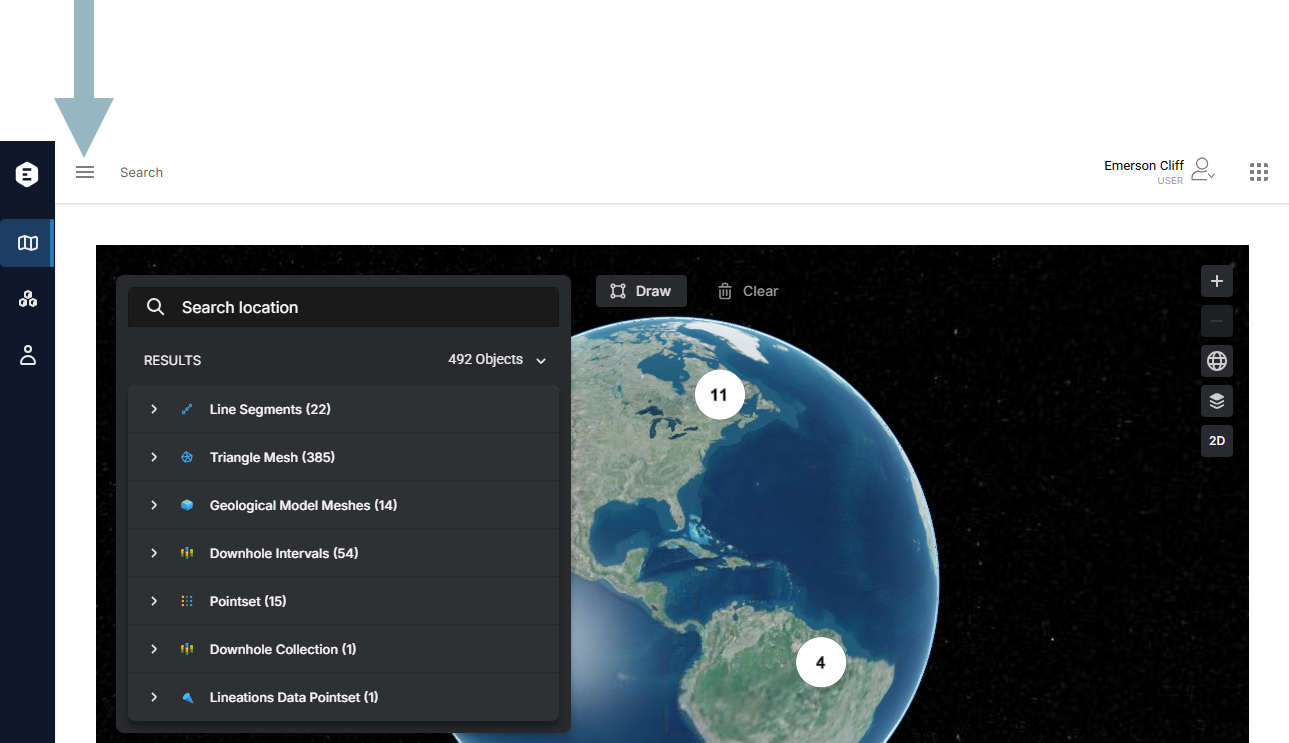
The search bar at the top of the page is for searching the Evo instance for geoscience objects, workspaces and locations. For example, here searching returns objects and workspaces that use the search term and a number of locations that are similar to the search term:
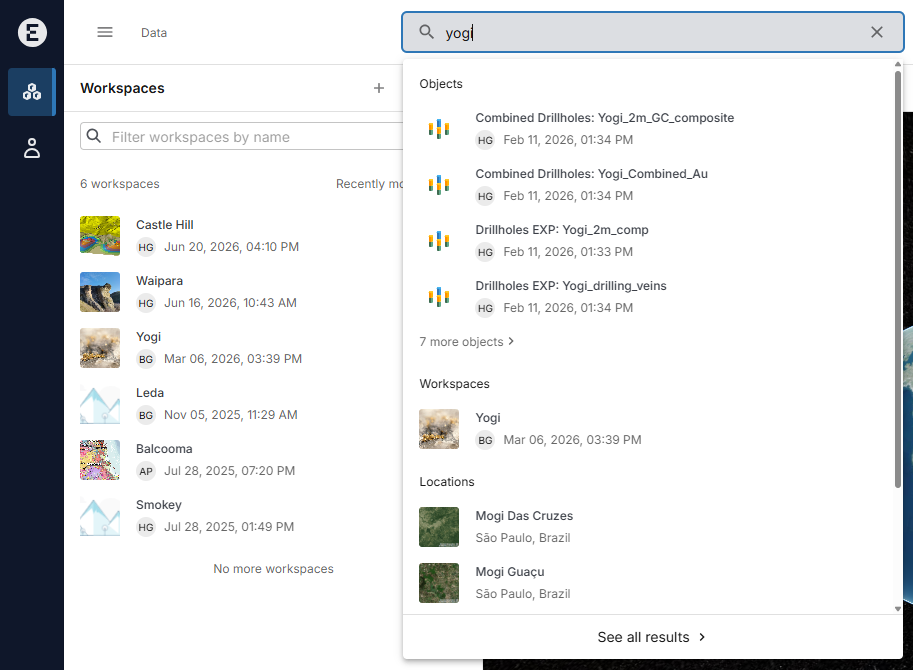
Search results will only include workspaces and the data items in them if you have been assigned to those workspaces.
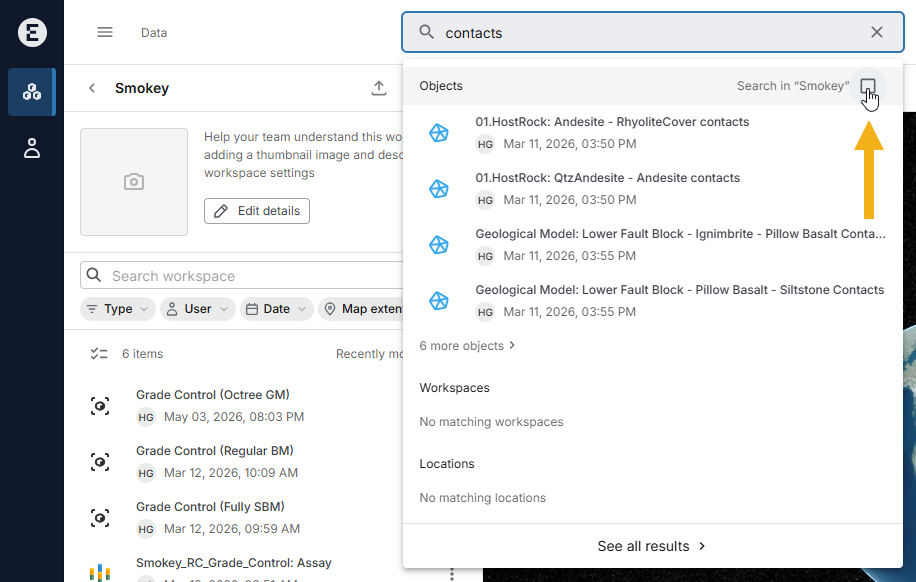
If you have a workspace open, you can restrict the search to that workspace:
Exploring workspaces
Click on a workspace to view its contents:

You can filter the list of objects by data type and see more information about each object. If a geoscience object contains CRS information, you can open it the 3D Viewer:
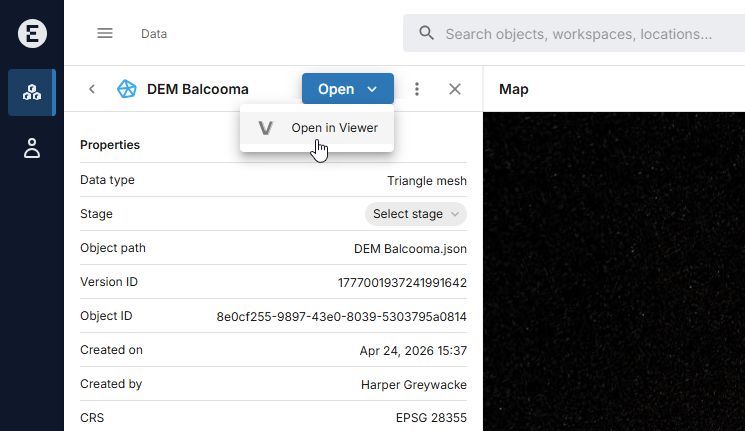
In the 3D Viewer, you can add other geoscience objects in the workspace to the scene and display them in different ways, allowing for the analysis of the objects in context.
See the 3D Viewer topic for more information.
Using the map
The Map is useful for understanding what geoscience objects are available in the workspaces you have permissions for in a particular region of interest.
- Only geoscience objects in the workspaces you have permissions for are displayed.
- Only geoscience objects that contain Coordinate Reference System (CRS) information are displayed.
- Objects are projected using WGS84.
- Objects retain their original CRS information.
To see what objects are available in a region of interest, use the mouse to zoom in, then click on the number to display a list of objects in that area (A). You can also zoom in progressively by clicking on the number that appears for a region.
To see more information about an object, click on its overflow menu (B).
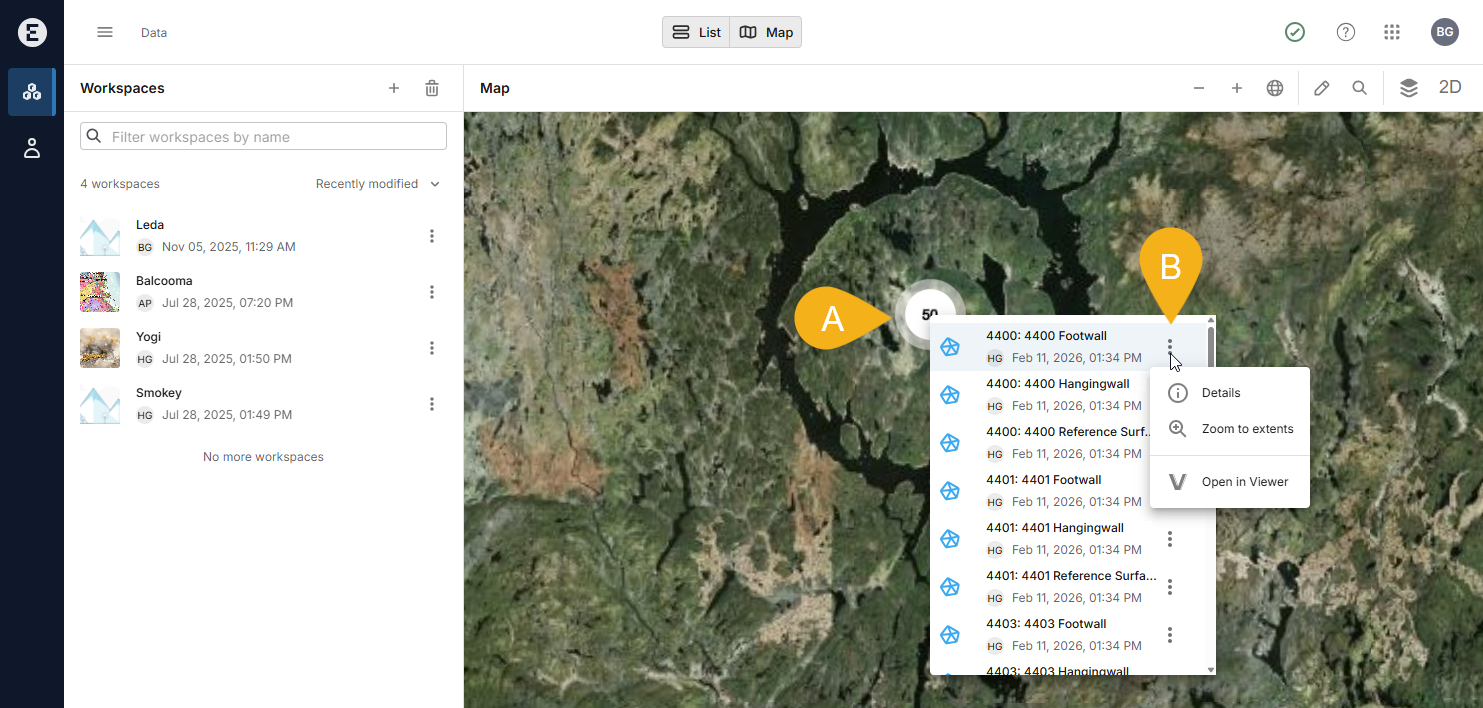
What options are available depends on the type of object.
See the Spatial search topic for more information on navigating in the map view and searching for geoscience objects.
Viewing users
Click on Users in the sidebar to see who belongs to your instance, along with their user role. If you are not an admin for your instance and you need an admin to, for example, add someone new to your instance, you can find out who your admins are in the Users page.
To learn more about assigning users to workspaces, see the Managing workspace users topic.
If you are an instance admin, see the Introduction to the Evo admin role topic.