
Workspaces
In Seequent Evo, data is organised into workspaces where access is controlled by assigning users to the workspace and granting them different permission levels. This topic provides an introduction to Seequent Evo workspaces and describes how to manage workspaces that are no longer in use. This topic is divided into:
Assigning users to workspaces
Users can be assigned to a workspace at three different permission levels:
- Workspace Viewers can view and search all data in the workspace.
- Workspace Editors can edit data and add data to the workspace. A workspace editor can also share the workspace by adding instance members, although editors cannot assign permissions higher than their own.
- Workspace Owners can edit data and add data to the workspace, and can share the workspace. Workspace owners can also delete the workspace. By default, the user who creates a workspace is assigned as a workspace owner. A workspace can have multiple workspace owners, if required.
See the Workspace permissions topic for detailed information on what each permission level allows you to do in a workspace.
The workspaces list
Click on Data in the sidebar (A) to see all the workspaces you have permissions for (B). If the map is also displayed, you can hide it by clicking the List button (C) in the menu:
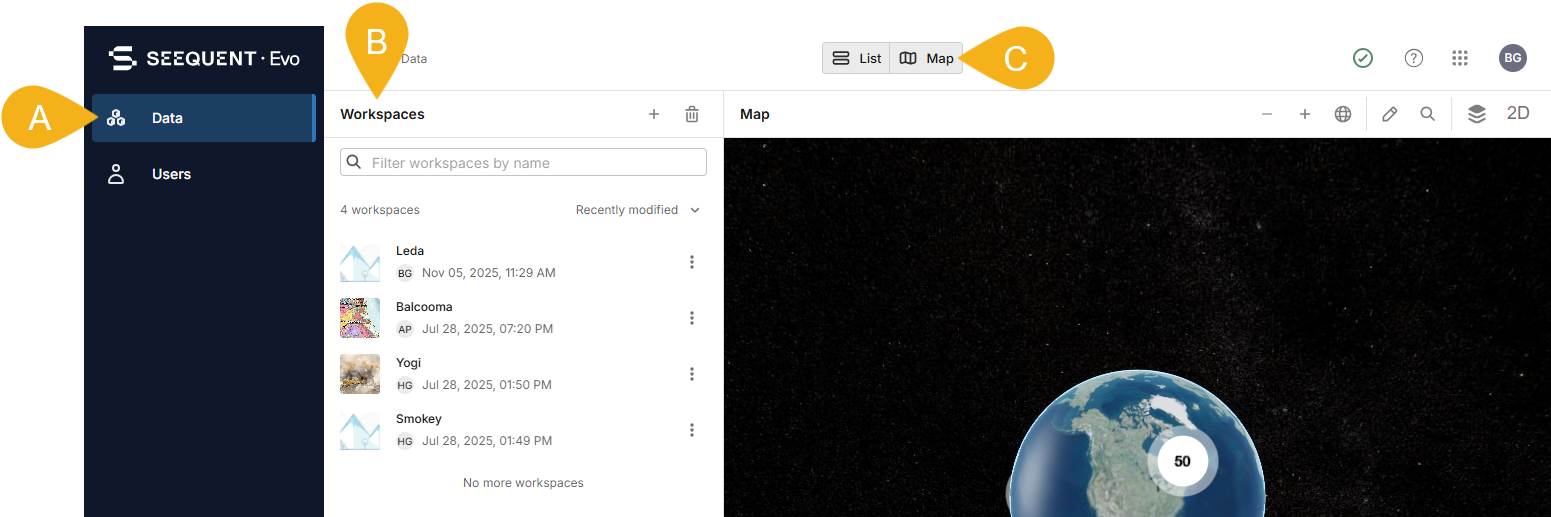
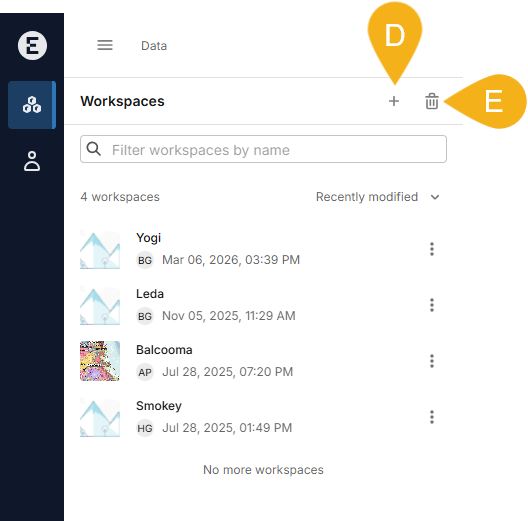
There are two buttons at the top of the workspaces list. These are for creating a new workspace (D) and opening the workspaces recycle bin (E):
The recycle bin is for workspaces that are no longer being used. If a workspace you have permissions for has been recycled, you will be able to see it in the recycle bin. If you are the owner of a recycled workspace, you can restore it. See Removing and restoring workspaces later in this topic.
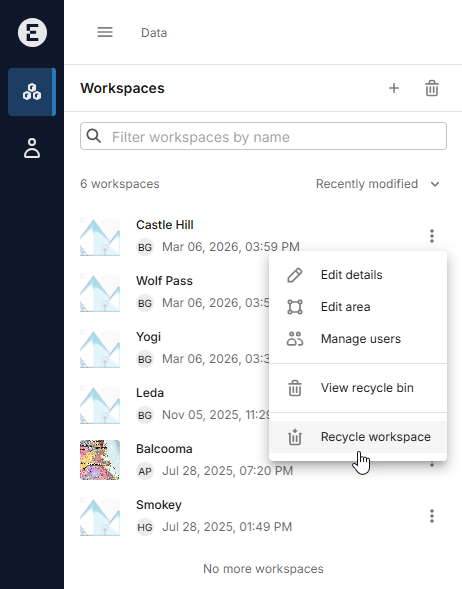
Each workspace has an overflow menu that is for making changes to that workspace.
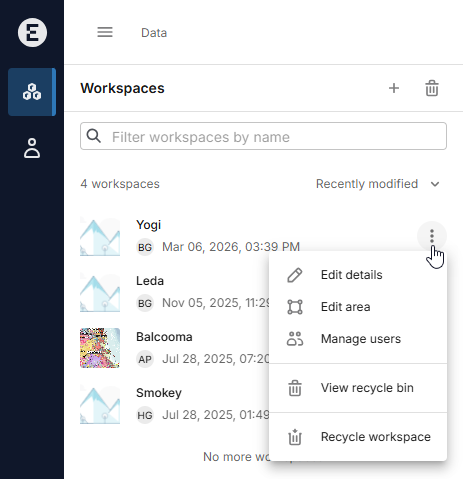
What options are available to you depends on your permission level for that workspace. You may be able to:
- Change the workspace settings, if you are an owner or editor
- Assign new members, if you are an owner or editor
- Change permissions for existing members, although how much control you have depends on your own permissions
- Send the workspace to the recycle bin, if you are an owner
See the Workspace permissions topic for an overview of owner, editor and viewer permission levels.
Options not available for your permission level will be greyed out.
Removing and restoring workspaces
When a workspace is no longer being used by the team, a workspace owner can remove it from the workspaces list, sending it to the recycle bin. If, later, the workspace is required once again, a workspace owner can restore it from the workspace recycle bin.
The workspaces recycle bin (A) is separate from the recycle bin for each individual workspace (B), which is for data items in that workspace that are no longer required.

Sending a workspace to the recycle bin is, in effect, archiving the workspace in its current state. This includes the workspace settings, permissions and data items, including items stored in the workspace’s own recycle bin. Restoring a workspace reinstates its state at the time it was recycled; it is not necessary to add users back to a restored workspace or modify their permissions.
Viewing recycled workspaces
To view recycled workspaces you have permissions for, click on Data in the sidebar, then click the recycle bin button (![]() ):
):
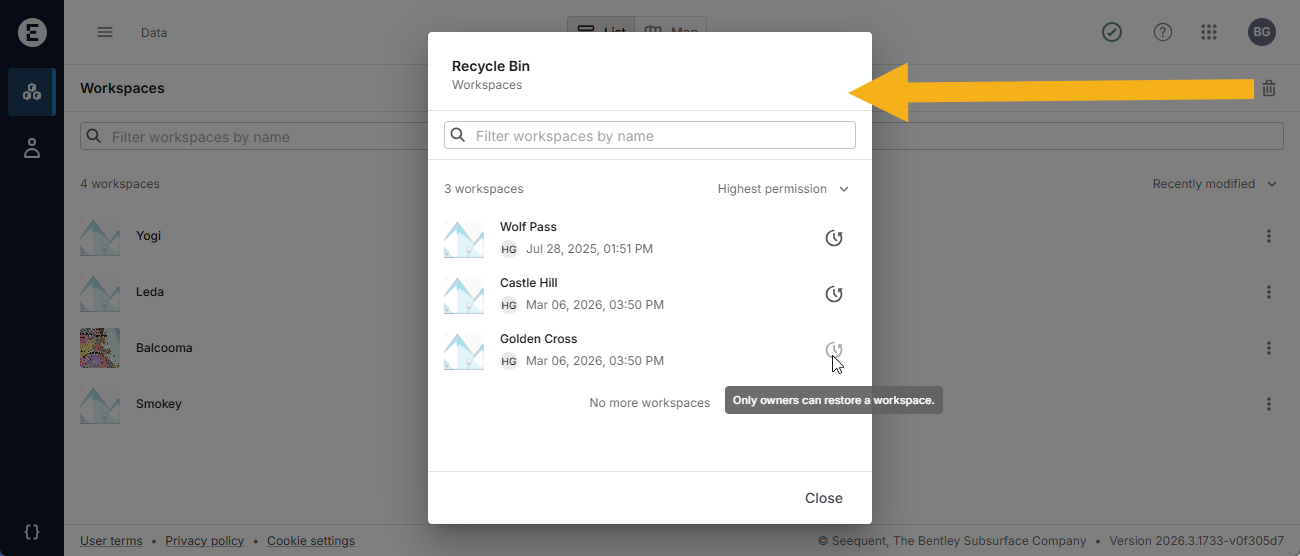
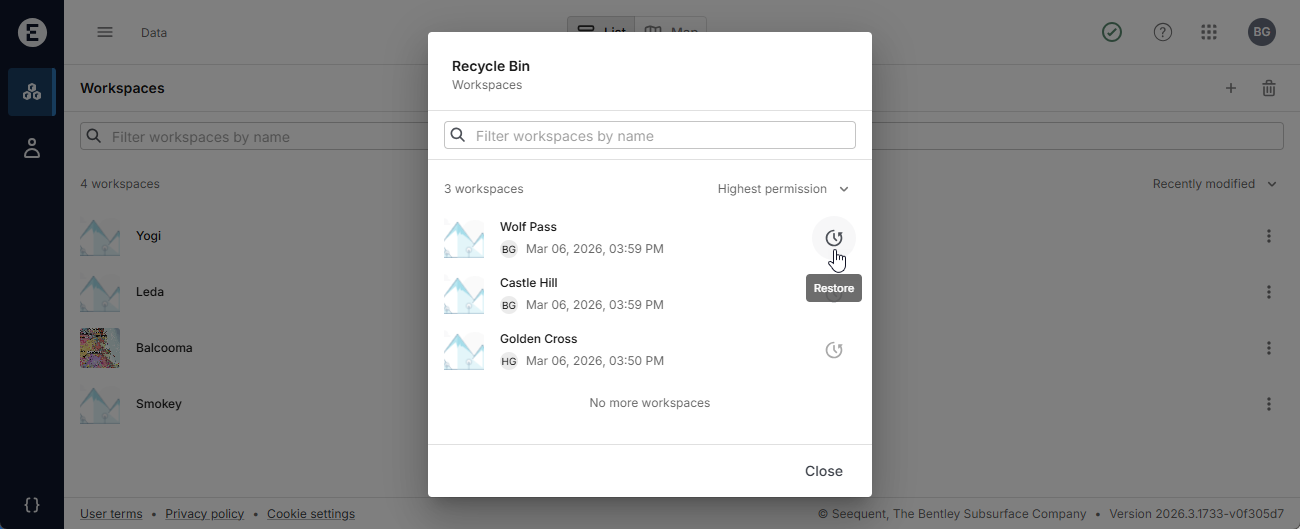
You must be an owner of a workspace to recycle or restore it, but all recycled workspaces you have permissions for are shown in the workspace recycle bin, even if you are not able to restore them. In the example above, the signed in user is the owner of both the Waipara and the Castle Hill workspaces and so is able to restore them. However, the user cannot restore the Golden Cross workspace because they are not an owner.
Sending a workspace to the recycle bin
If you are the owner of a workspace and wish to remove it, click on Data in the sidebar, then choose Recycle workspace from the workspace’s overflow menu:
You will be asked to confirm your choice.
Restoring a workspace from the recycle bin
If you are an owner of a recycled workspace, you can restore it from the recycle bin. To do this, click on Data in the sidebar, then click the recycle bin button (![]() ).
).
Click the restore button (![]() ) for the workspace you wish to restore:
) for the workspace you wish to restore:
You will be asked to confirm your choice.