
Capturing Images Using Capture X
Seequent Imago has two applications for capturing images, Imago Capture X and Imago Mobile. We will not discuss Imago Mobile as part of this guide, but will instead focus on becoming familiar with Capture X.
The best way to learn Capture X is to experiment with capturing images, applying cropping templates to them and uploading them. You can then view the results in the Imago Portal. That is the subject of this part of the Imago Subscription Setup Guide. This topic is divided into:
- Downloading and Installing Capture X
- Signing In and Selecting a Profile
- Connecting Your Camera
- Capturing and Cropping the First Image
- Creating a Cropping Template
- Capturing Subsequent Images
- Selecting a Different Profile
- Starting a New Collection
- Reviewing and Uploading Captured Images
- Viewing Captures in the Imago Portal
You can experiment with Capture X without capturing actual core boxes or chip trays. For this part of the guide, we are capturing a demo core box tray in order to illustrate the process.
Downloading and Installing Capture X
The latest version of Capture X is always available on MySeequent at https://my.seequent.com/products/imago-capture-x/latest.
Once you have downloaded the file, run the installer and then launch Capture X.
Signing In and Selecting a Profile
When prompted, sign in using your credentials.
If Capture X has been freshly installed on your computer, you will then be prompted to select from the profiles your Imago credentials give you access to. To prepare for capturing images, we have set up two profiles in the Imago Admin Portal, which you can see listed alongside the Core Boxes profile we set up in Setting Up Capture Profiles.
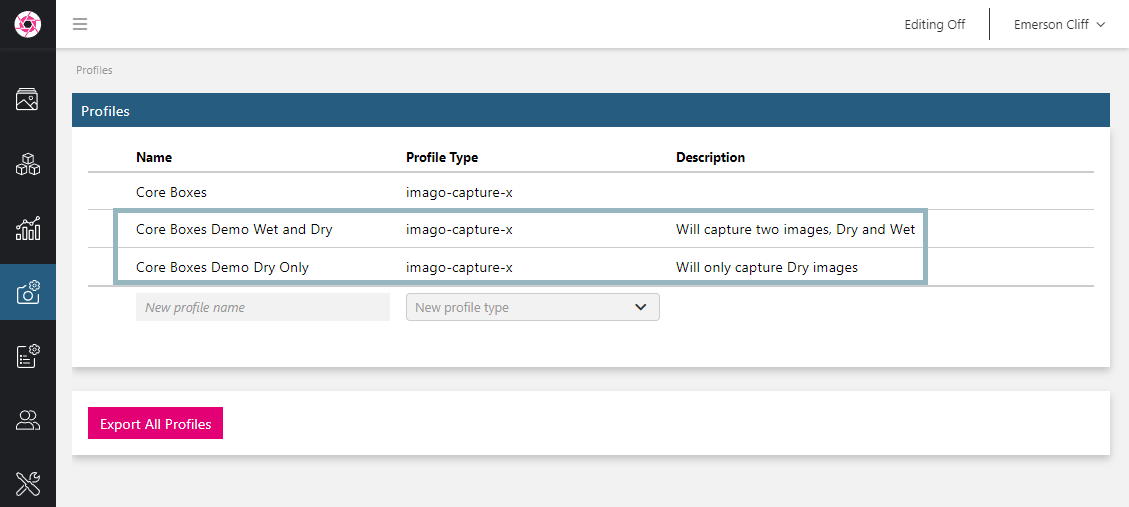
In Capture X we are prompted to choose between these three profiles. First we will capture some images using the dry only profile (A). Later we can switch profiles by clicking on the button in the upper righthand corner of the window (B).

Click Activate.
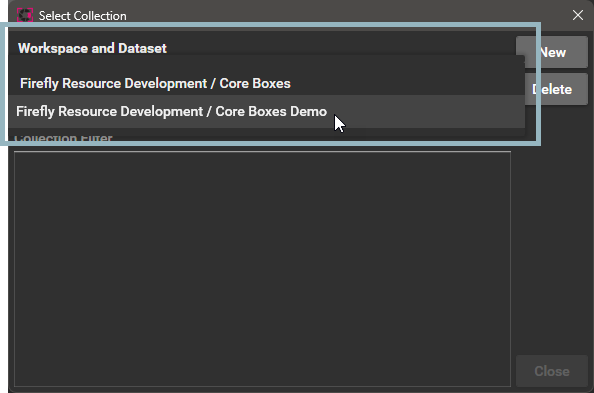
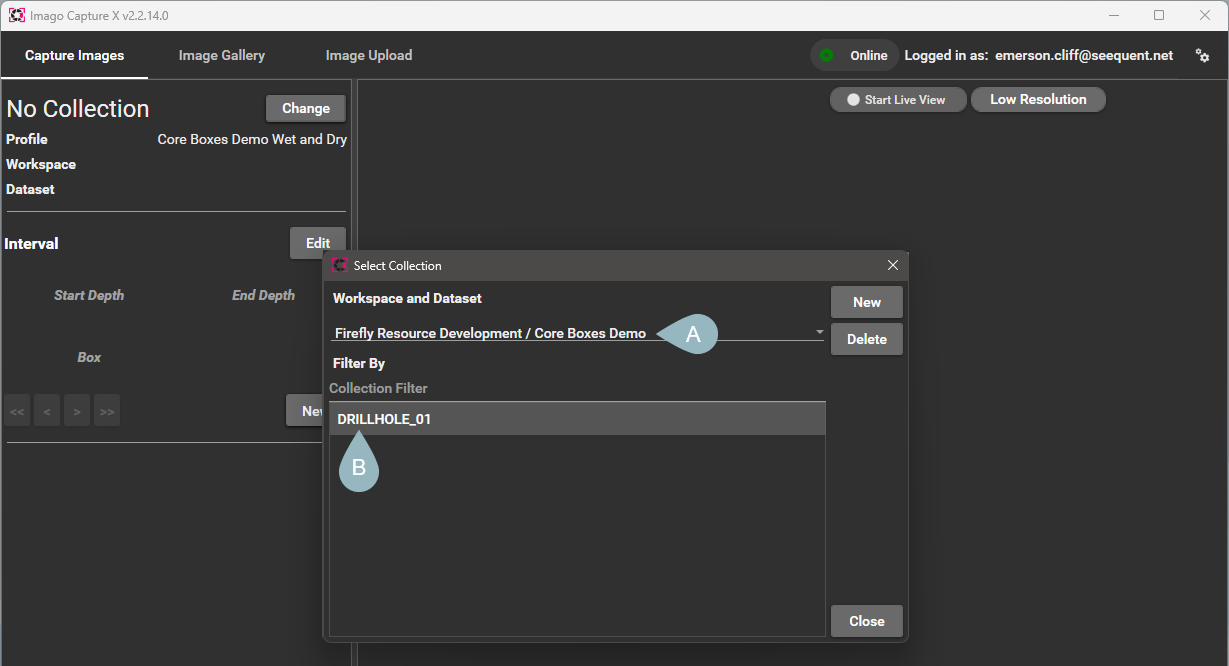
You will then be prompted to select which workspace/dataset you wish to capture images to. We will choose the Core Boxes Demo:
The next prompt is for a collection to capture images to. Click New (A) to create a new collection, then enter its name (B).
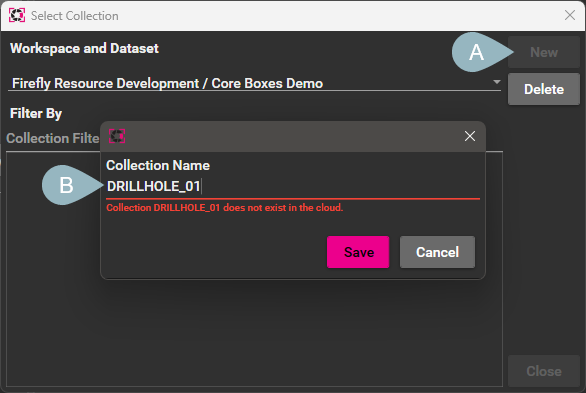
Click Save.
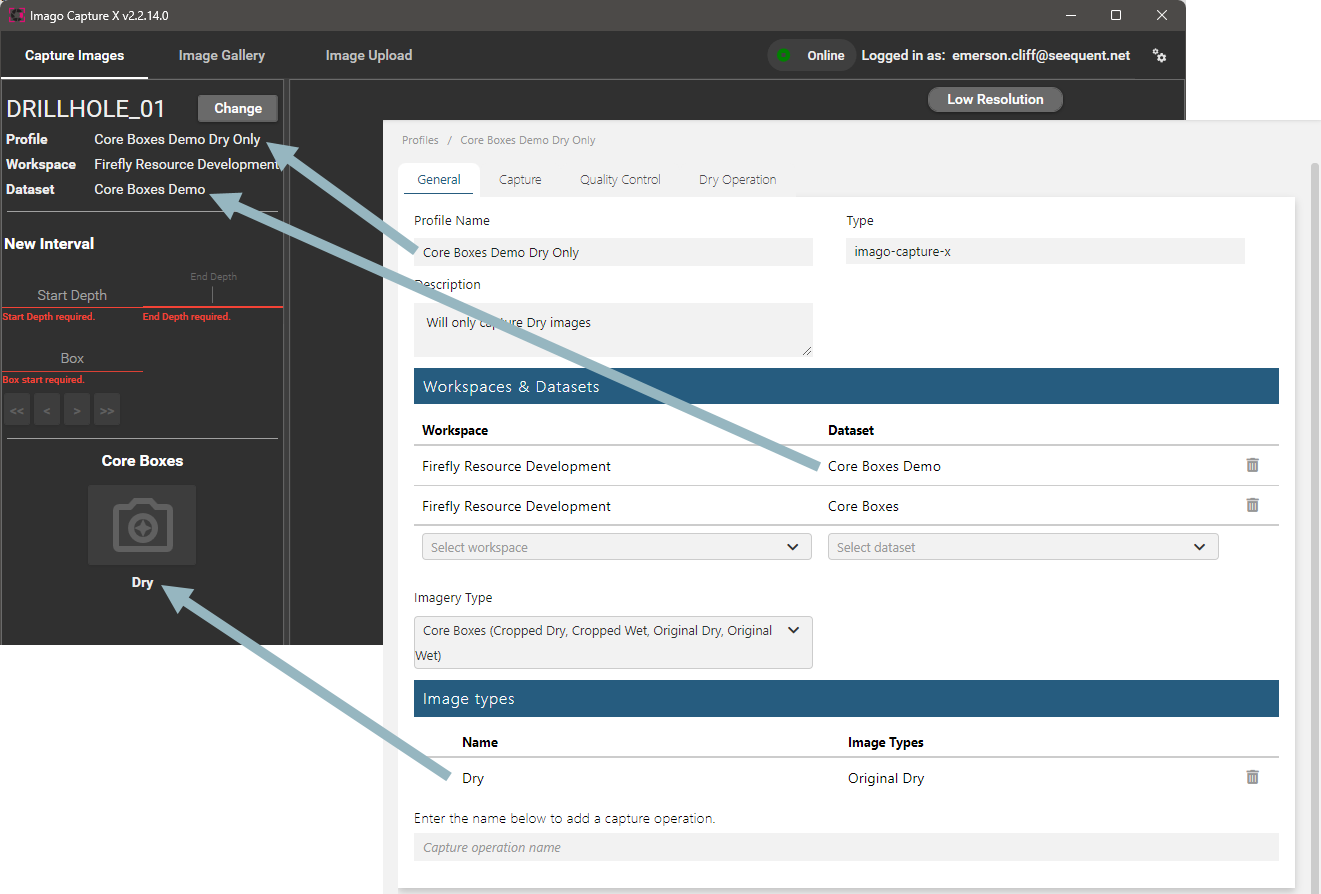
At this point, Capture X has been set up to start capturing images for a collection called DRILLHOLE_01 in the workspace/dataset selected. When we look at the capture profile, we can see how it relates to what we see in Capture X.
Connecting Your Camera
Once your camera has been connected to and detected by your computer, click on the button in the upper righthand corner of the Capture X window and select Settings. Click on Camera Station (A), then select your camera from the dropdown list for RGB Sensor (B):
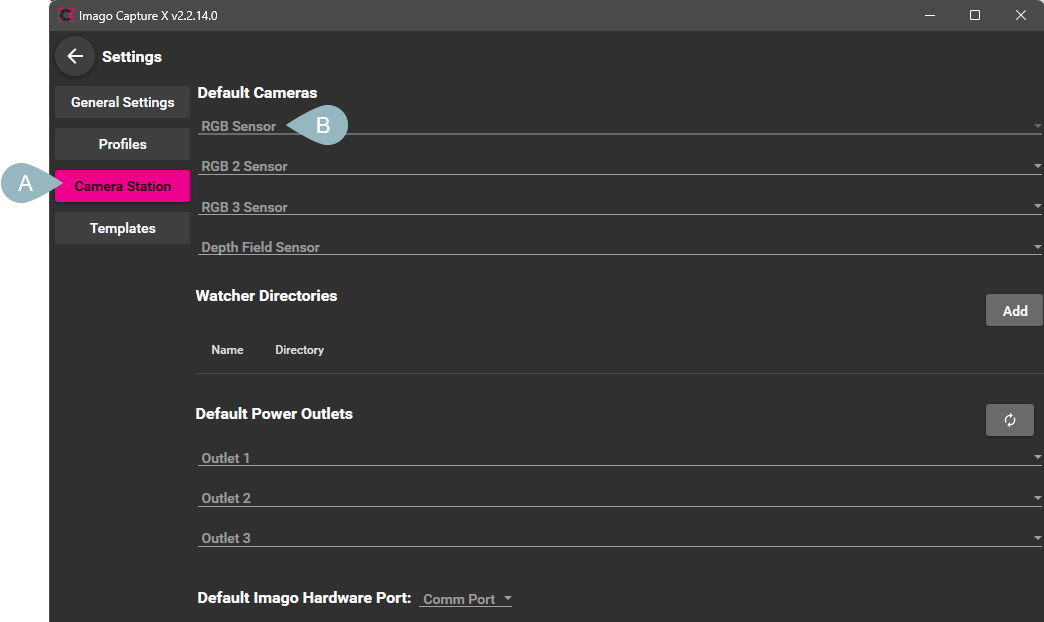
If your camera does not appear in the dropdown list and appears to be properly connected to your computer, your Imago Support contact will be able to help you troubleshoot the issue.
Capturing and Cropping the First Image
Once your camera is in position, enter the start and end depths (A) and the box number (B). Then click the Dry button (C):

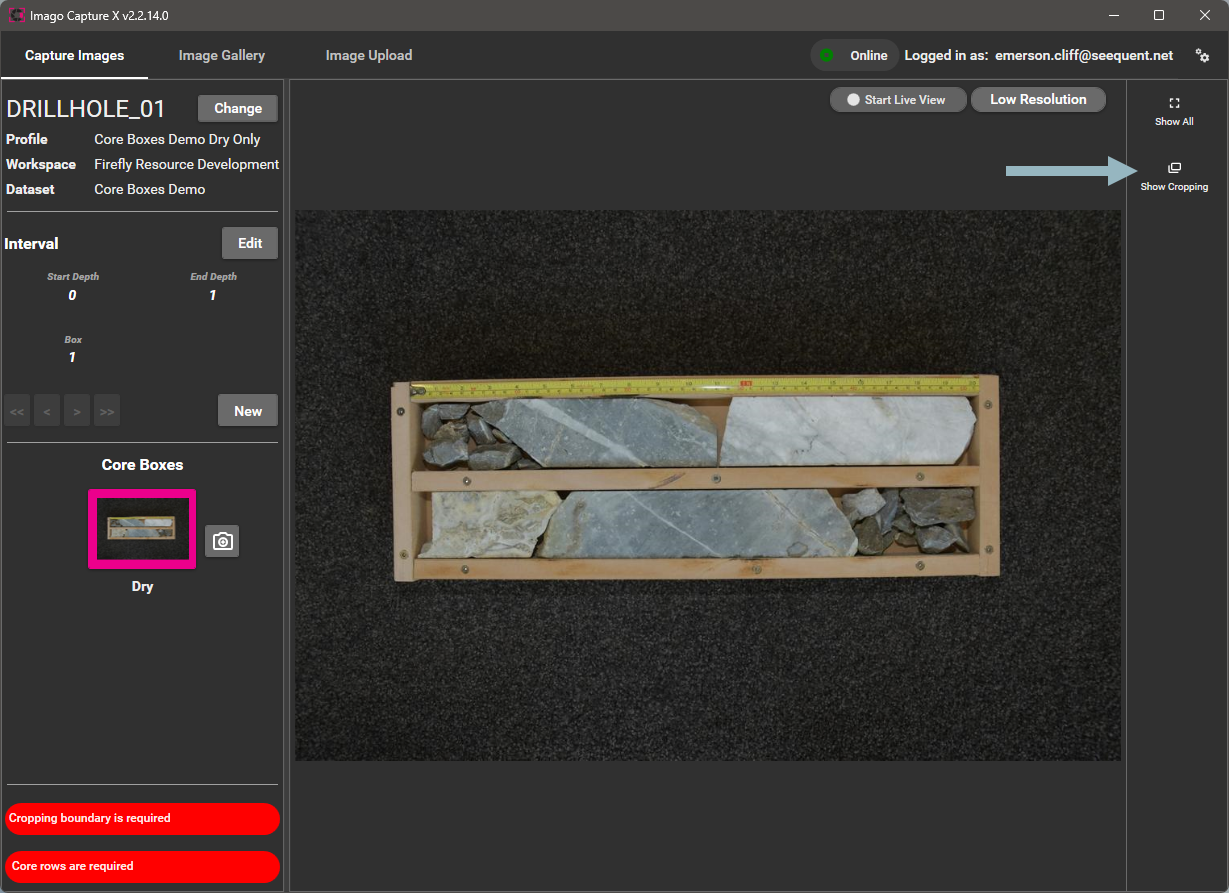
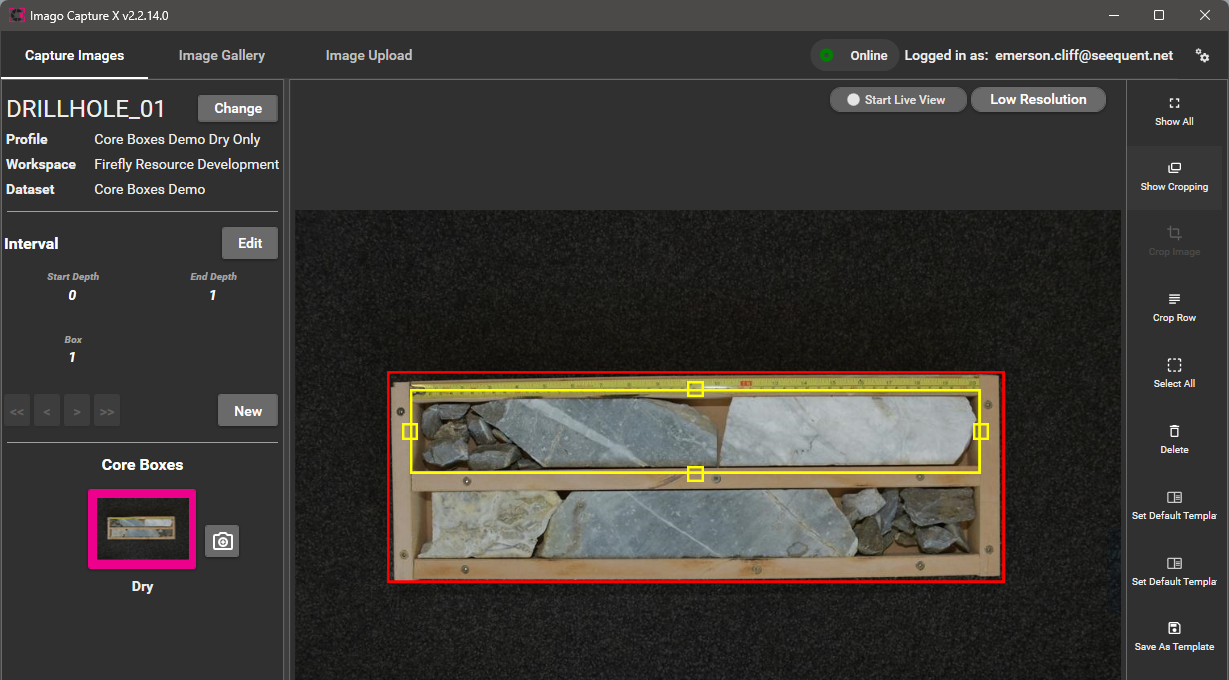
Once the image has been captured, it will be displayed. The next step is to crop it and creating a cropping template that can be used for the other captured images. Start by clicking on the Show Cropping button:
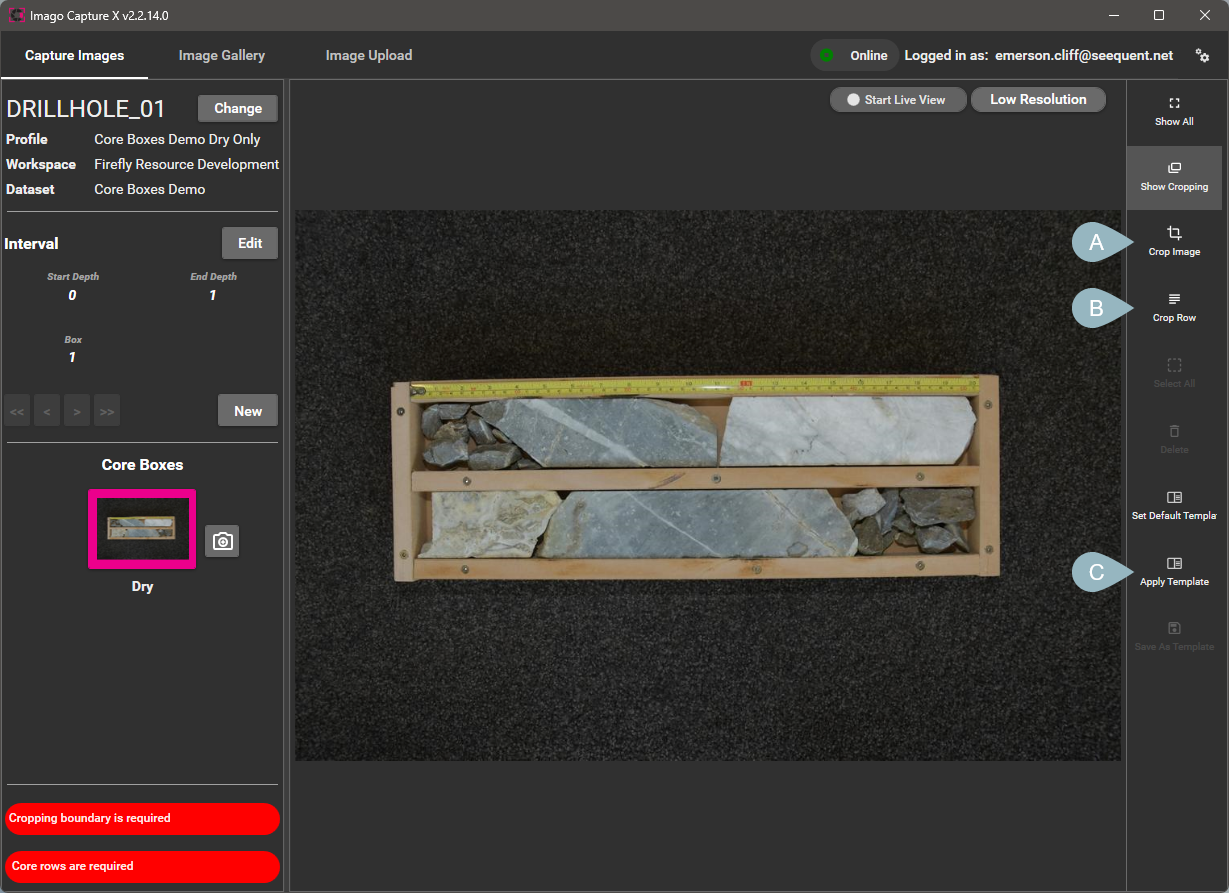
The Crop Image button (A) is for setting the boundary for the image as a whole. Click the Crop Row button (B) to define rows inside the box. The Apply Template button (C) is for applying a cropping template to the image, and will be useful for subsequent images.
Clicking Crop Image shows the current image boundary:

Use the handles to resize it:

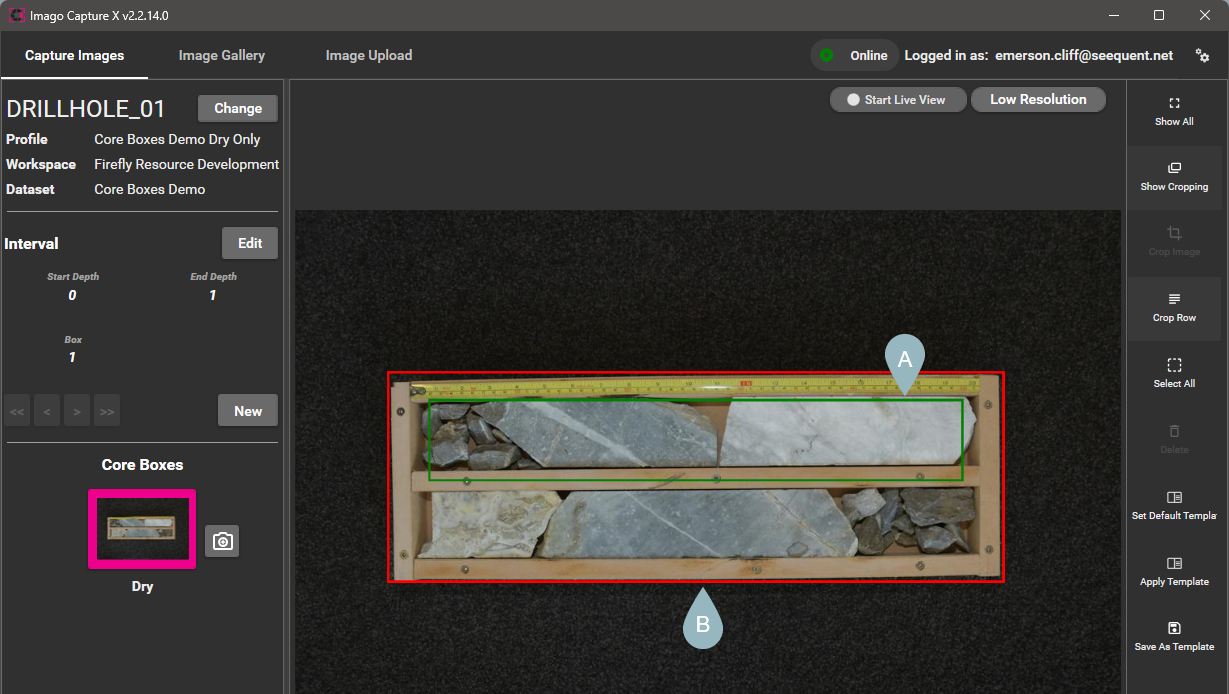
Next click the Crop Row button. This will add a row to the image, outlined in green (A). Note that the cropping boundary (B) is now outlined in red.
Click inside the row boundary to edit it. It will turn yellow and you can use the handles to resize it:
Click the Crop Row button again to add the second row boundary to the image. Here we can see the first row boundary (A) in green and the second (B) in yellow:
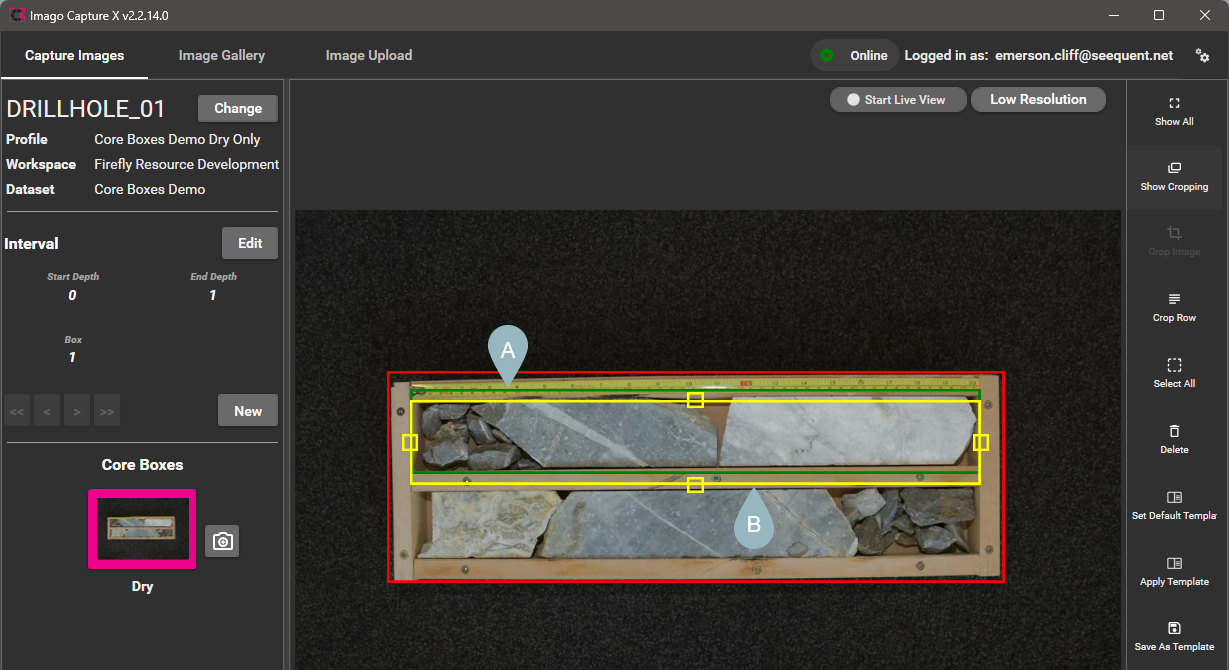
When you first add the second row boundary to the image, you will need to click inside of it to edit it; it will turn yellow and you will be able to adjust it using the handles.
Creating a Cropping Template
Once you have cropped the first captured image, you can save the image and row boundaries as a cropping template. To do this, click on the Save As Template button, then enter a name for the new template:

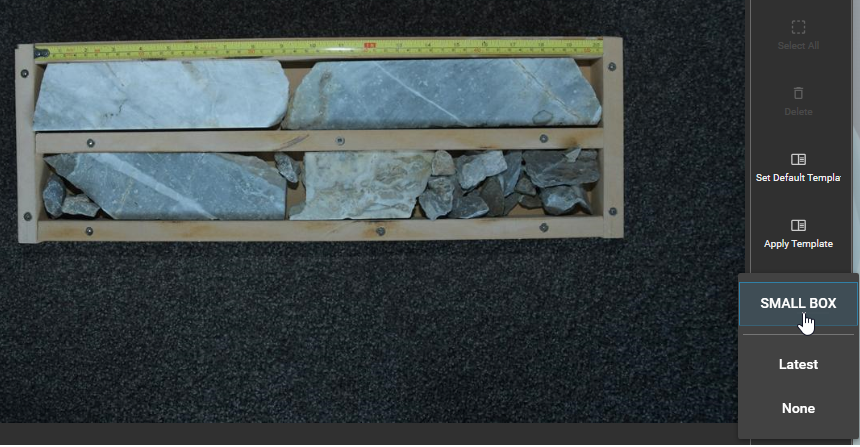
The next time you capture an image, you can apply the template by clicking the Apply Template button:
Then you can edit the image and row boundaries to suit the newly-captured image, if necessary.
Capturing Subsequent Images
To capture the next image in the dataset, click the New button:

As before, enter the start and end depths and the box number, then click the Dry button. Once the captured image has been displayed, apply the saved cropping template and adjust it, if required.
As you work capturing additional images for the collection, you can navigate through the images and adjust their information, if necessary. Navigate using the arrow buttons:

Selecting a Different Profile
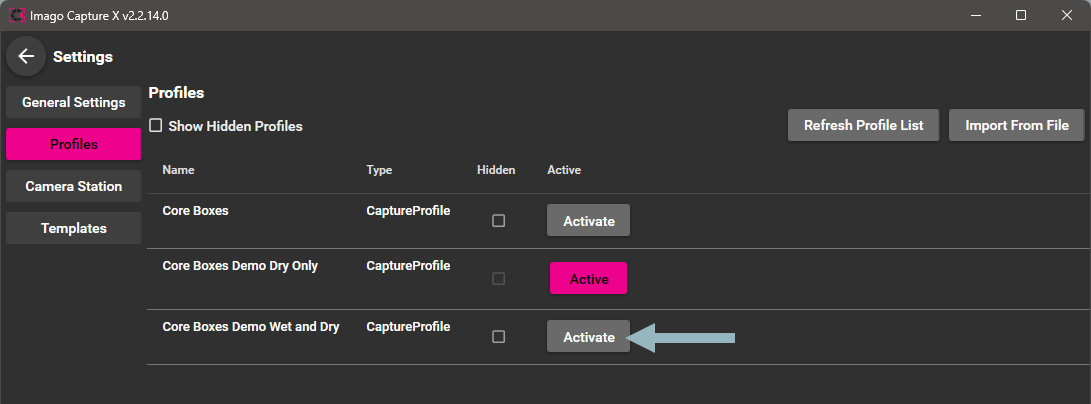
Up to this point, we have captured only dry images; this is what the selected profile allows for. We can change to a different profile by clicking on the button in the upper righthand corner of the window and selecting Settings. Click on Profiles, then click the Activate button for a different profile. In this example, we will switch to a profile that supports capturing wet and dry images.
Upon returning the main window, you will be prompted to select a workspace/dataset and collection for capture. In this case, we will select the Core Boxes Demo (A) once again but instead of creating a new collection, we will add images to the existing DRILLHOLE_01 (B) collection:
The capture profile supports a second image type, Wet, so there is an additional button in the Capture X window. Because we decided to add to an existing collection (DRILLHOLE_01), we only need to enter the end depth, then click Dry to capture the next image.

We can also keep using the existing cropping template set up for the small box.
Starting a New Collection
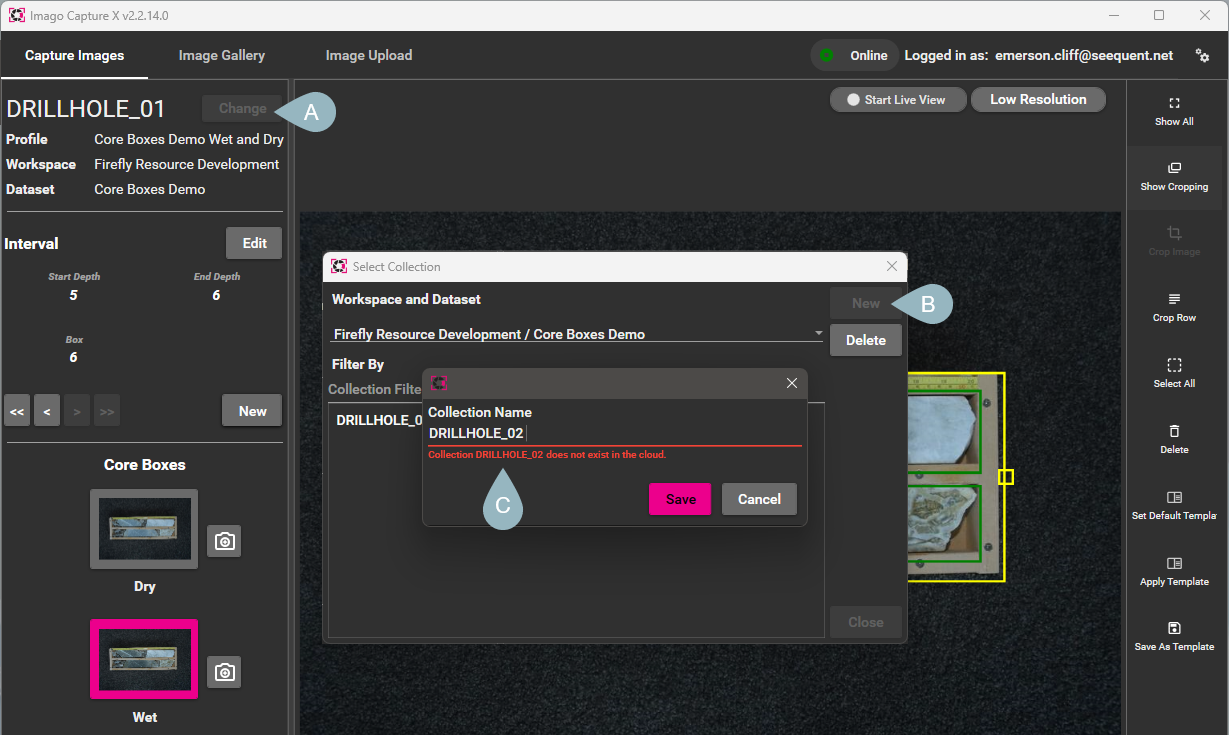
Once you finish capturing a collection such as a drillhole, you can start a new collection/drillhole by clicking on the Change button (A). Click New (B) to create a new collection, then enter a name for it (C).
You can then start adding images to the new collection.
Reviewing and Uploading Captured Images
Once you have captured some images, click on Image Upload to view the list of captured images that have not yet been uploaded to the Imago Portal.
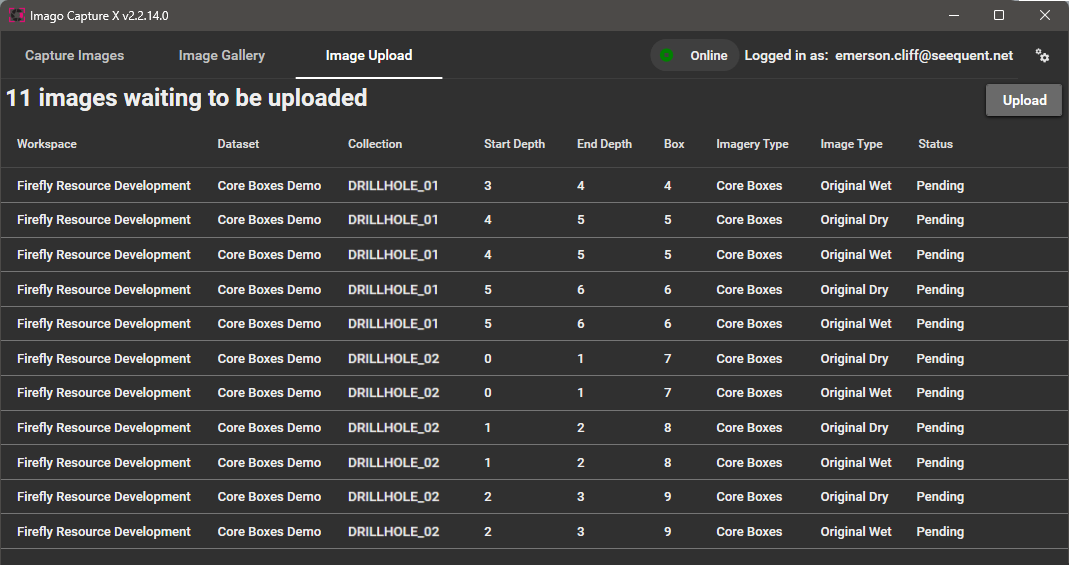
Click Upload to start uploading images.
If you want to have images upload automatically, there is a setting to Automatically Upload Photos in the Settings > General Settings window.
Viewing Captures in the Imago Portal
In the Imago Portal, we can view the captured images. For example, here we have the Cropped Dry and Linearized Dry images captured for the DRILLHOLE_01 collection:

Got a question? Visit the Seequent forums or Seequent support
© 2024 Seequent, The Bentley Subsurface Company