
Setting Up Capture Profiles
Both Imago Capture X and Imago Mobile use a capture profile to determine:
- What workspace and dataset captured images will be uploaded to. If there is more than one workspace/dataset available in the profile, the person running Capture X/Capture Mobile can choose which one to work with from the main Capture X/Capture Mobile window.
- The imagery type captured images will be organised into. Only one imagery type can be selected for each profile, and if different imagery types need to be captured for a collection, a different profile can be selected.
See Capture Profiles in the The Imago Data Hierarchy topic for an overview of how capture profiles work.
The rest of this topic describes how to set up an Imago Capture X profile. It is divided into:
- Creating a Capture Profile
- Selecting the Imagery Type and Workspaces/Datasets
- Adding Capture Operations
- Capture Settings
- Assigning Users to a Profile
- Learning More
Creating a Capture Profile
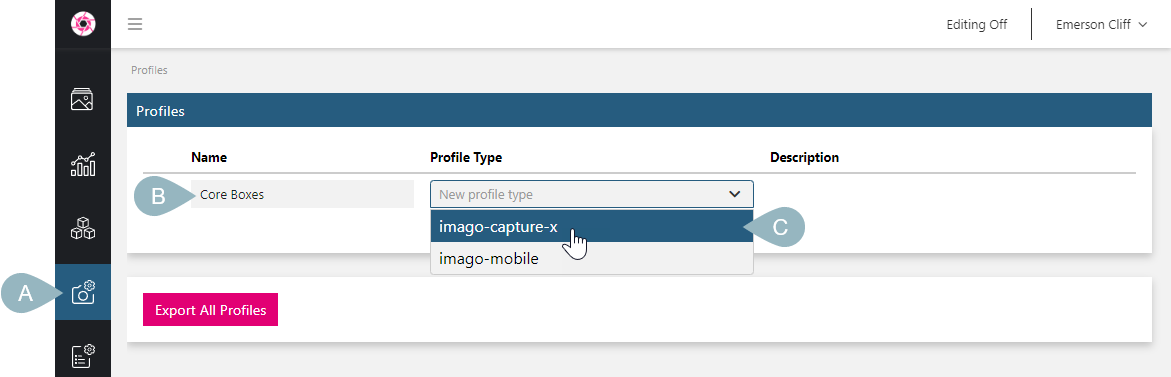
Profiles are configured in the Profiles part of the Admin Portal (A). To create a capture profile, enter a name for it (B), then choose the Profile Type from the dropdown menu (C):
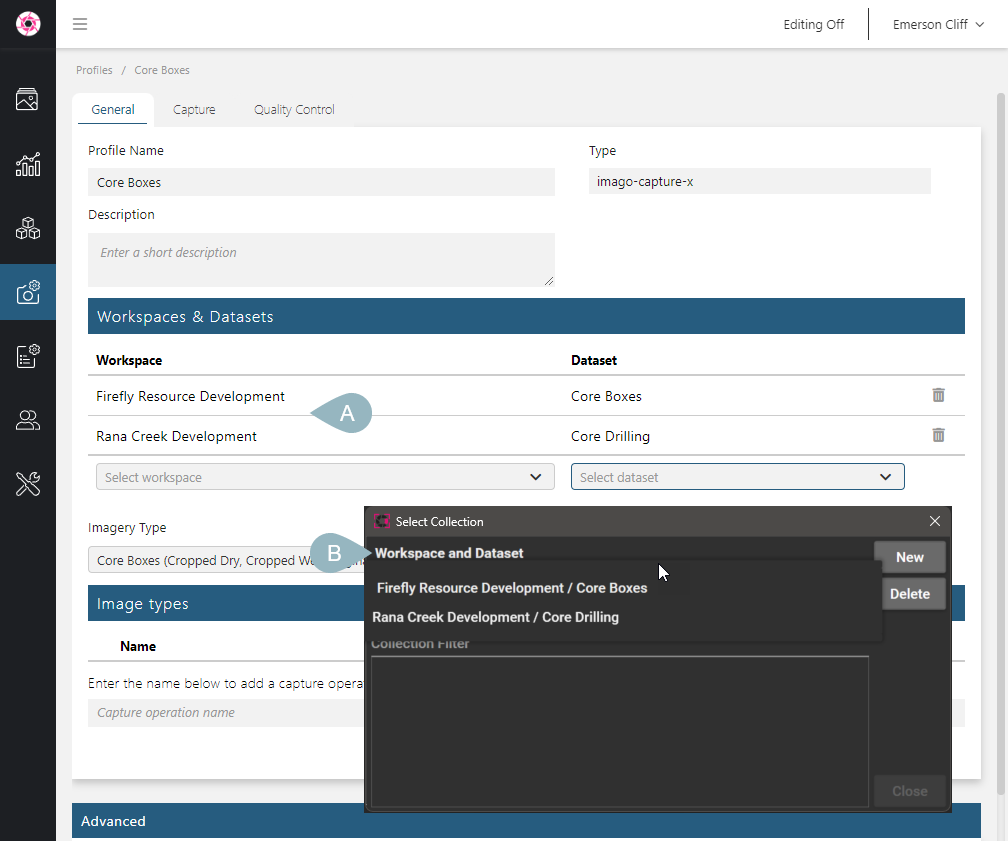
A window will then open that is divided into General, Capture and Quality Control tabs (A). The General tab is where you choose what workspaces/datasets (B) and image types (C) will use the capture profile:

The settings you choose for your capture profiles will depend on what type of imagery will be captured and the level of detail required. For this guide, we will illustrate setting up a simple profile for capturing core boxes.
Selecting the Imagery Type and Workspaces/Datasets
In the profile’s General tab, select which workspaces (A) and datasets (B) the captured images will upload to when taken with Capture X:

The Imagery Type setting (C) determines what imagery type the profile captures to. A profile can only select one imagery type.
Imago does not validate a profile’s Imagery Type setting against those in use by the workspaces/datasets you have added to the profile.
You can add as many workspaces and datasets as required; when a profile supports more than one workspace/dataset (A), the Capture X operator can choose between those available (B) when setting up capturing of a new collection:
Adding Capture Operations
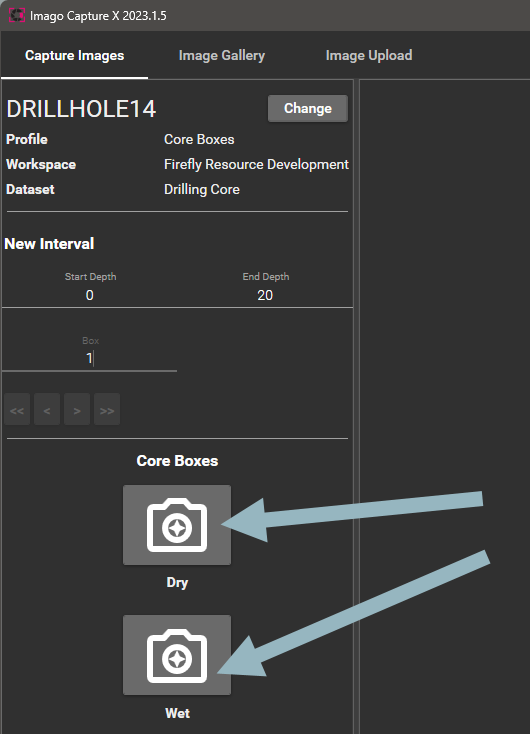
Each type of image that will be captured needs to have a ‘capture operation’ defined. If, for example, two images will be captured for each core box (dry, wet), you need to define two capture operations. Each capture operation will have a corresponding button in the Capture X window:
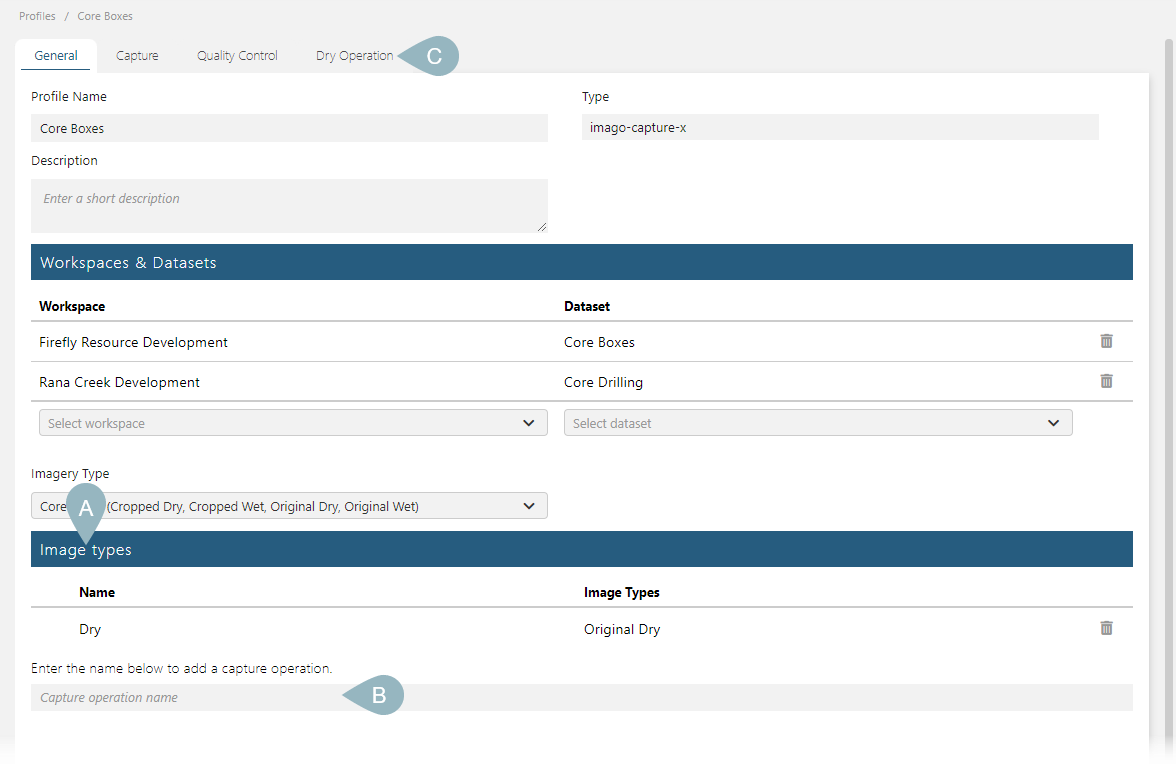
To define capture operations, use the Image types list (A). Enter the name of the operation you want to define in the box below the list (B), then press the Enter key. The new image type will be added to the list and a corresponding Operation tab (C) will be added to the window:
It is a good idea to keep these capture operation names short as they do need to fit on a button in Capture X.
The Imago Admin Portal will attempt to match the capture operations entered in the General tab with the image types defined in the selected Imagery Type. If, however, the wrong image type is set for the capture operation, you can change it by clicking on the entry’s Operation tab. There you can remove the incorrect image type (A) and add the correct one (B):

See Adding Capture Operations in the Capture X Profiles topic for more information.
You can change an operation’s setting by double-clicking on it in the list or by clicking on its tab. For example, here we have added Dry and Wet operations:
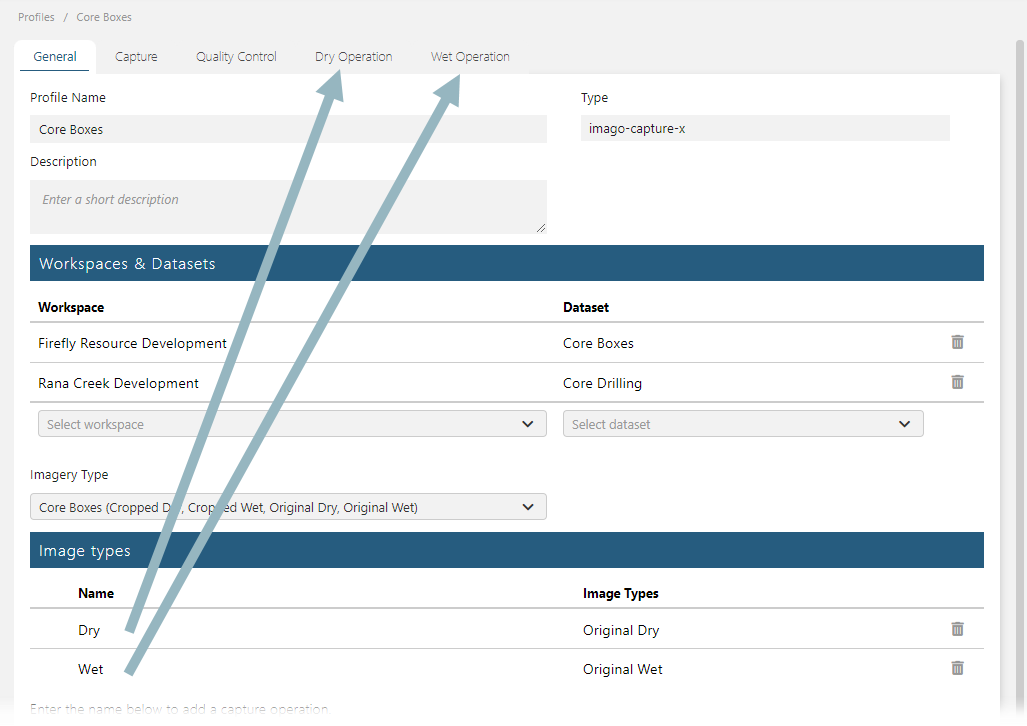
What this list shows is what image type captured images will be saved as. In the example above, the Dry image will be saved under Dry and the Wet image will be saved under Wet.
We will not discuss the options in these tabs in this guide.
Capture Settings
In the Capture tab, you can change a range of settings to suit your on-site operations. These are described in detail in the Capture Profiles topic in the Admin Reference Guide.
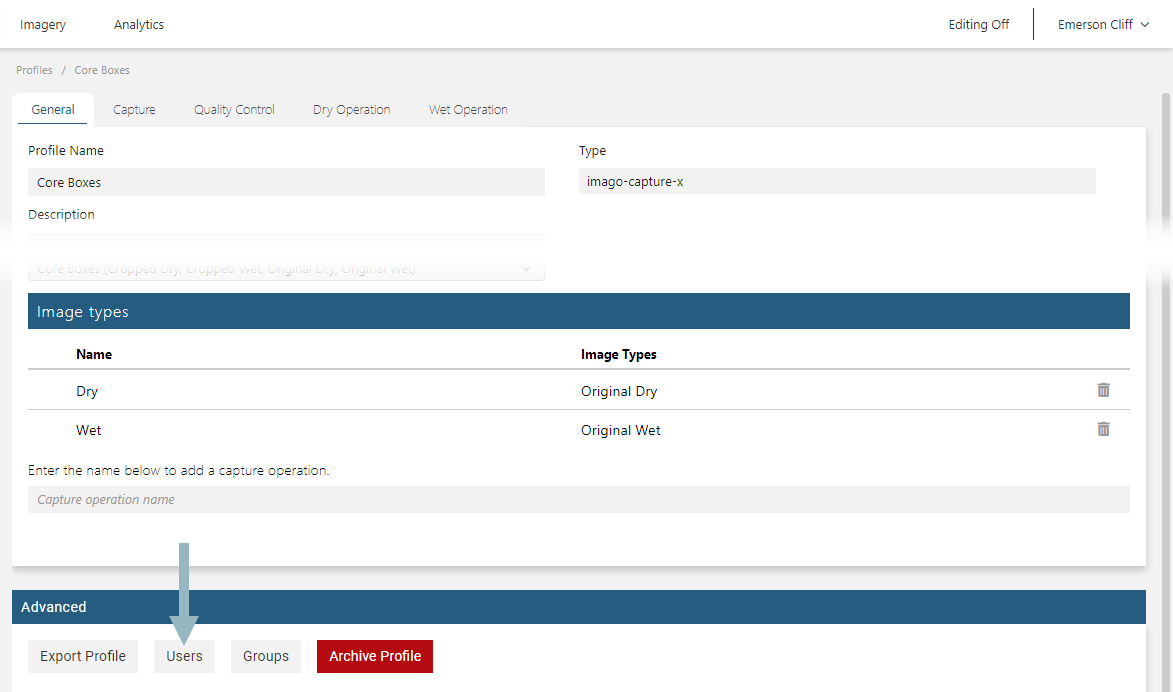
Assigning Users to a Profile
Users need to be assigned to capture profiles before they can start capturing images.
To assign a user to a capture profile, click on the profile, then click on Advanced > Users at the bottom of the window:
Imago will load the list of users, divided into those who have already been assigned to the profile and those who haven’t. Click the + sign for the user you wish to add to the profile:
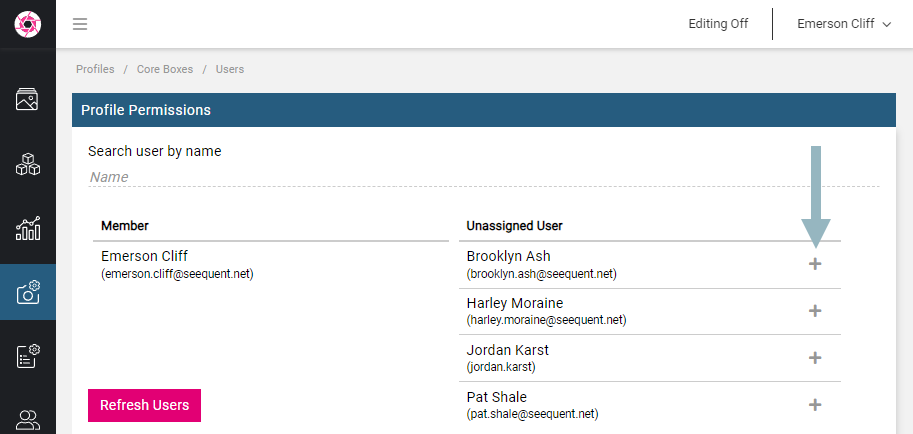
Ensure that the user has access to Capture X (or Capture Mobile if working with a Capture Mobile profile) in the Users window. If they do not have the right application access, they will not be able to make use of the profile in capturing images.
Learning More
Once you have set up a capture profile, you can experiment with capturing images and uploading them to the Imago Portal. You can do this using either of Imago’s image capture applications, Imago Capture X and Imago Mobile.
The Capture X Getting Started Guide will help you become familiar with using Capture X.
To learn more about capture profiles, see the following topics in the Admin Reference Guide:
Got a question? Visit the Seequent forums or Seequent support
© 2025 Seequent, The Bentley Subsurface Company