
Capture X Getting Started Guide
CaptureX gives direct access to a local camera (via a tethered cable/cord) and provides an integrated live view window you can use to capture standardised, high quality core or chip photos in an efficient and easy way.
This guide provides an introduction to using Capture X. First, we will discuss:
- Capture X Profiles
- Downloading and Installing Capture X
- Signing In and Selecting a Profile
- Connecting Your Camera
- Exporting Capture Profiles from the Imago Portal
Then separate topics discuss:
- Capturing and Cropping the First Image
- Capturing Collections
- Reviewing and Uploading Captured Images
- Capture X Settings
Capture X Profiles
Imago Capture X uses a capture profile to determine:
- What workspace and dataset captured images will be uploaded to. If there is more than one workspace/dataset available in the profile, you can choose which one to work with from the main Capture X window.
- The imagery type captured images will be organised into. Only one imagery type can be selected for each profile, and if different imagery types need to be captured for a collection, a different profile can be selected.
Capture profiles are created by your Imago admin.
Downloading and Installing Capture X
The latest version of Capture X is always available on MySeequent at https://my.seequent.com/products/imago-capture-x/latest.
Once you have downloaded the file, run the installer and then launch Capture X.
Signing In and Selecting a Profile
When prompted, sign in to Capture X using your Seequent ID.
Once you have signed in, Capture X will prompt you to start capturing images by creating a new collection. In this Collection window you can:
- Select a different profile (A)
- Select a workspace and dataset (B) you wish to capture images to
- Create a new collection (C)
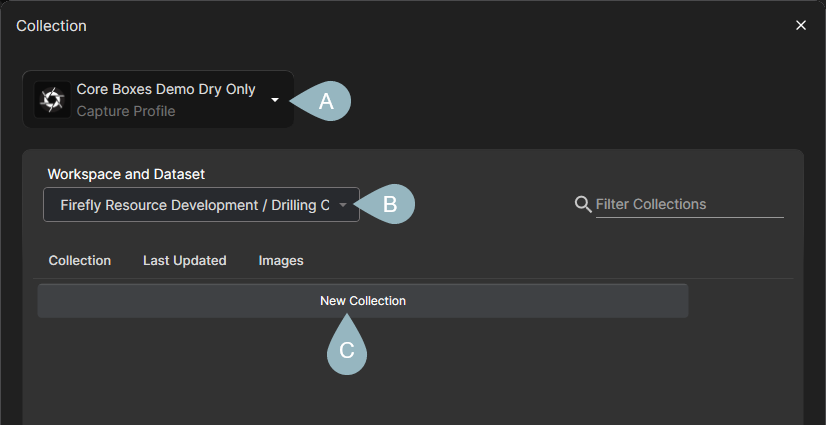
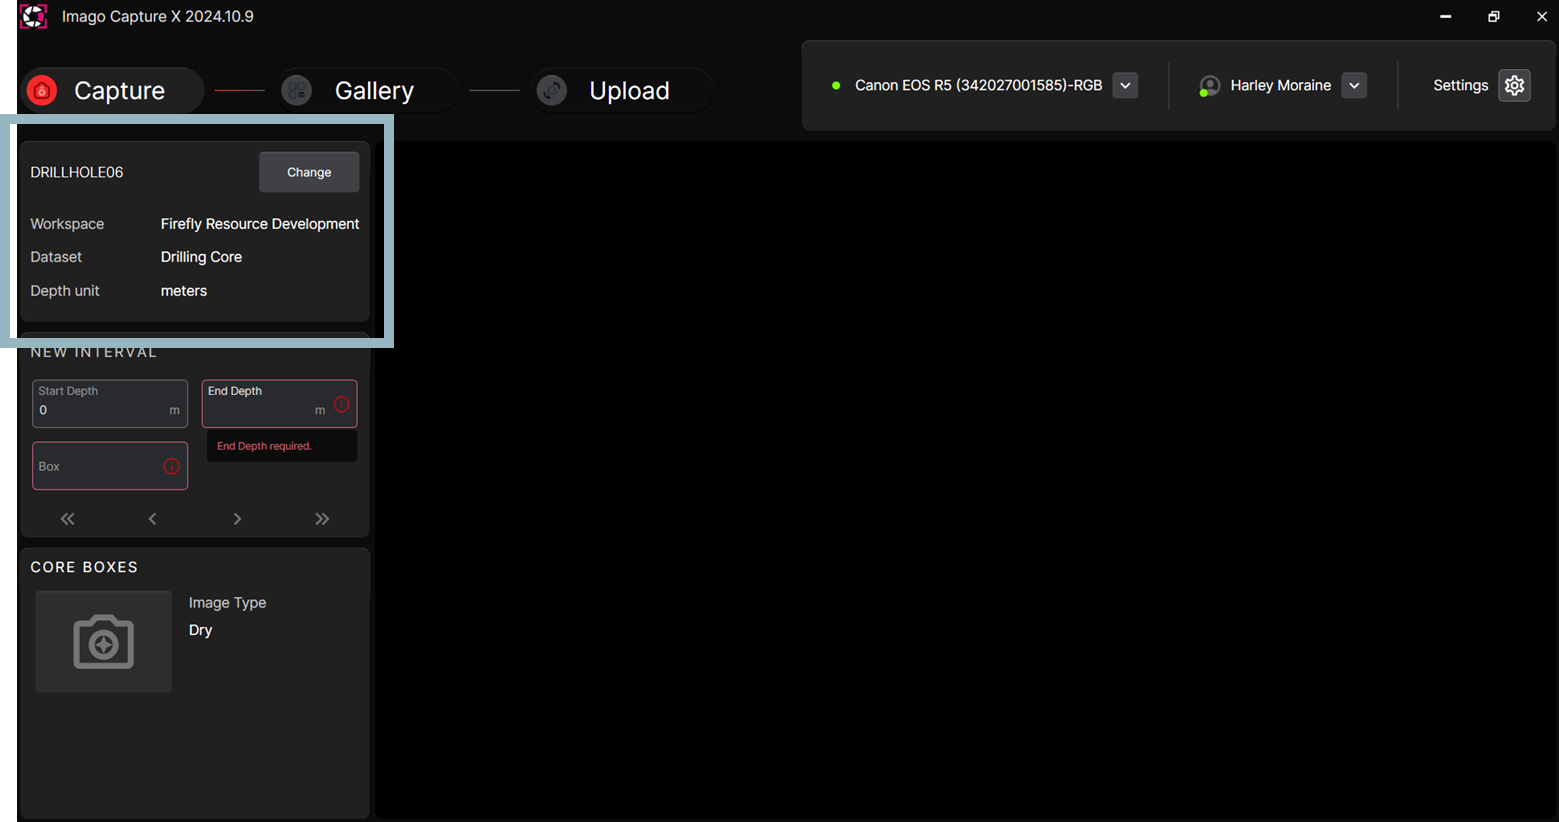
In this example, Capture X has been set up to start capturing images for a collection called DRILLHOLE06 in the workspace/dataset selected:
Connecting Your Camera
Once your camera has been connected to and detected by your computer, click on the Choose camera button in the main window and choose your camera.
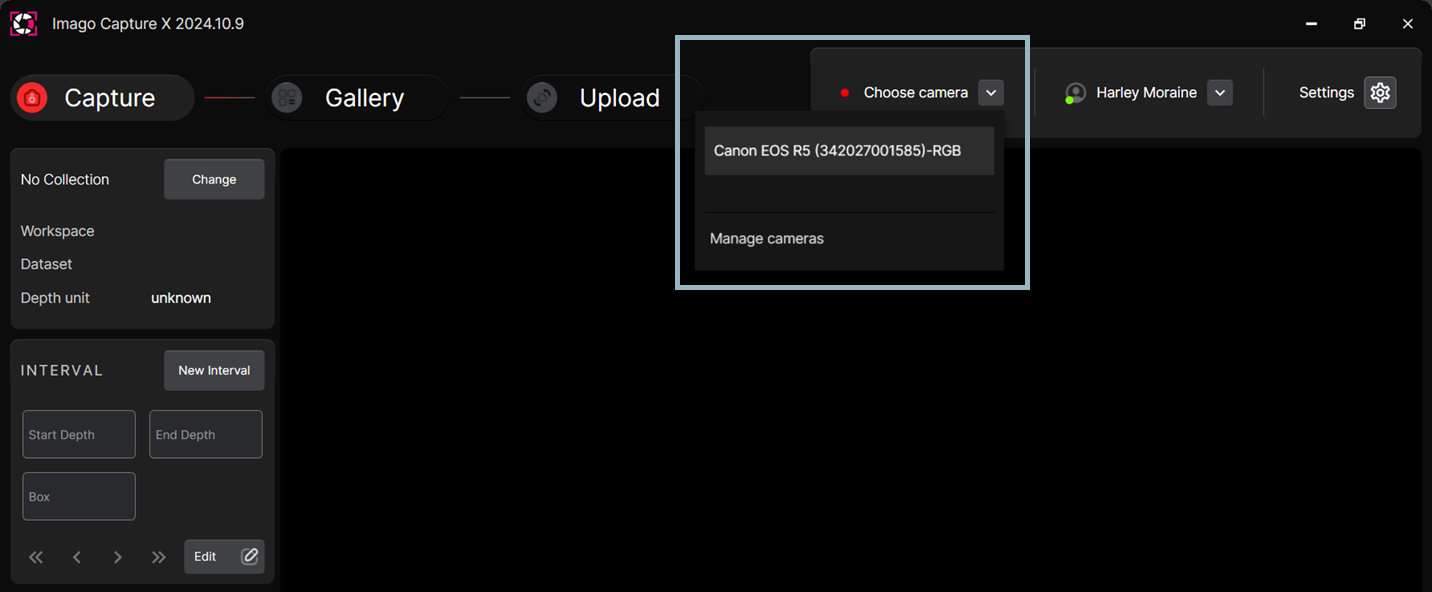
If your camera does not appear in the dropdown list and appears to be properly connected to your computer, your Imago Support contact will be able to help you troubleshoot the issue.
Exporting Capture Profiles from the Imago Portal
Capture profiles are set up by Imago admins and can only be edited by them. If you are not an admin, however, you can view the settings for the profiles you have access to, and you can export them, which is useful if the capture site has little or no connectivity. Capture profiles can be exported from the Imago Portal in *.json format and then copied to the capture site’s computer.
To do this, sign in to the Imago Portal and click Capture Profiles (A) in the sidebar. In this window, click the Export All Profiles button (B) to export the profiles listed.
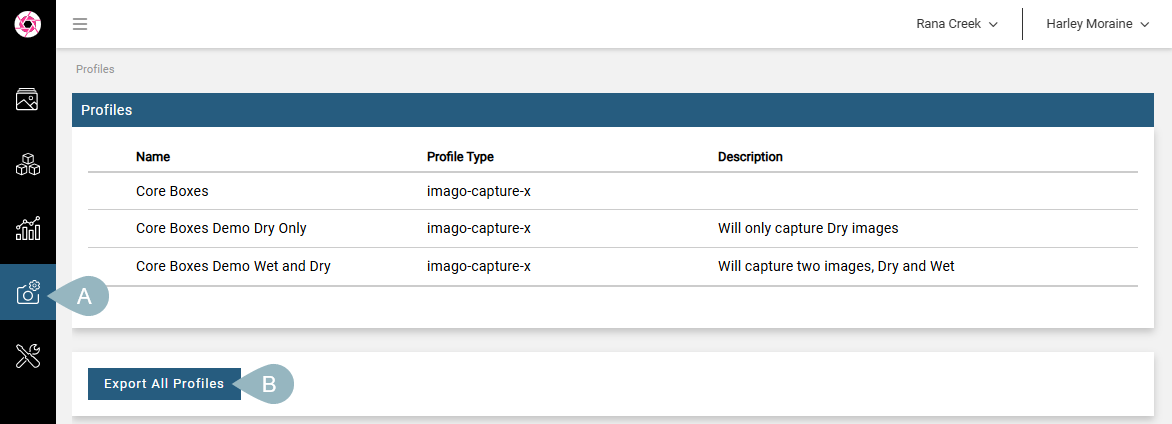
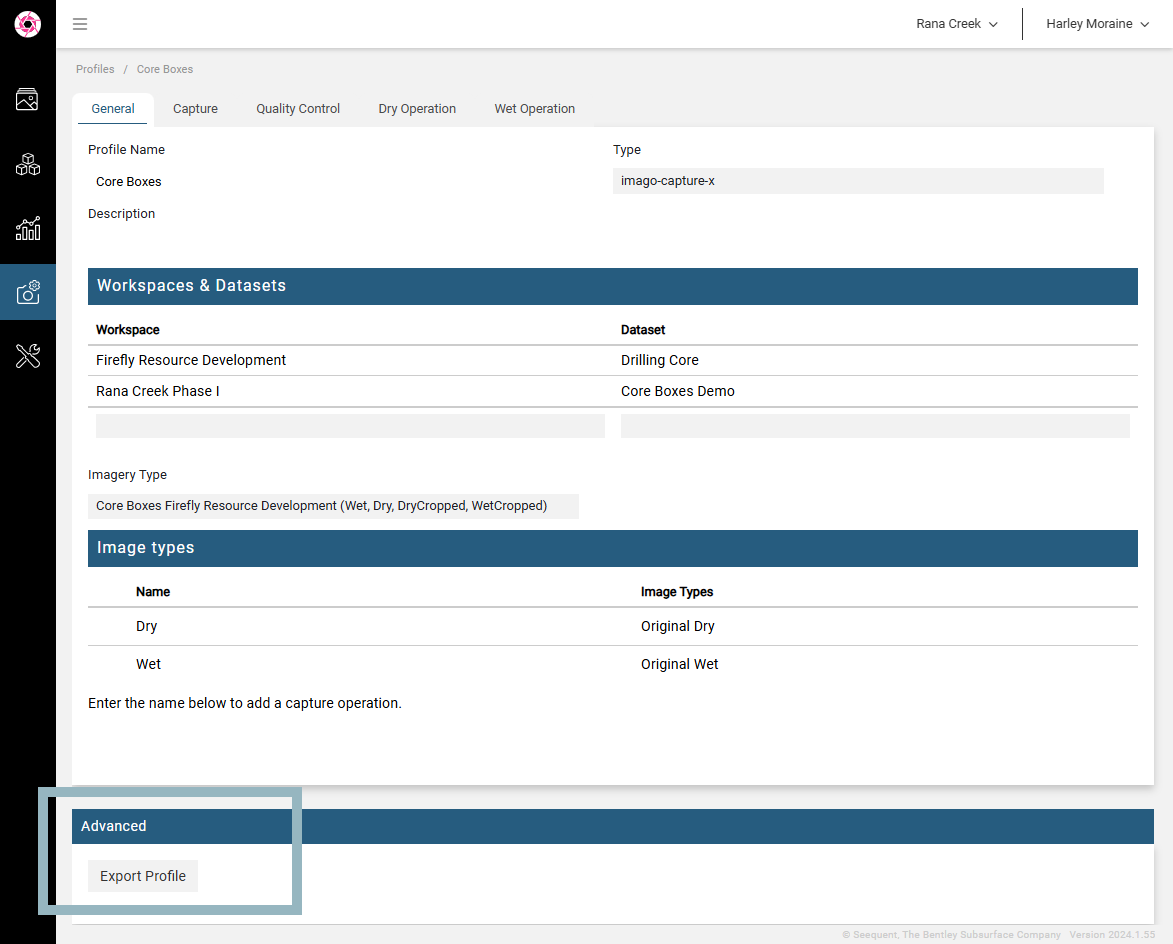
If you only wish to export one profile, click on it, then click on the Export Profile button at the bottom of the window:
Got a question? Visit the Seequent forums or Seequent support
© 2025 Seequent, The Bentley Subsurface Company