
Capturing Collections
This part of the Capture X Getting Started Guide follows on from Capturing Collections. It describes:
- Capturing Subsequent Images
- Changing Collection Information
- Selecting a Different Profile
- Starting a New Collection
Capturing Subsequent Images
To capture the next image in the dataset, click the New Interval button:

As before, enter the start and end depths and the box number, then click the Dry button. Once the captured image has been displayed, apply the saved cropping template and adjust it, if required.
As you work capturing additional images for the collection, you can navigate through the images and adjust their information, if necessary. Navigate using the arrow buttons:

Changing Collection Information
If at any point while capturing images, you need to change the workspace, dataset, collection and/or interval captured images belong to, click the Edit button:
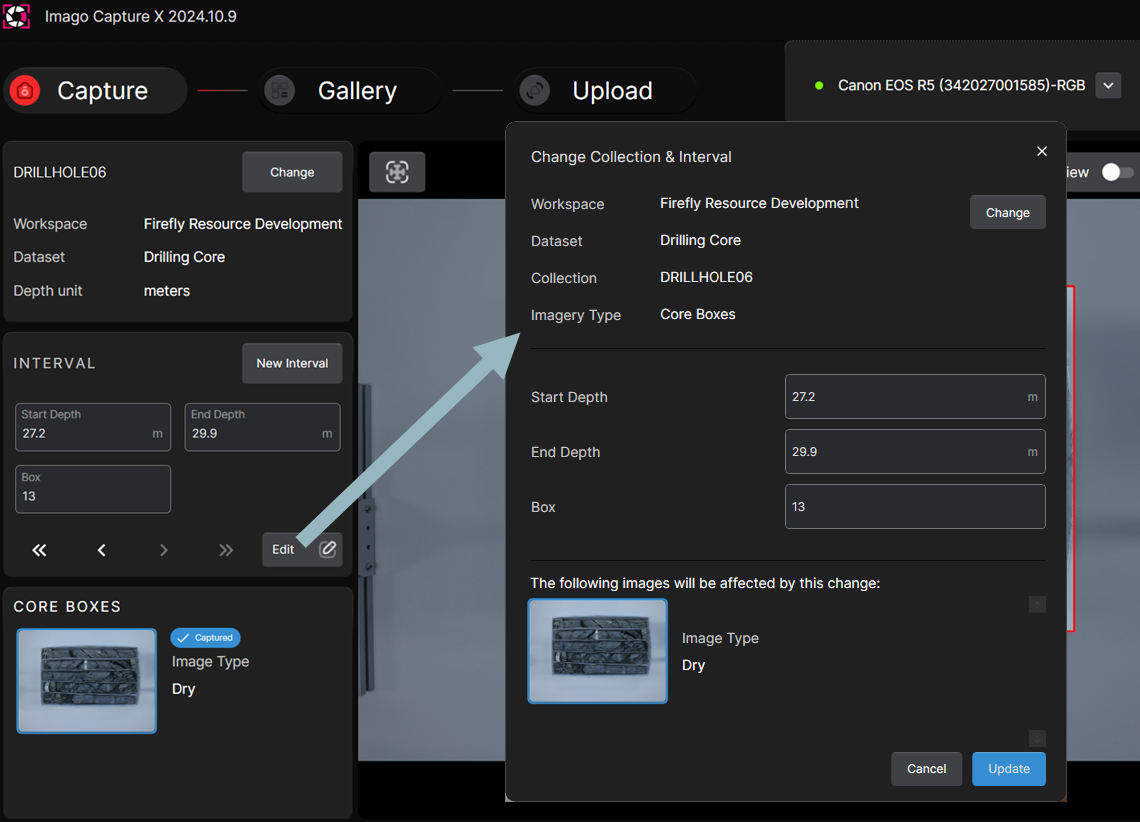
You can then:
- Change the collection images will be added to. Click Change, then either define a new collection or select an existing collection. You can also select a different workspace/dataset, if required.
- Change the interval images will be added to. Enter the new start and end depths and box number you wish to use.
Click Update to make the changes.
Selecting a Different Profile
To use a different profile for capturing images, click the Change button, then select the profile you wish to use from the Capture Profile list:
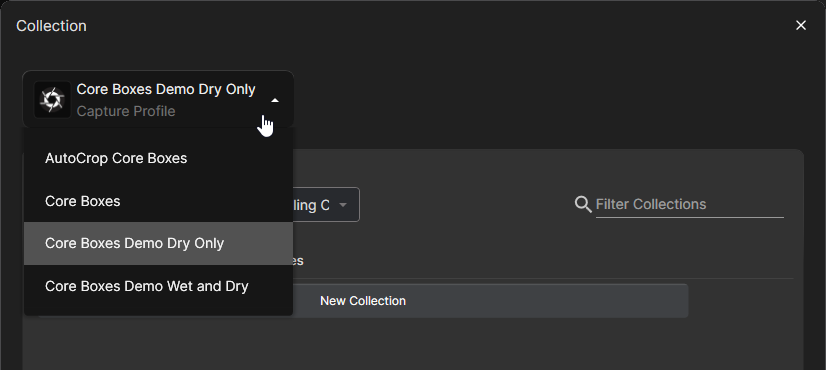
The Capture Profile list shows all profiles your Imago admin has given you permissions for. If the list displayed is too long, you can change what profiles are displayed in Settings > Profiles. See the Capture X Settings topic.
If a profile you expect to see is not listed, open Settings > Profile as described in the Capture X Settings topic. Check to see if the profile you wish to use is not marked as Hidden. If you still cannot see the profile you wish to use, click the Refresh Profile List button to make sure Capture X has the full list of profiles you have permissions for.
After selecting a different profile, select a workspace/dataset and collection for capture. In this example, the same workspace/dataset will be used (A) once again but instead of creating a new collection, images will be added to the existing DRILLHOLE06 collection, which is listed in the Collection window.
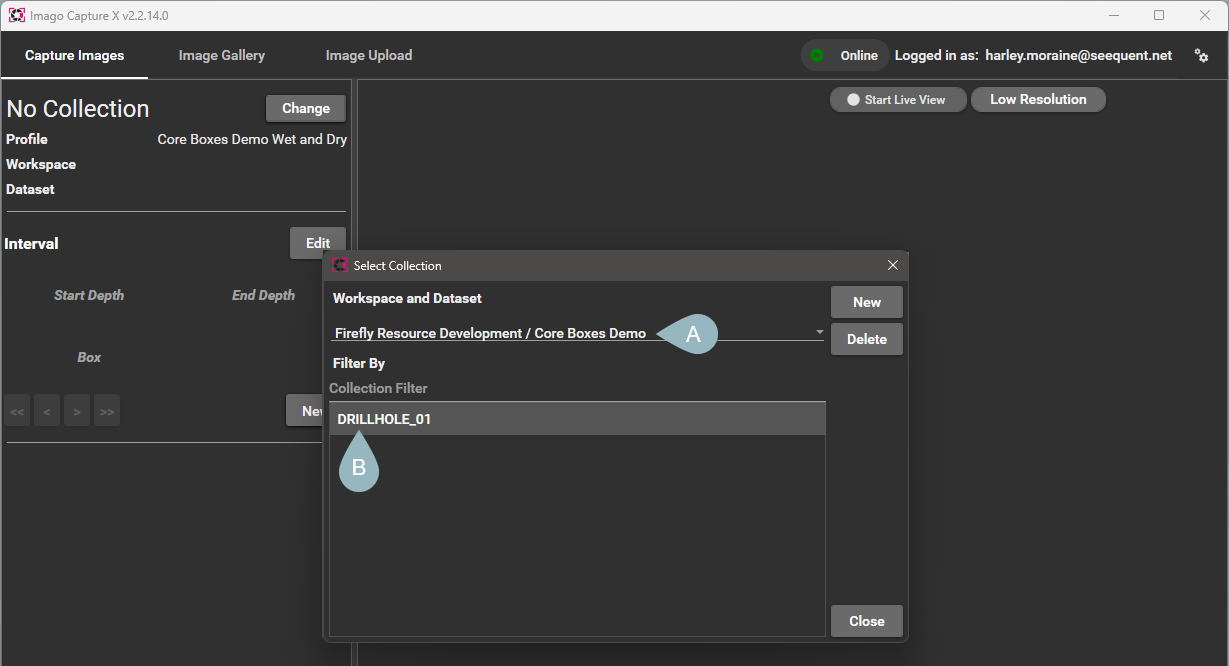
Click Open to return to the main window and start capturing images using the new profile.
When you open an existing collection, the start depth and box number will already be defined; you only need to enter the end depth (A):

In this example, the new capture profile selected supports a second image type, and so there is an additional button in the Capture X main window (B).
For each interval, capture each required image type. You can keep using the existing cropping template or create a new one.
Starting a New Collection
Once you finish capturing a collection such as a drillhole, you can start a new collection/drillhole by clicking on the Change button in the main window (A). Then enter a name for the new collection (B) and click Add Collection (C):
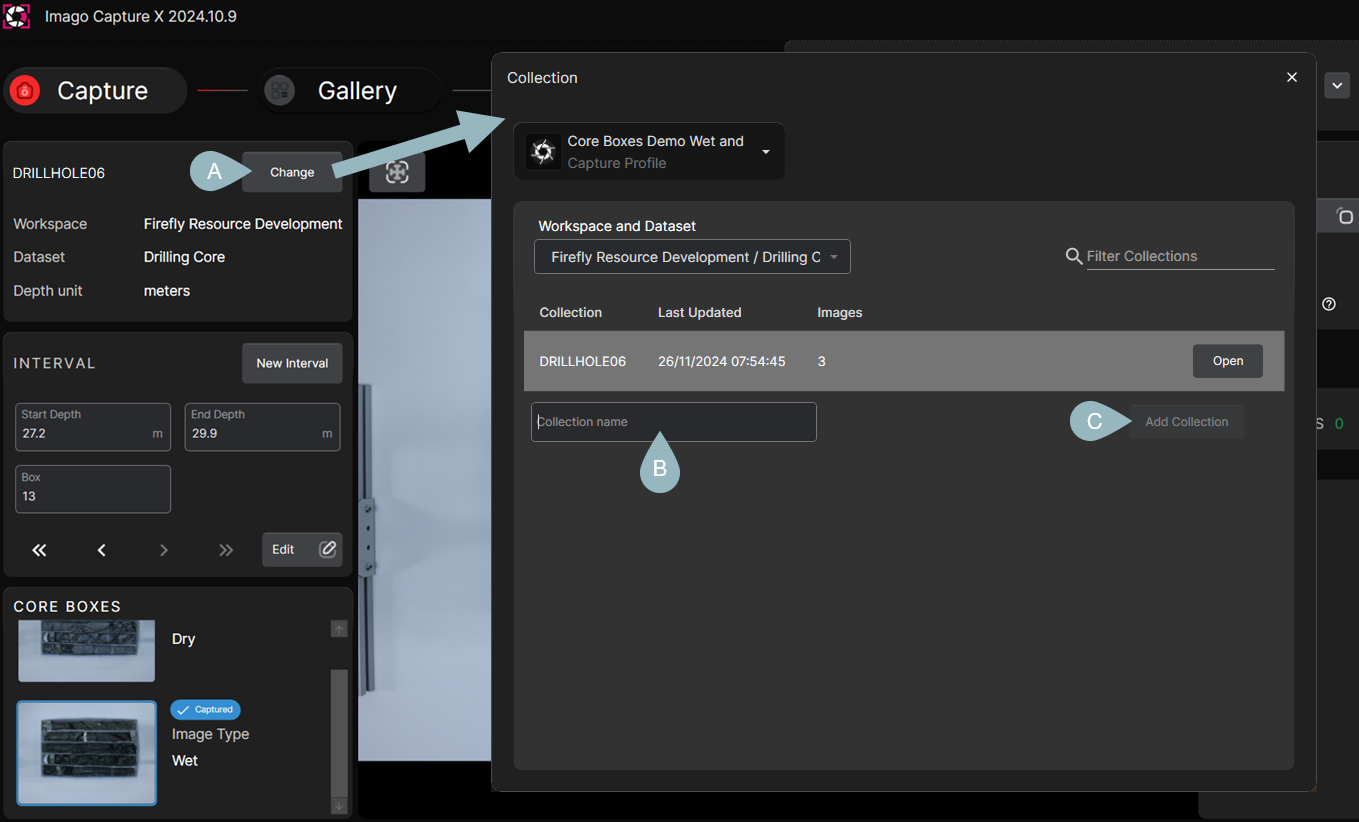
You can then start adding images to the new collection.
Got a question? Visit the Seequent forums or Seequent support
© 2025 Seequent, The Bentley Subsurface Company