
Capturing and Cropping the First Image
This part of the Capture X Getting Started Guide describes:
In Imago, there are two options for cropping images, manually defining image cropping and AutoCrop.
- AutoCrop can be used in capturing diamond drilling core tray images, although the cropping boundary itself will not be applied until the image is uploaded to the Imago Portal. See the Applying AutoCrop to Core Tray Images guide for information on using Seequent’s machine learning technology to automatically crop core tray images.
- Manual cropping is available for all captured images and is the process described in this topic.
Capturing the First Image
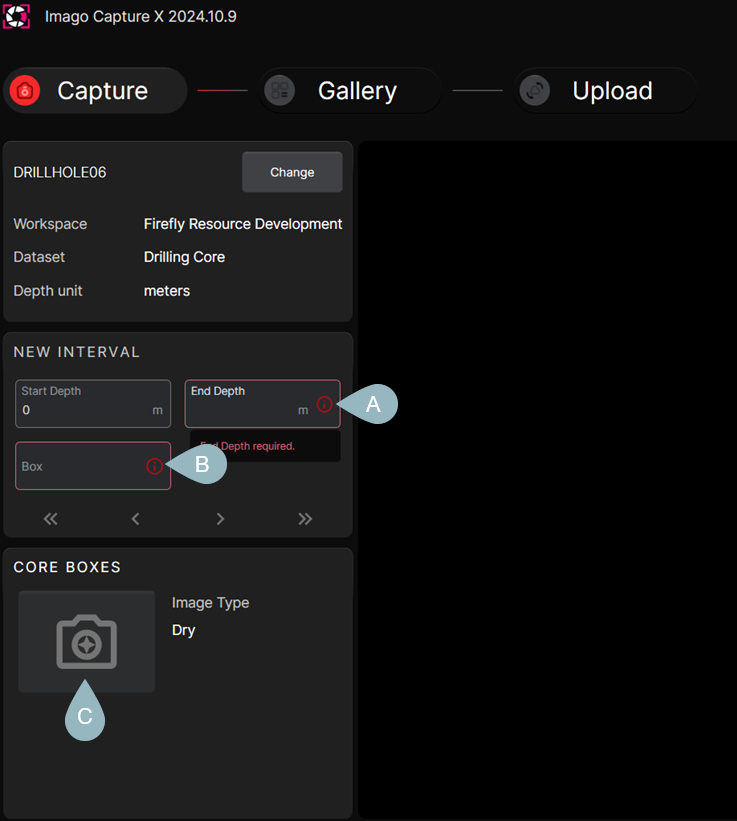
Once your camera is in position, enter the start and end depths (A) and the box number (B). Then click a button (B) to capture the first image. In this example, only a Dry image will be captured:
Once the image has been captured, it will be displayed:
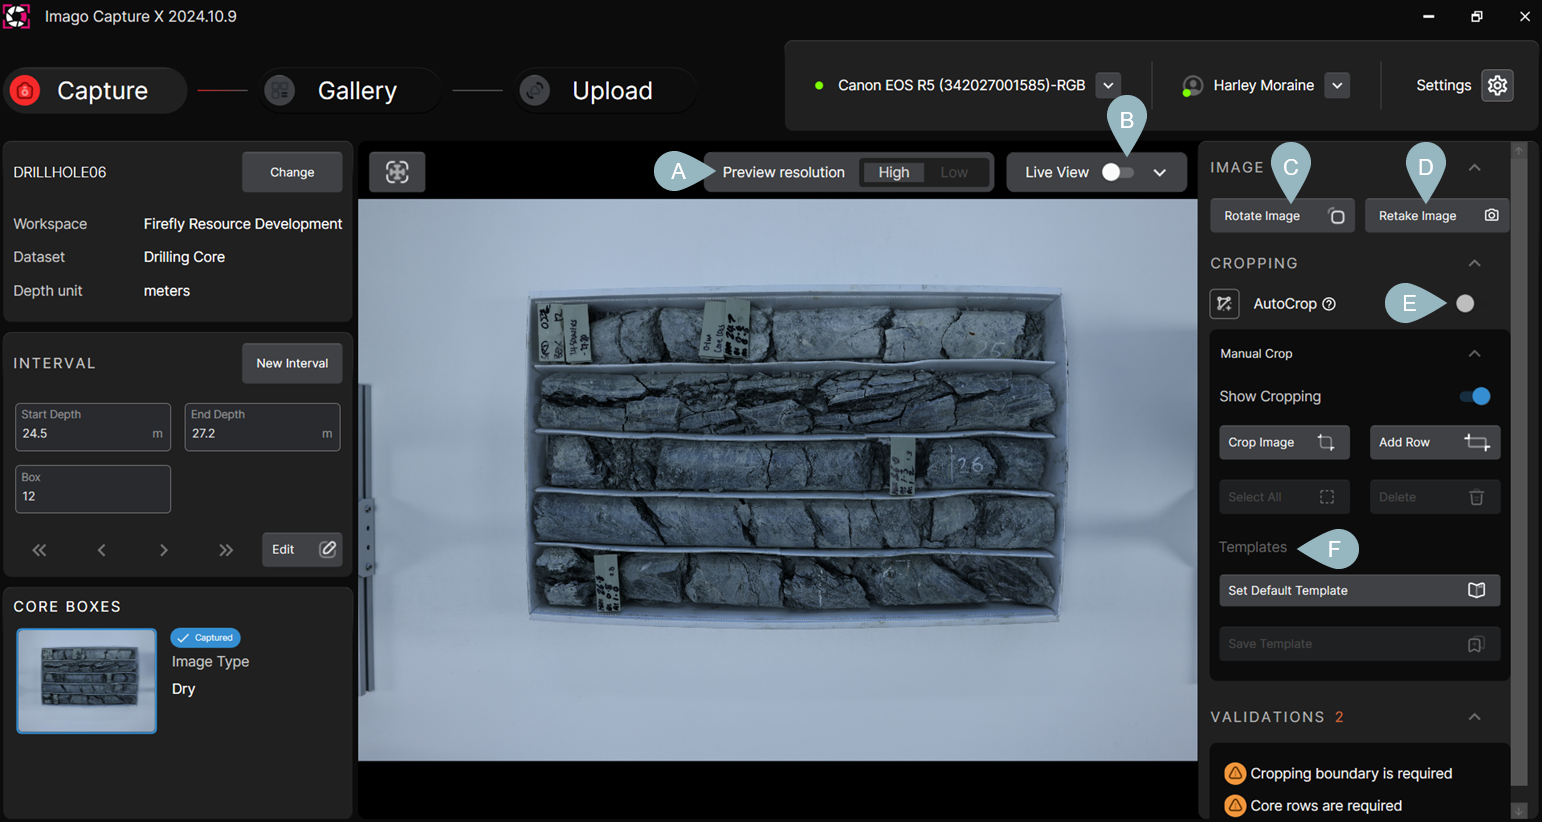
In this window, you can:
- Change the Preview resolution (A). The default is to use high resolution for the preview, but you can switch to low resolution if you find a high resolution preview is slow to load.
- Display a Live View (B). Slide the switch to on, which will replace the capture preview with the live camera view. This is useful if you need to reposition the camera or make changes to lighting before taking the next capture. Capture X can be set up to automatically display a live view when you are capturing a new interval. See the Capture X Settings topic.
- Rotate the captured image (C).
- Recapture the image (D). When you click the Retake Image button, a new capture will be taken and you will be prompted to choose whether to replace the first captured image with the new image.
- If AutoCrop is enabled for the image, you can disable it (E) and instead manually crop the image. The manual cropping process is described below.
- Apply a cropping template to the image (F). See Creating a Cropping Template below for more information on cropping templates.
Cropping the Image
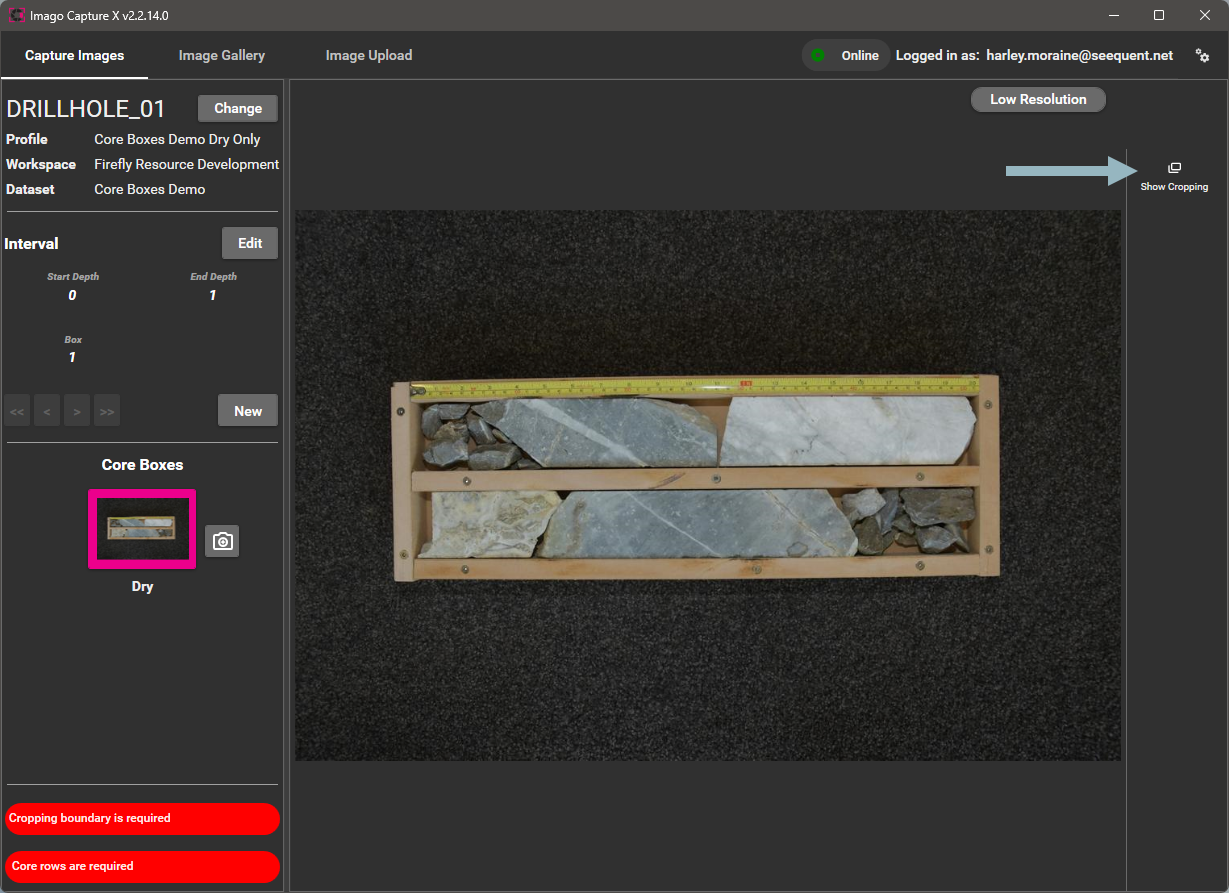
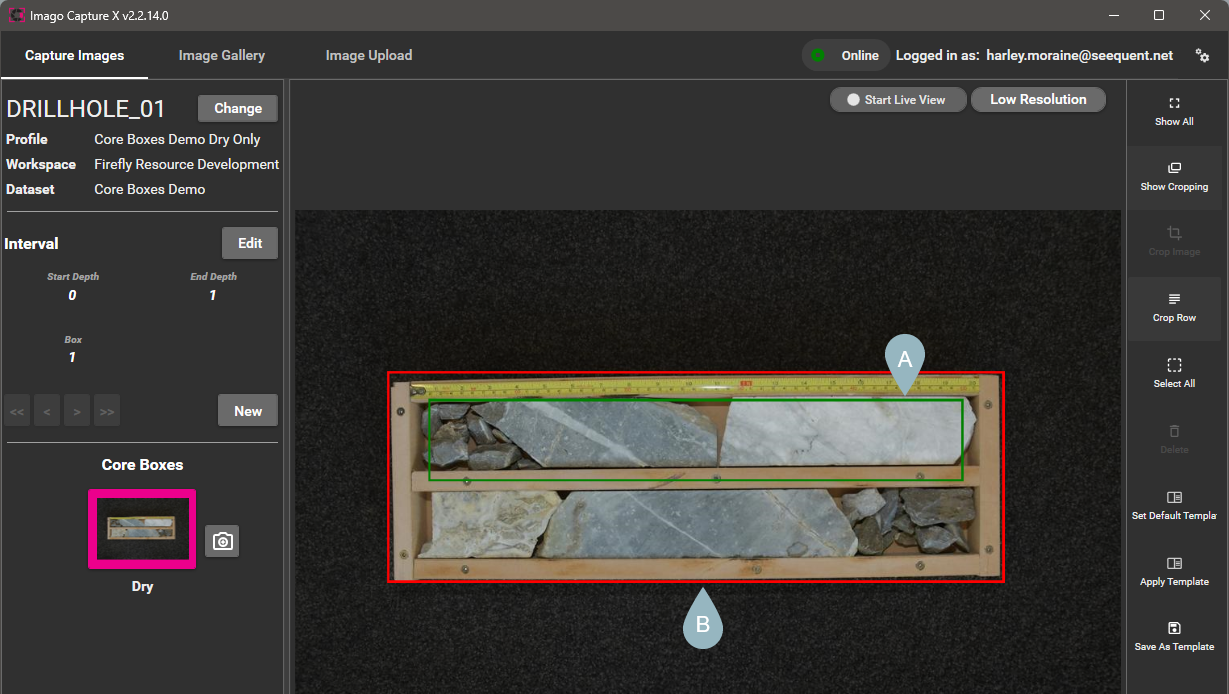
Once the image has been captured, the next steps are to crop it and creating a cropping template that can be used for the other captured images. Start by clicking on the Crop Image button (A):
Note that the Crop Image button (A) is for setting the boundary for the image as a whole, whereas the Crop Row button (B) is for defining rows inside the box.
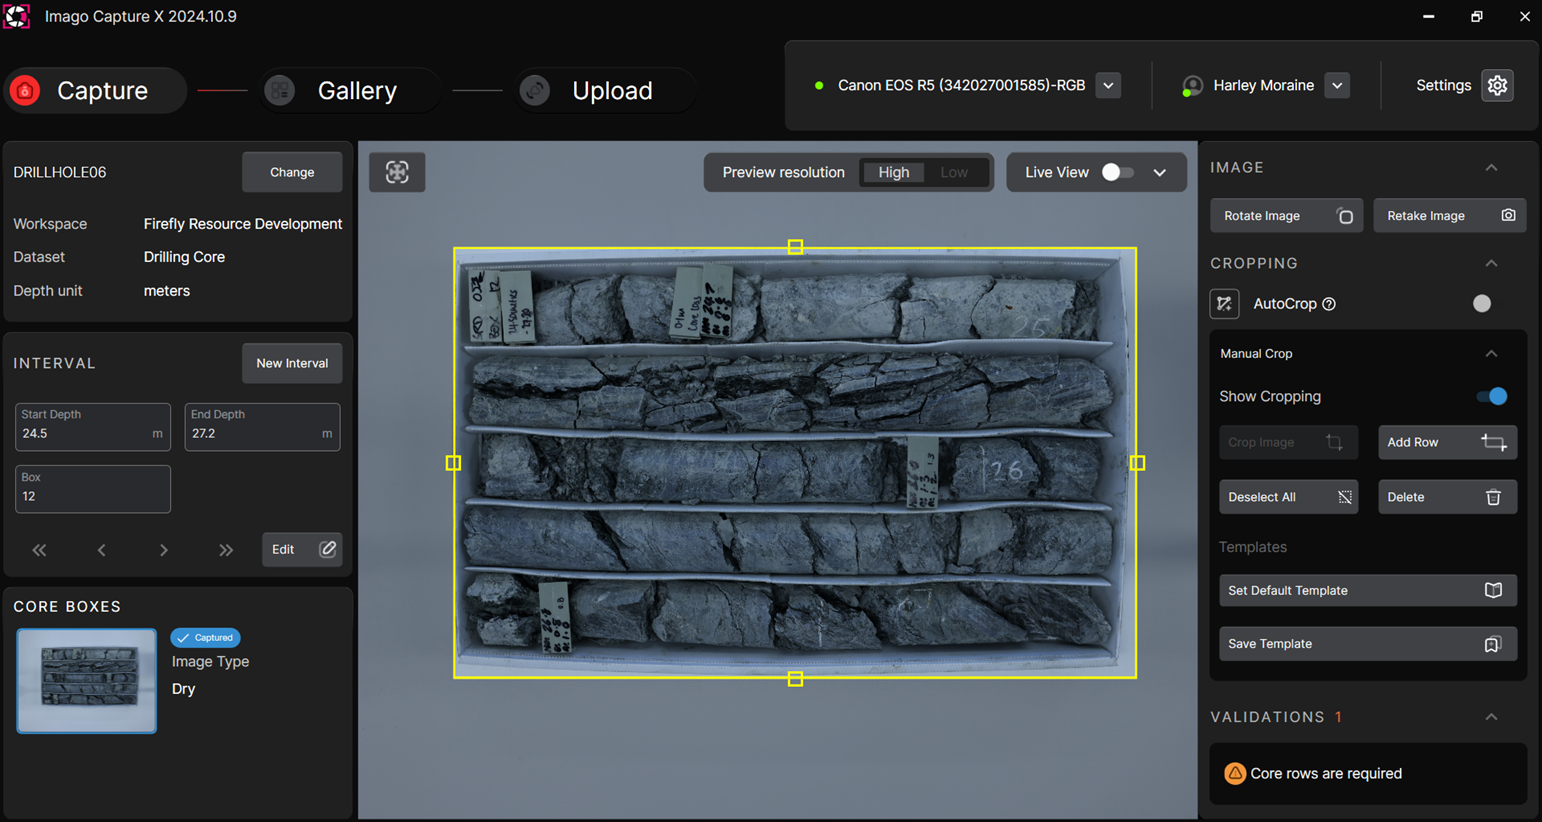
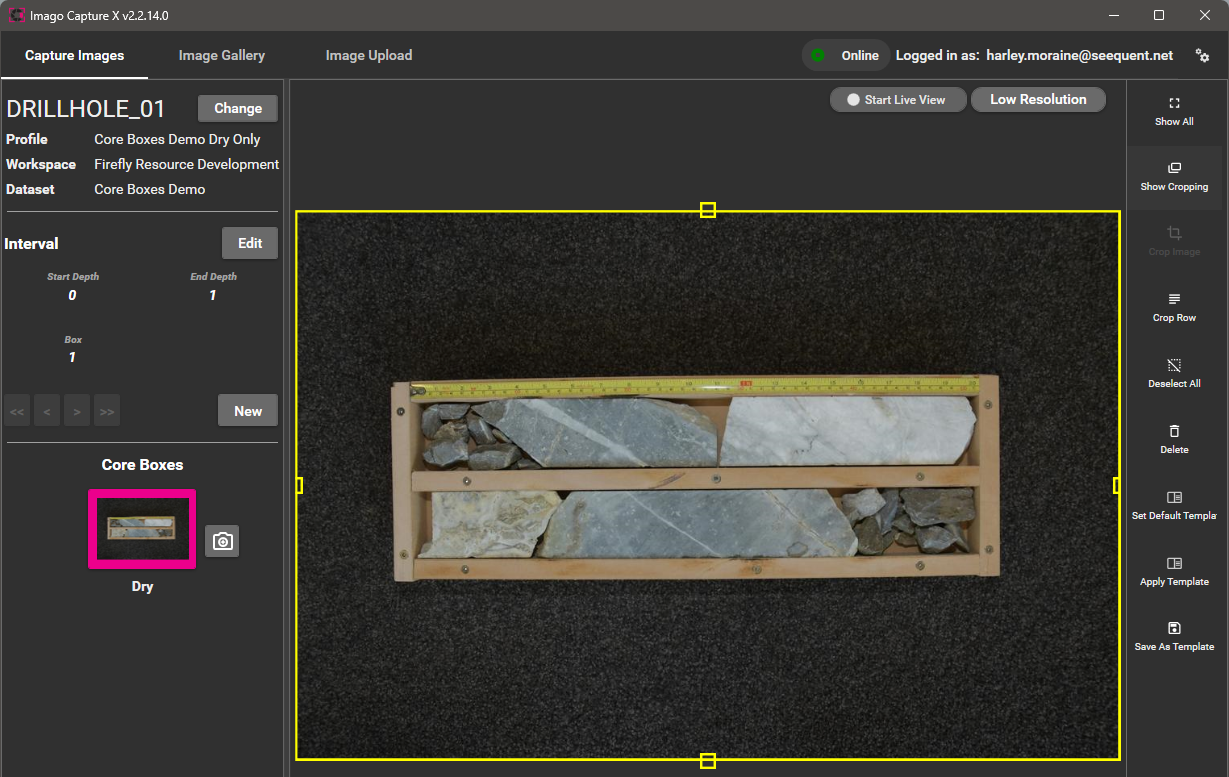
Here, clicking Crop Image has displayed the current image boundary, in yellow:

There are handles along each edge that can be clicked and dragged to resize the image boundary:
Next click the Crop Row button. This will add a row to the image, outlined in green (A). Note that the cropping boundary (B) is now outlined in red.
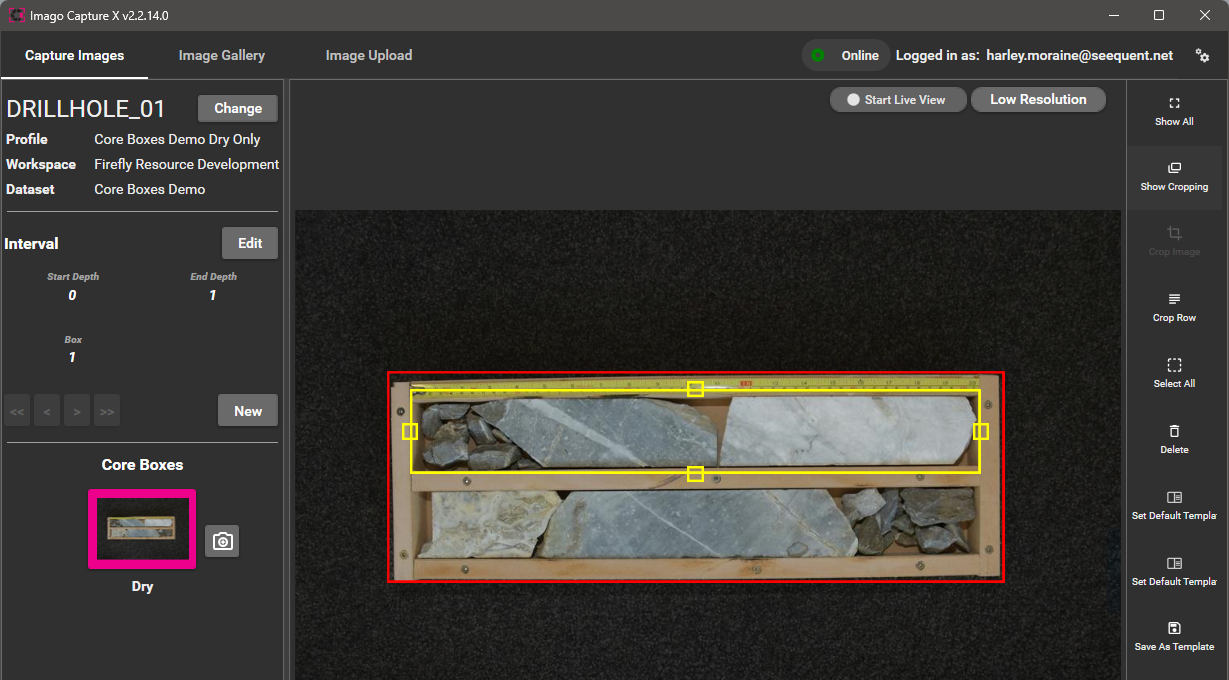
Click inside the row boundary to edit it. It will turn yellow and you can use the handles to resize it:
Click the Crop Row button again to add another row boundary to the image. Here we can see the first row boundary (A) in green and the second (B) in yellow:
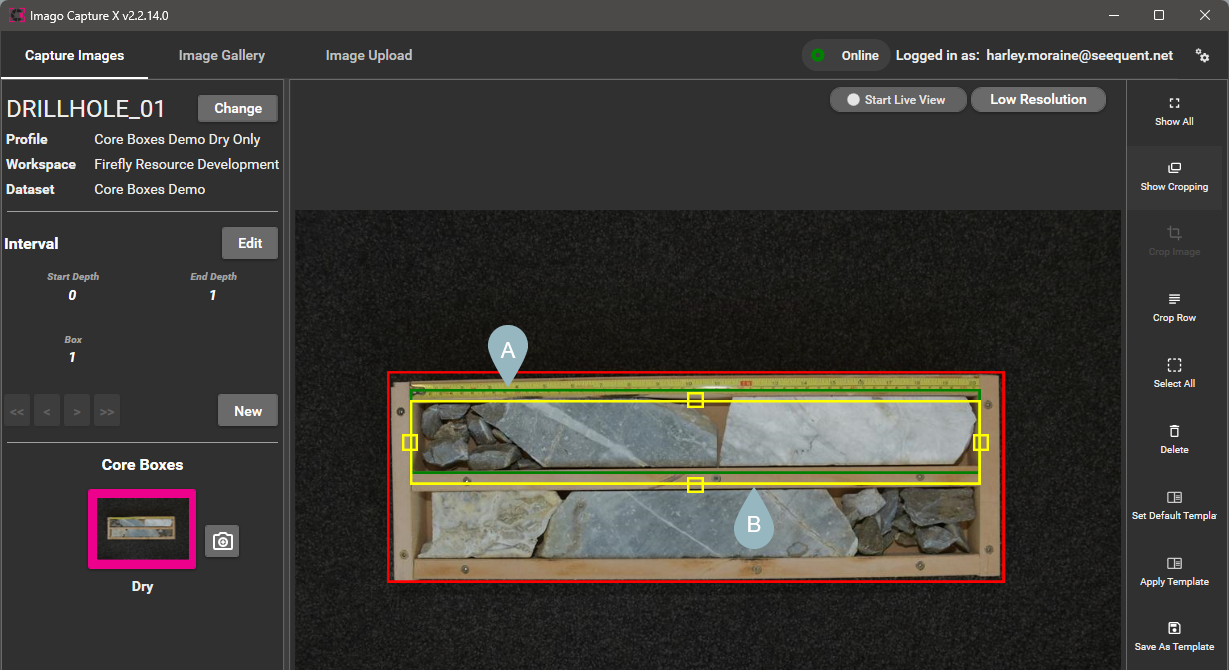
When you first add another row boundary to the image, you will need to click inside of it to edit it; it will turn yellow and you will be able to adjust it using the handles.
Continue clicking Add Row and adjusting the row boundaries until you have defined all the rows in the image:
Creating a Cropping Template
Once you have cropped the first captured image, you can save the image and row boundaries as a cropping template. To do this, click on the Save As Template button:

Enter a name for the new template and click Create.
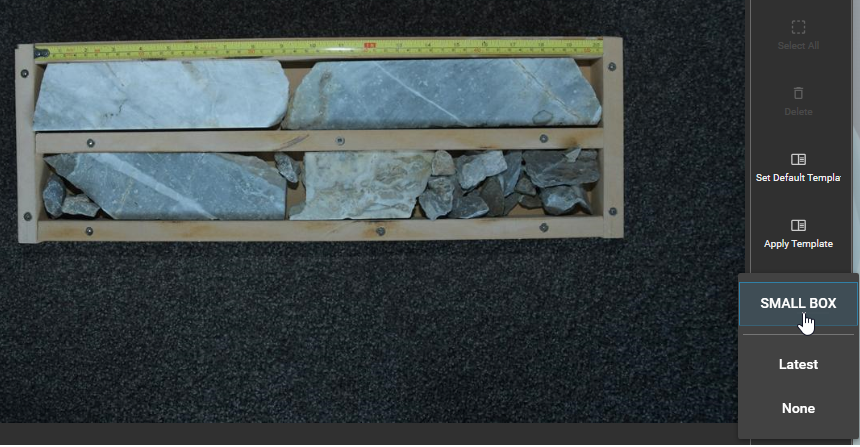
Once you have created the template, you can set it as the default, which be automatically applied to the next captured image. Do they by clicking Set Default Template, then clicking Auto Apply for the template you wish to use:

The next time you capture an image, you can apply the template by clicking the Apply Template button:
Then you can edit the image and row boundaries to suit the newly-captured image, if necessary.
Got a question? Visit the Seequent forums or Seequent support
© 2025 Seequent, The Bentley Subsurface Company