Capture Profiles
Both Imago Capture X and Imago Mobile use a capture profile to determine:
- What workspace and dataset captured images will be uploaded to. If there is more than one workspace/dataset available in the profile, the person running Capture X/Capture Mobile can choose which one to work with from the main Capture X/Capture Mobile window.
- The imagery type captured images will be organised into. Only one imagery type can be selected for each profile, and if different imagery types need to be captured for a collection, a different profile can be selected.
Profiles are configured in the Capture Profiles part of the Admin Portal.
The rest of this topic describes how to create and manage capture profiles in the Imago Admin Portal. It is divided into:
- Creating a New Capture Profile
- Assigning Users to Profiles
- Managing Profile User Groups
- Exporting Profiles
- Deleting a Profile
Beyond choosing the imagery type and workspace/datasets for a profile, the workflow for setting up Capture X and Capture Mobile profiles is different. See these separate topics for more information on setting up each type of profile:
Creating a New Capture Profile
To create a new profile, click on Capture Profiles in the sidebar (A). Enter a name for the new profile (B), then choose the Profile Type from the dropdown menu (C):

Once created, the new profile will be displayed. See the following topics for detailed information on settings for each type of profile:
Assigning Users to Profiles
Users need to be assigned to capture profiles before they can start capturing images.
To assign a user to a capture profile, click on the profile, then click on Advanced > Users at the bottom of the window:
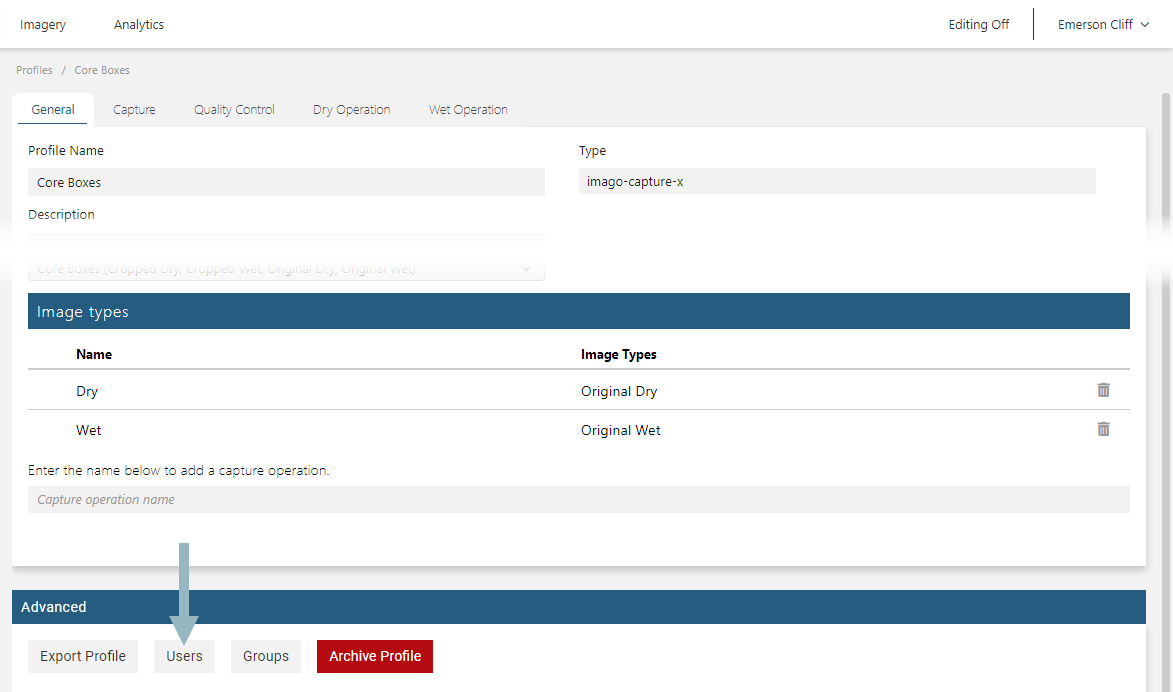
Imago will load the list of users, divided into those who have already been assigned to the profile and those who haven’t. Click the + sign for the user you wish to add to the profile:
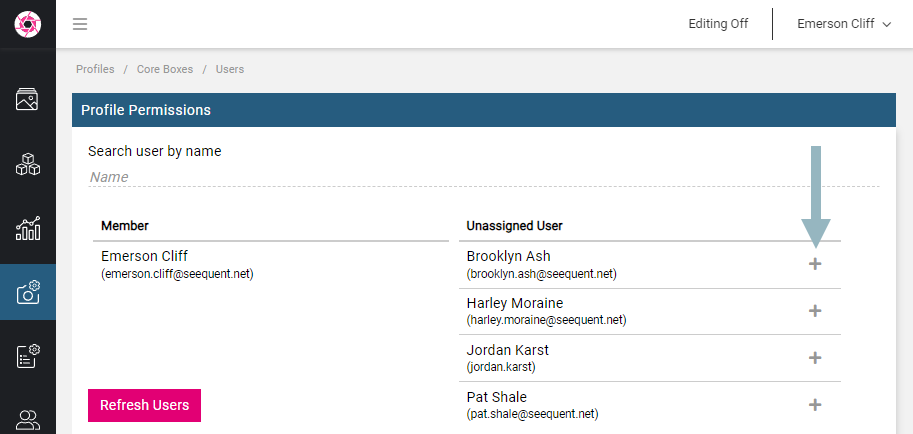
If the list of members shows an assigned user as inherited, they are members of the profile as the result of being part of an assigned user group that has been given access to that profile. User groups are available for Enterprise subscriptions and are described inManaging Profile User Groups below.
To remove a user from the profile, click the delete button next to their name:
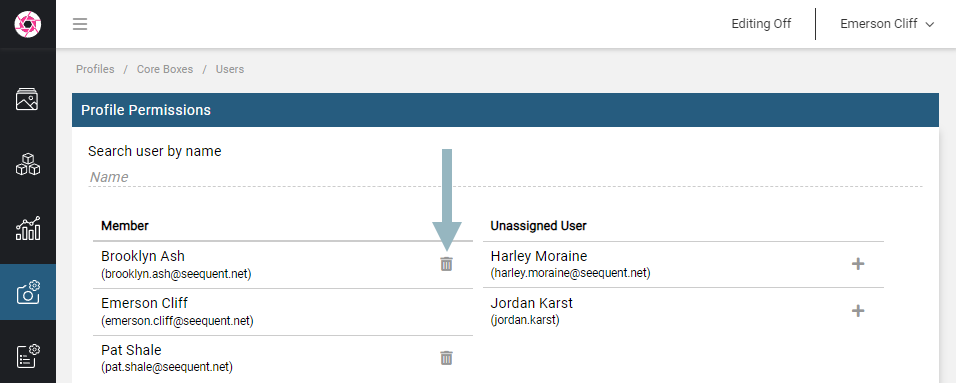
This does not delete them from the subscription; it simply removes them from the profile.
Managing Profile User Groups
User groups are available for Imago Enterprise subscriptions.
To assign a user group to a capture profile, click on the profile, then click on Advanced > Groups at the bottom of the window:
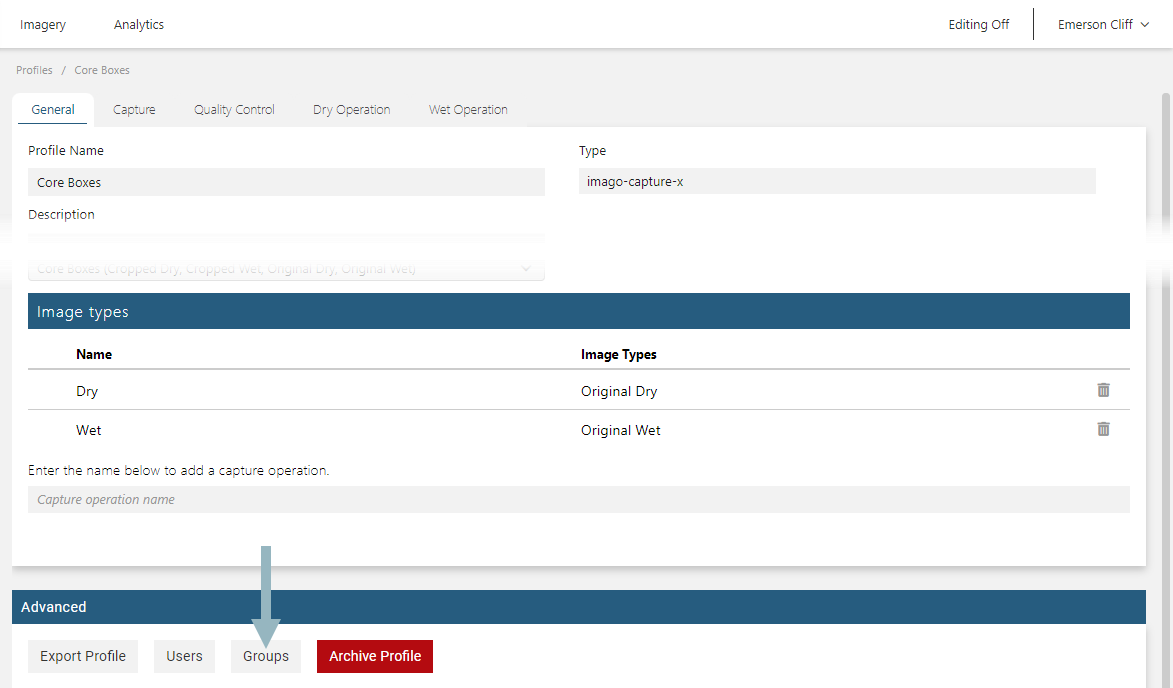
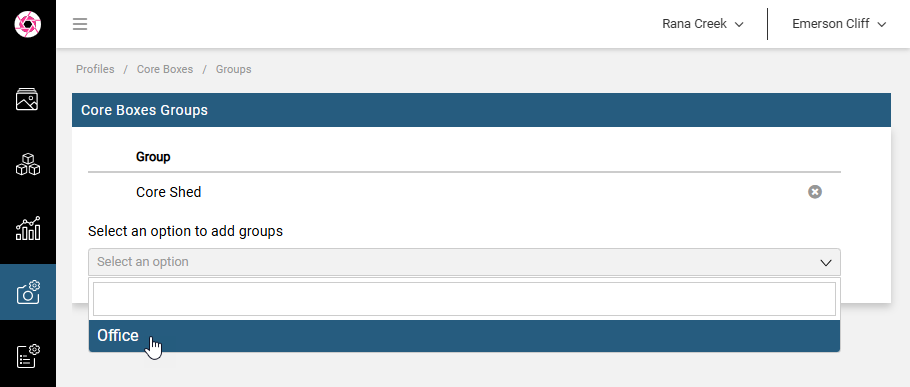
Imago will load the list of user groups already assigned to the profile. To assign another group, pick from those available in the dropdown list:
To remove a user group from the profile, click its delete button:
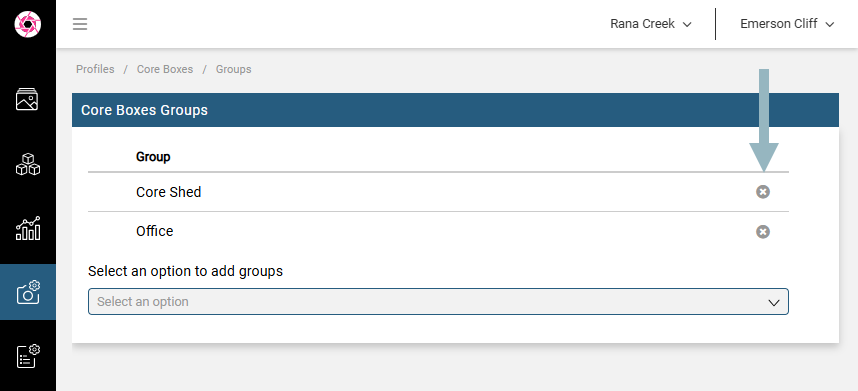
This does not delete the group from the subscription; it simply removes it from the profile.
Exporting Profiles
There are two options for exporting capture profiles:
- Export a single profile. Open a profile in the Admin Portal and scroll to the bottom of the page. Select the Export Profile option.
- Export all profiles in the subscription. On the Profiles page, click Export All Profiles.
Both options export the capture profile(s) in a file called profile.json. You can then import that file into Imago Capture X or Imago Mobile.
Note that the Export All Profiles option exports both Capture X and Imago Mobile profiles, and neither application distinguishes between profile types when importing them. When you import the profile.json file, be sure to then delete all profiles that do not match the application.
Deleting a Profile
To delete a capture profile, click on it in the Profiles list. Then click the Archive Profile button at the bottom of the window.
You will be asked to confirm your choice.
Got a question? Visit the Seequent forums or Seequent support
© 2025 Seequent, The Bentley Subsurface Company
