
Defining Activity Groups
Activity groups allow multiple loggers to log data on different tables for the same hole at the same time. This is achieved by controlling what tables each logger has access to, and also what tables will be locked when drill holes are assigned. For example, a drilling activity may have geotechs logging RQD data and geologists logging lithology data. Creating a geology activity group and a geotech activity group limits who can edit what data.
Activity groups are created and assigned to the tables in an activity. Groups can be assigned to tables with two levels of access:
- Read only access gives users assigned to that group the ability to see the data but not change it.
- Read & write access gives users assigned to that group the ability to edit the data. Only one group assigned to a table can have read/write access.
An important consideration with activity groups is that if you decide to use them, you must assign activity groups to every table in an activity in order for those tables to be visible to users in projects that use those activities. If a table in an activity has no activity groups assigned, the only way it will be visible to any user in a project is if they are assigned to the activity at the general level.
The rest of this topic describes activity groups in more detail. It is divided into:
- Introduction to Activity Groups
- Creating Activity Groups
- Assigning Groups to Logging Tables
- Removing an Activity Group From a Table
- Deleting an Activity Group
Introduction to Activity Groups
To illustrate how activity groups can be used to provide finer control over user access to data, we have an example project that has two activities. One activity (A) is set up without groups, the other activity (B) is set up with three groups, and users have been assigned to each activity (C):
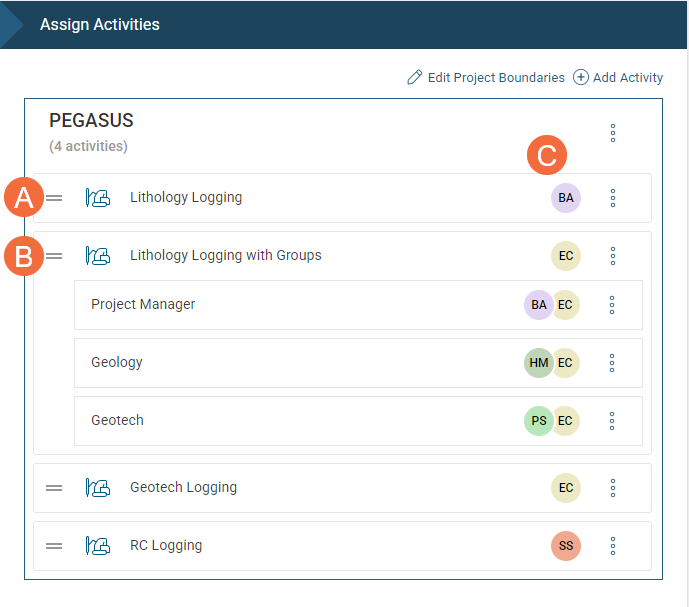
For the activity without groups (A), users assigned to the activity have full read/write access to all tables in the activity.
For the activity with groups (B), what users belong to each group determines what access they have to the project data.
- User BA has been assigned to the Project Manager group.
- User HM has been assigned to the Geology group.
- User PS has been assigned to the Geotech group.
- User EC has been assigned to the activity as a whole, and so belongs to all three groups.
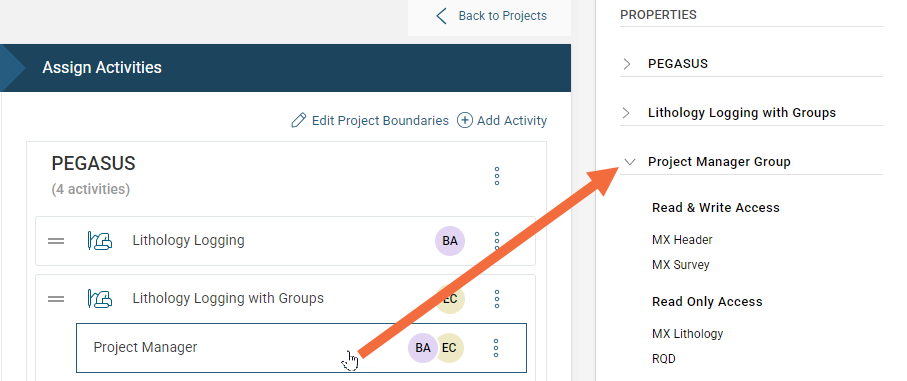
We can find out more about what access each group has to data by clicking on the group and viewing it in the Properties panel. For example, here we can see that users assigned to the Project Manager Group have Read & Write Access to the MX Header and MX Survey tables, but have Read Only Access to the MX Lithology and RQD tables:
Creating Activity Groups
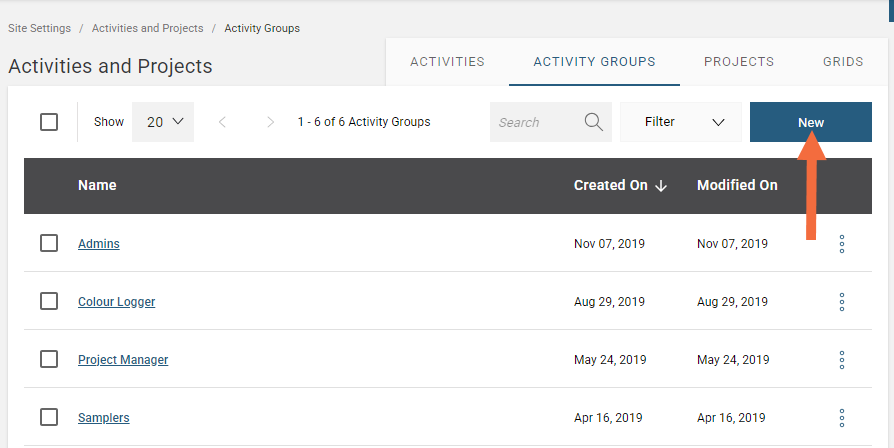
Your MX Deposit account comes configured with one set of activity groups. You can manage this set under Site Settings > Activities and Projects > Activity Groups.
To add a new group, click the New button:
In the window that appears, give your group a name and click Add.

Assigning Groups to Logging Tables
To assign a group to a table, choose Assign Groups from the table's overflow menu. In the window that appears, choose the activity groups.
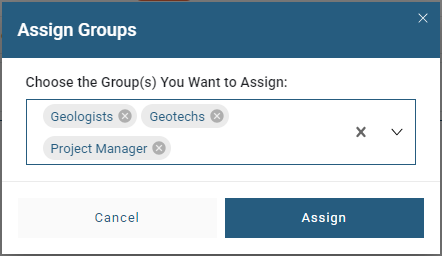
The first group you add to a table will be given read/write access; additional groups will be given read-only access.
If the group you wish to assign isn't listed, select Add New Activity Group. In the window that appears, you can name your new activity group.
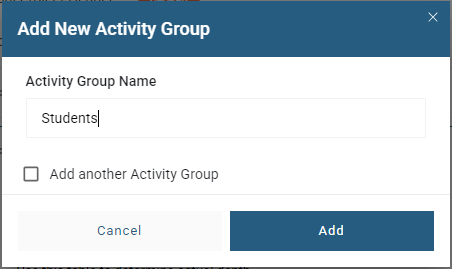
Click Add. Your new activity group will be added to your table. Activity groups can be managed under Site Settings > Activities and Projects > Activity Groups.
Only one activity group can have read/write (RW) permissions, however you can have multiple groups that have read only (RO) permissions. To change a group’s access to read-only, click on the arrow and select Make read-only (RO):

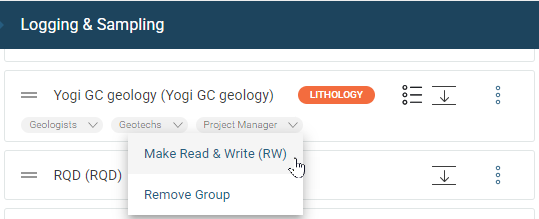
To give a group read/write access, first remove read/write access from any other group that has read/write access. Then you can give a different group read/write access:
Be sure that when are using activity groups for a specific activity that you assign at least one group to each table in that activity. If a table in an activity has no activity groups assigned, it will not be visible to the project’s users.
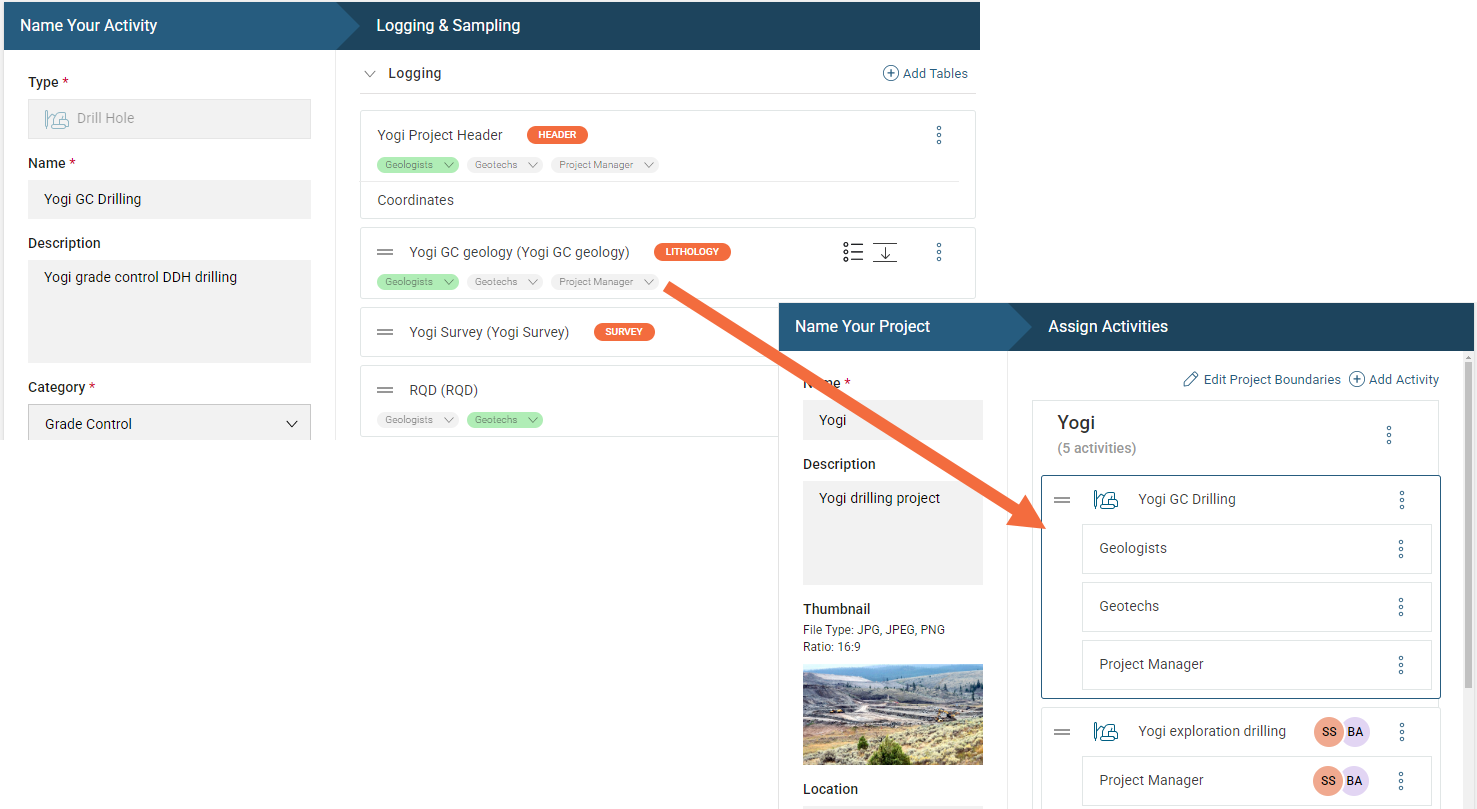
Remember that you cannot see what users are in an activity group; these groups are simply names for “containers” that you will use to assign users to activities when configuring a project. We can illustrate this by comparing the groups assigned to tables in the activity (left) and how those appear in a project to which the activity has been added (right):
At this stage, the activity groups have been created but individual users have not been assigned to these activity groups. Users are assigned to activity groups at a project level.
For information on managing user assignments via activity groups in projects, see Assigning Users in the Setting Up Projects topic.
Removing an Activity Group From a Table
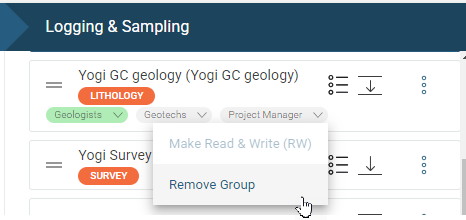
To remove an activity group from a table, click on the groups arrow and select Remove group:
If the activity has been assigned to a project and a user has been assigned to that group in the project, you will not be able to remove the group from the table.
Deleting an Activity Group
If you need to delete an activity group, you first need to make sure:
- There are no activities that have that group assigned to any of their tables
- There are no projects that have users assigned to those activity groups
To delete an activity group go to Site Settings > Activities and Projects > Activity Groups. If the activity group is not in use, click Delete from the overflow menu of the activity group you wish to remove. You will be asked to confirm your choice.