
Setting Up Projects
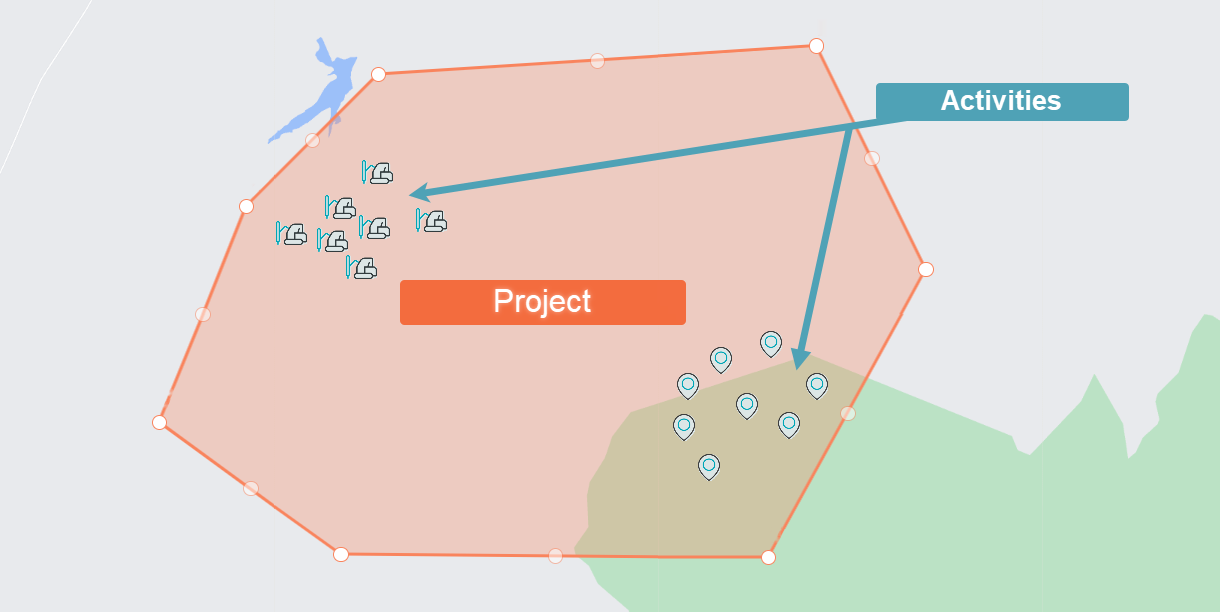
Setting up a project in MX Deposit involves setting the project’s boundary and grid, then assigning activities from the Activities collection.
Assigning users is the final step before publishing the project.
This topic describes the process of setting up projects. It is divided into:
- Viewing the Project Library
- Creating a New Project
- Setting the Project Boundaries
- Assigning Activities
- Assigning Users
- Editing Existing Projects
- Deleting a Project
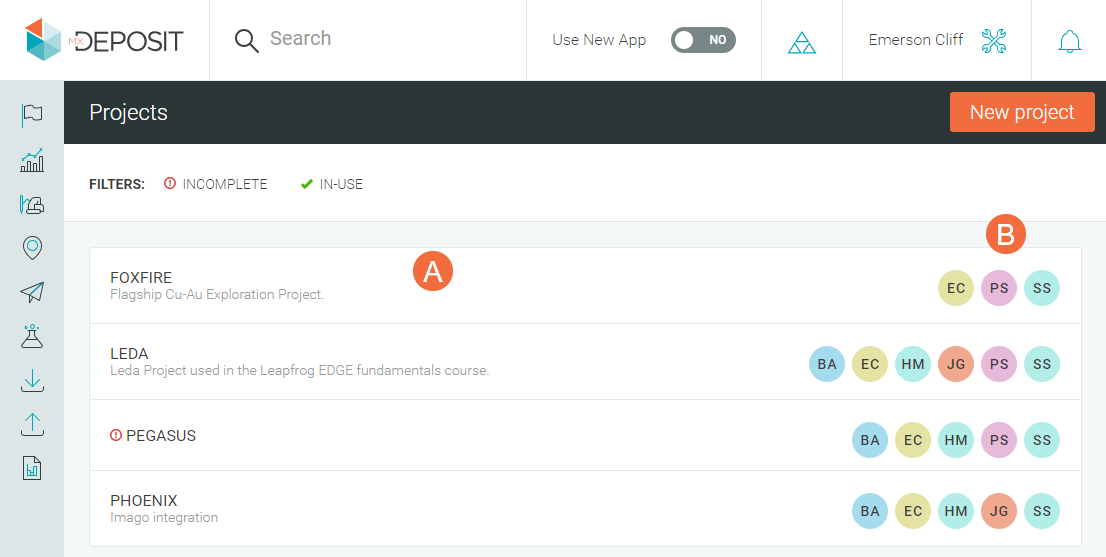
Viewing the Project Library
To view the projects in your MX Deposit account, open the Admin panel and click on Projects under Your site. All the projects in your account will be listed (A), along with an overview of the users assigned to each project (B):
Creating a New Project
To create a new project, click the New project button.
The first step in creating a new project is to give it a name and description. The next steps are:
There is an option when creating a new project to base it on an existing project. If you choose this option, MX Deposit will populate your new project with the grid and boundaries, activities and users from the existing project, which you can then modify as you choose.
If you choose to create a new project from scratch, work through the steps shown along the bottom of the screen:
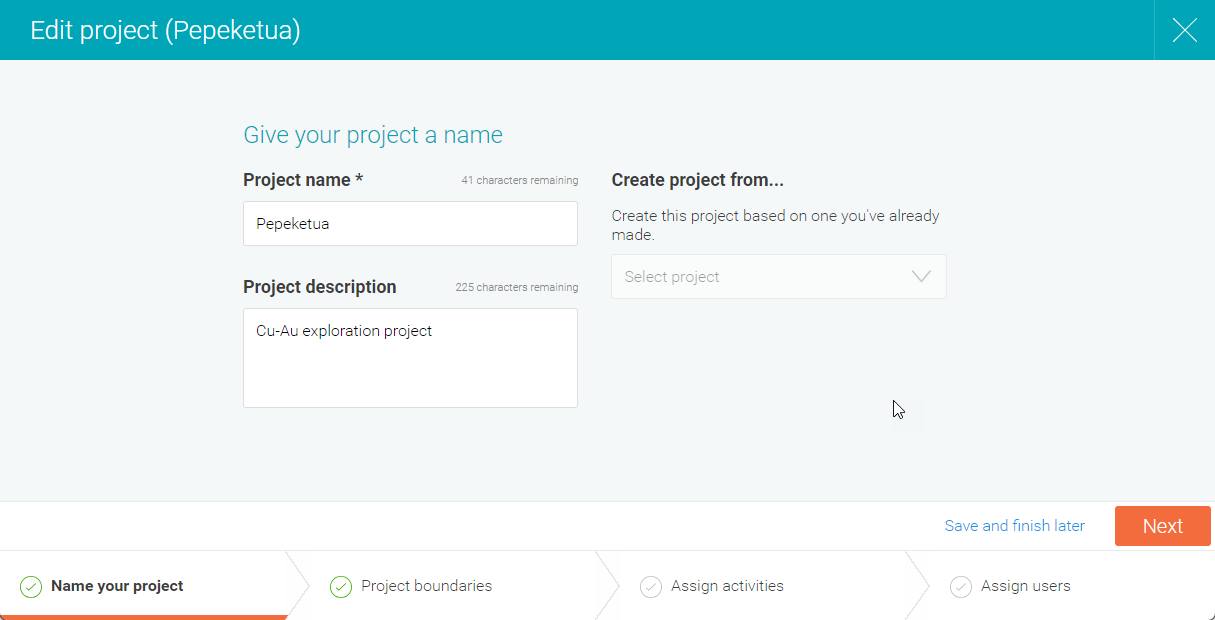
At any stage, you can click Save and finish later if you are not yet ready to make the project available for use.
Once the project is complete and ready to be used, click Publish.
Setting the Project Boundaries
In the Project boundaries step, there are two ways to set the project’s boundaries:
- Import a KML file
- Draw the boundary
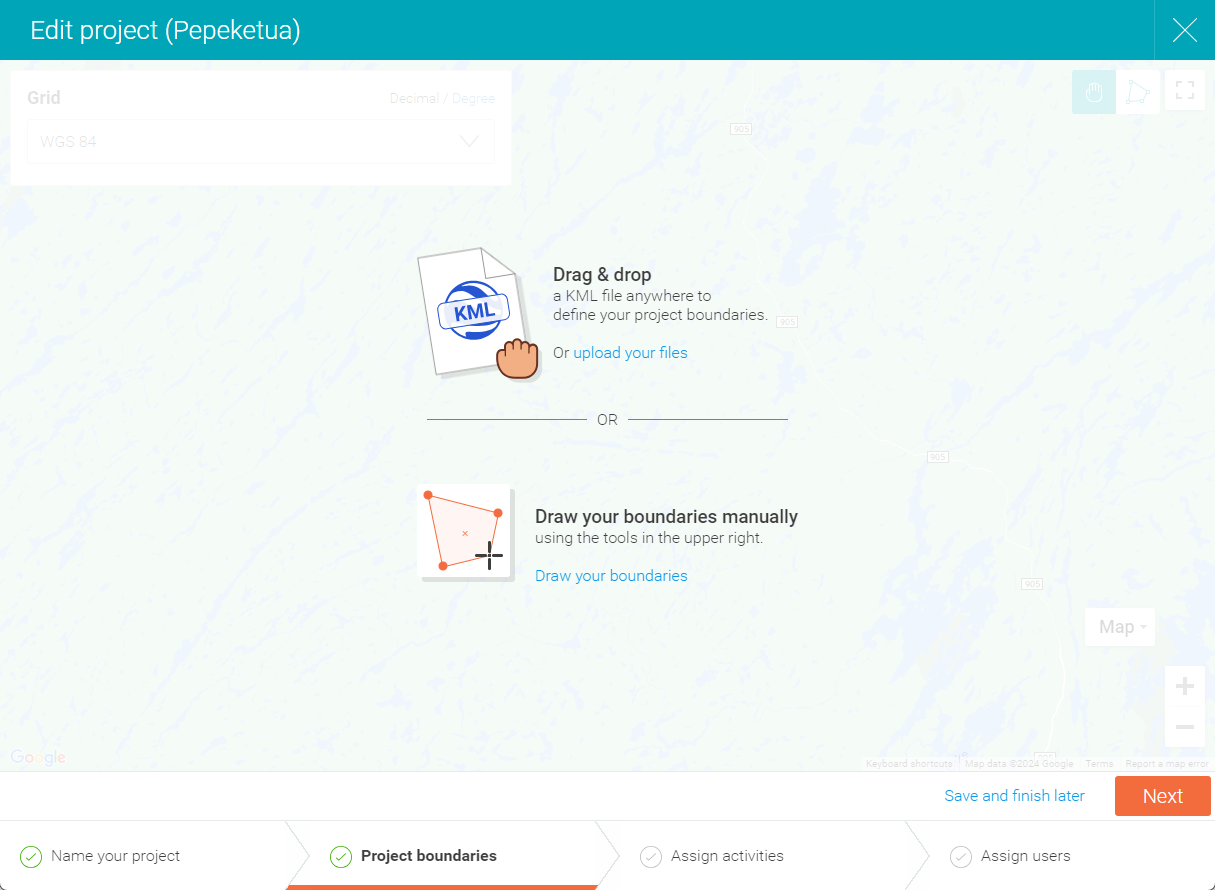
You can have multiple boundaries, to represent the different sites in a project.
Once you choose an option, you can set the grid used by the project. See the Grids topic for more information on the grids available in MX Deposit and how to add new ones.
Assigning Activities
Once you have set the project’s boundaries, the list of activities in the Activities collection will be displayed. Add the activities you want to the project, then click Next.
Assigning Users
There are two ways to assign users to projects:
- On a one-by-one basis
- Assigning users to activity groups
Activity groups are a way of achieving finer control over who has access to what data during the logging process.
For more information on setting up activity groups, see the Defining Activity Groups topic.
Both ways are illustrated here, where there are two activities, one without activity groups (A) and one with activity groups (B). The defined activity groups (C) are listed below the activity itself.

For the project without activity groups, assign users by dragging them from the Available users list onto the activity.
For the project with activity groups, there are two ways to assign users:
- Drag users from the Available users list onto the activity itself. This will assign users to the activity and all its activity groups.
- Drag users onto an activity group. This will limit their access to the project according to the permissions set for the activity group.
Once you have added users to the project, you can:
- Publish the project, if you have finished with the project and it is ready to be used. Click Publish.
- Save the project without publishing it, if you have not yet finished defining it or do not yet want people working in it. Click Save and finish later.
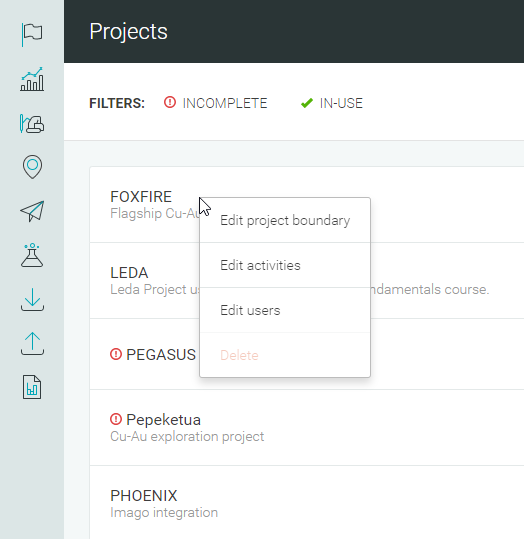
Editing Existing Projects
To edit an existing project, either click on its name or right-click on it and choose one of the options available:
Deleting a Project
You can delete a project from the library only if it has no activities or users assigned to it. If this is the case, a Delete option will be available when you right-click on a project in the Projects collection:
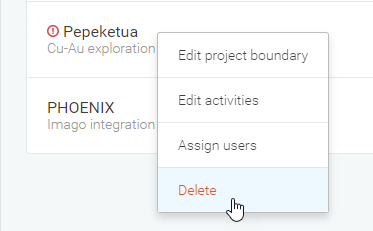
You will be asked to confirm your choice.