Build Analysis Workflows
The analysis workflow tracks samples from dispatch through to lab certificate import. It includes the dispatch header, services schedule and the prep and analysis codes for the laboratory you choose to send your samples to. It is configured to prepare your project for import of lab assay results.
An analysis workflow is built by adding elements already defined in Site Settings > Sampling. These include:
- A header from the Dispatch Headers collection.
- The sample analysis and prep codes derived from the Lab Services list.
- The sample parameters and certificate import rules derived from multiple Sample Lists.
This topic describes how to build analysis workflows in MX Deposit. It is divided into:
- Viewing the Analysis Workflows Library
- Creating a New Analysis Workflow
- Adding Dispatch Headers, Prep and Analysis Codes
- Configure Certificate Import Rules
- Reviewing the Summary
- Deleting an Analysis Workflow
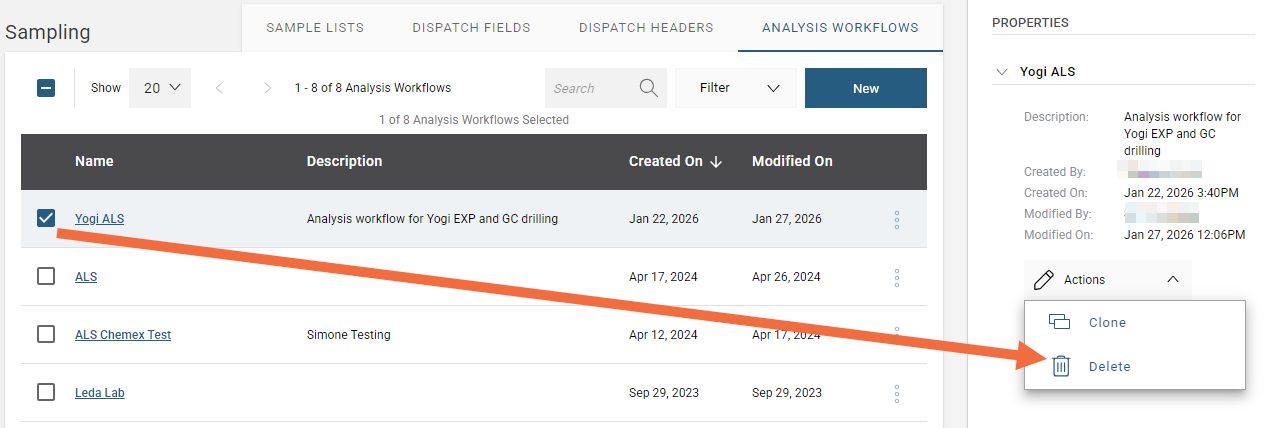
Viewing the Analysis Workflows Library
To view the analysis workflows in your MX Deposit account, go to the Site settings page and click Sampling > Analysis Workflows.
You can filter or search the Analysis Workflows available.
Creating a New Analysis Workflow
To create an analysis workflow, click on the New button in the Analysis Workflows collection. If there is an analysis you already have in your account that you want to create a copy of, you can select Clone from the overflow ![]() menu.
menu.
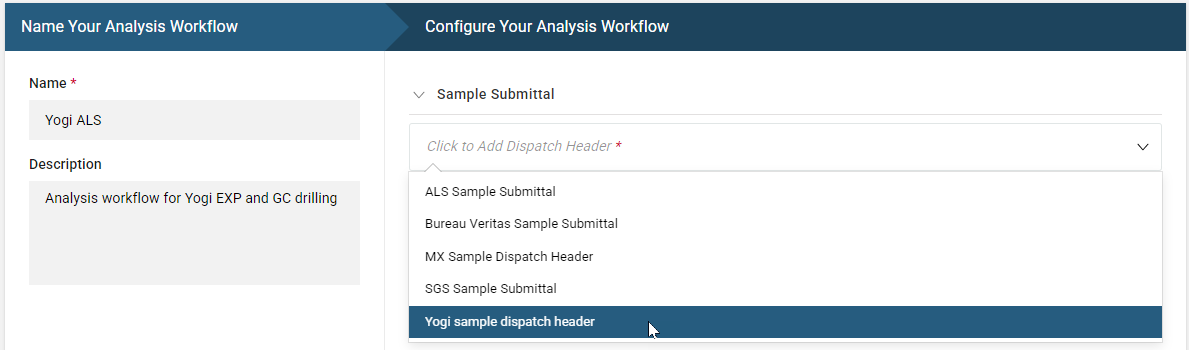
Name Your Analysis Workflow and provide an optional Description to help you to know at a quick glance what this analysis workflow is for.

Click Create Workflow to Configure Your Analysis Workflow.
Adding Dispatch Headers, Prep and Analysis Codes
In the next Configure Your Analysis Workflow step, choose a dispatch header.
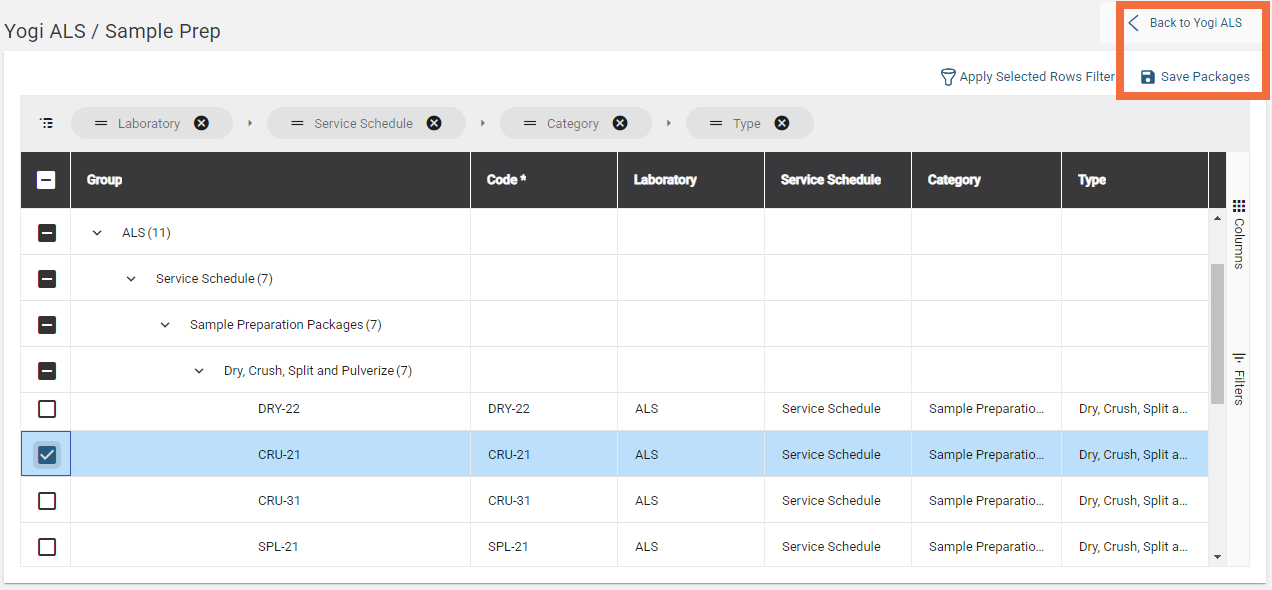
Once you have chosen a dispatch header, add Sample Prep codes and Sample Analysis codes by clicking on the add buttons.

Sample prep and analysis codes are provided by the laboratory in the lab certificates and are defined in the lab services list.
Choose the packages you wish to include then:
- Click Save Packages
- Click the back button to go back to your analysis flow configuration
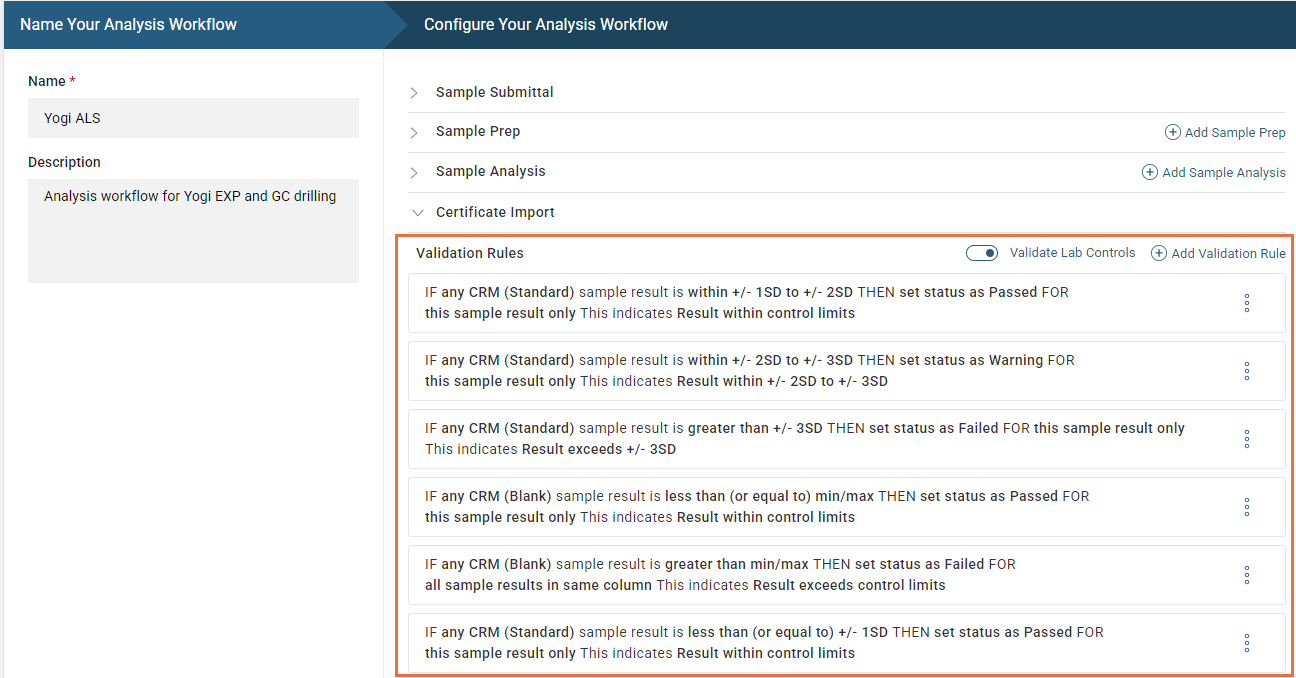
Configure Certificate Import Rules
The next step defines the validation rules used when importing the lab certificate containing the assay data. The analysis workflow configuration will show the rules expected for:
- Pass, fail and warning Validation rules. In the certified results sample list the minimum, maximum and standard deviation values were defined for each of the CRM standards and blanks. In this certificate import step we will specify how MX Deposit will treat the assay values imported with lab certificates by setting rules for values that fall inside or outside of the benchmarks set in the certified values list. See the Certified Results in the Sample Lists topic for more information on this list.
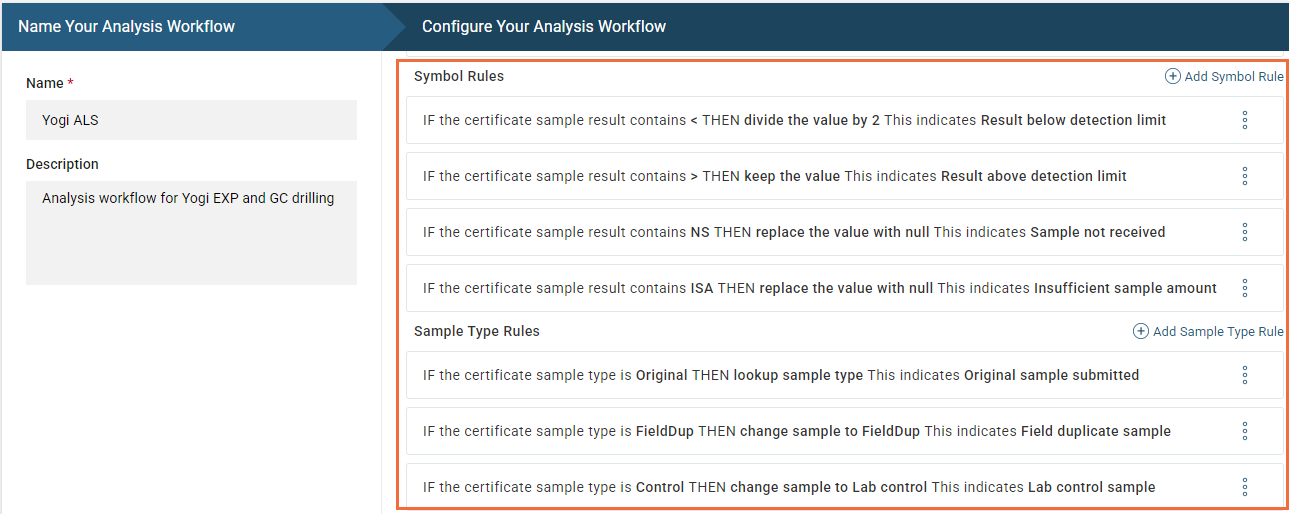
- Actions to be taken for Symbols in the lab certificate. These non-numeric symbols and their meaning may be specific to the laboratory used.
- Actions to be taken for Sample types in the lab certificate.
To define a new validation rule, select Add Validation Rule:

Next, define a new rule. Here, a validation to pass any CRM (Standard) that is within control limits is added:
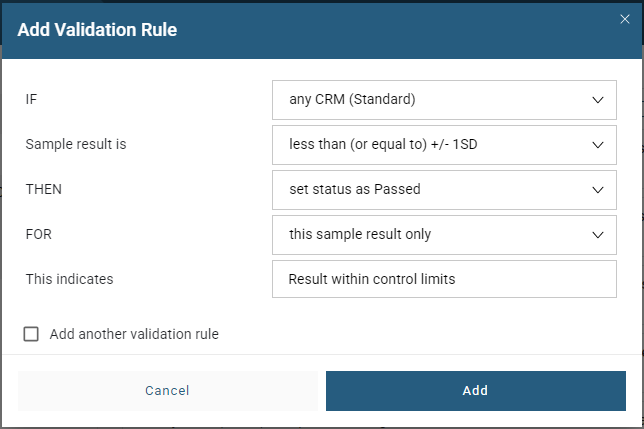
If there are more rules to add select Add another validation rule, otherwise click Add to go back to the analysis workflow configuration.
Here is an example of the completed validation rules for CRM standards and blanks:
In the same way continue to add rules for Symbols and Sample Types:
Reviewing the Summary
The Summary shows you all of the different analytes, units and method codes that can be accommodated by this sample analysis workflow.
Your lab certificate does not need to contain all of the result columns listed on the summary page. However, your summary page needs to contain all of the result columns to be expected in the lab certificate. If it does not, the import may fail.
Once you have looked over the summary and you're satisfied with it, you can add the analysis workflow to an activity.
Deleting an Analysis Workflow
You can delete an analysis workflow from the library only if it is not used in an activity. If this is the case, a Delete option will be available from the Actions menu in the Properties panel of the selected workflow. You will be asked to confirm your choice.