Project Explorer - Grid Tools

The Project Explorer provides tools that enable you to perform tasks for individual and multiple grids:

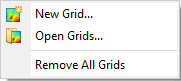
Create a Grid, Open Multiple Grids, Remove all Grids

  1. Select (highlight) the Grids node in the Project Explorer, right- click and select the desired option from the popup menu.

  1. The New Grid option displays the Open Database to Process dialog if no database is open in your current project. Select the database to grid a channel from, and the Grid Data dialog will open. Use this dialog to generate your grid using one of the available gridding methods.

  2. The Open Grids displays the Add New Grids dialog. Select the grid to be added and the new grid will be added to the project.

  3. The Remove All Grids option removes all grids from your current "Project" but does not delete the grid files from their location.

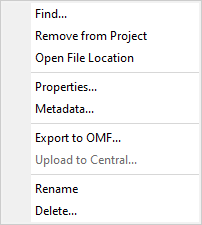
Find, Remove, Rename, Delete, View Properties or Metadata of a Grid, Export a Grid to OMF, Upload a Grid to Central

  1. Expand the the Grids node in the Project Explorer, select (highlight) the grid name, right-click and then select the desired option from the popup menu.

  1. The Find option is available when the source file of the selected grid document is missing: the grid appears in grey along with a warning icon . Use this option to open the browse dialog and locate the missing file. See Missing Data Files for more details on the Find functionality.

  2. The Remove from Project option will remove the grid from the "Project", but it will not delete the grid file from the file location.

  3. The Open File Location option will open the Windows File Explorer to the location of the grid file selected.

  4. The Colour Tool option opens the Colour Tool dialog, which enables you to interactively edit the colour display of your grid and experiment with different colour configurations.

    You can select multiple grids and apply the same colour scheme and colour distribution to all selected grids. The Colour Tool will then open to allow you to further revise the colour display and apply the changes simultaneously to all your selected data.

  5. The Properties option will display the Grid Properties dialog. Click the Stats button to display the Grid Statistics and click the Modify button to modify the grid properties.

  6. The Metadata option will display the Metadata Viewer dialog. Click the Edit button on the Metadata Viewer to display the Metadata Editor. Click the OK button to accept your changes and close the dialogs.

  7. The Export to OMF option opens the Export Project to OMF dialog; the selected grid along with any other grids, voxels, and geosurfaces from your current project can then be saved to an OMF file.

  8. The Upload to Central option uploads the grid to a Central project. All the associated files (.xml, .gi) will be uploaded to the Central server as well.

  9. The Rename option renames the grid in the project as well as on the disk. Any auxiliary files (.xml, .gi) will be renamed at the same time.

  10. The Delete option removes the grid from the project's workspace and permanently deletes the grid file and any associated files from their location.

    The action will also remove the grid layer from any unpacked 2D or 3D documents (e.g., plan or section maps, 3D views) in the current workspace.

    Deleting a grid that defines a relief surface in a 3D view will remove the entire surface from the 3D view, including any associated groups.

    Deleting a grid that defines a section or a crooked section in a 3D view will remove the entire section from the 3D view, including any associated groups.

    Deleting a grid associated with a colour bar group in a 2D map will delete the group from the BASE view of the map.