
Import ArcGIS LYRX File
Use the Import ArcGIS LYRX File option (geogxnet.dll(Geosoft.GX.ArcGIS.ImportLYRX;Run))* to add an ArcGIS Pro Layer file (.lyrx) to a new or existing 2D map. When added to a new map, the Data view extents are defined by the data referenced in the layer file.
The option is available under the following menus:
-
Map > Import > ArcGIS LYRX File
-
ArcGIS Tools > Import ArcGIS LYRX File
-
DH-PLot > Import > ArcGIS LYRX File
-
Surface Mapping > GIS Import > ArcGIS LYRX File (available only in stand-alone Target)
A licensed installation of ArcGIS Pro and an active login are required to use .lyrx files that reference ESRI file geodatabases.
Import ArcGIS Pro LYRX File dialog options
Application Notes
*The GX.NET tools are embedded in the geogxnet.dll file located in the \Geosoft\Desktop Applications\bin folder. To run this GX interactively (outside the menu), first navigate to the bin directory and provide the GX.NET tool in the specified format. See the Run GX topic for more guidance.
Supported Types
-
Feature class: Requires both the .lyrx file and its associated ESRI file geodatabase.
-
Shapefile: Requires both the .lyrx file and the shapefile. (A shapefile is essentially a feature class that is not linked to a file geodatabase.)
-
ArcGIS Map Service: Only the .lyrx file is needed. (A map service is a data-hosting platform that provides map images for client applications, which may be dynamically rendered for a specific extent or pre-rendered and cached in a tile grid as static images.)
Supported Versions
LYRX files created in ArcGIS Pro versions 2.8 through 3.2 are compatible for import into Oasis montaj.
Reprojection
LYRX file projections are honoured in Oasis montaj and Target:
- A new map adopts the coordinate system of the first .lyrx file imported.
-
LYRX files that are not natively in the coordinate system of the current map are reprojected on-the-fly to the coordinate system of the map.
LYRX files cannot be imported into maps with undefined coordinate systems. -
Map service .lyrx files cannot be reprojected. (This constraint originates from the LYRX file’s internal structure, where an attribute is defined as “NoReprojection”.) An informational message will appear in this case.
-
If the LYRX file is under a different datum, a local datum transform will be needed. The Geographic Coordinate Systems Transformation will be displayed, allowing you to perform the datum transformation.
The status bar of the map window displays the coordinate system and units of the map.
Geosoft Map Identify Tool
LYRX files serve as visual representations of live data links. Use the
ArcGIS Pro Layer Files (.lyrx)
To create a .lyrx file in ArcGIS Pro:
-
In the Contents pane, select the map layer.
-
Right-click > Sharing > Save As Layer File.
-
In the Save Layer File dialog, choose a destination folder or accept the default location. Provide a file name or accept the default name.
When adding layer files to a map, the data referenced by the layer must remain accessible. For portability (i.e., to save the layer and its data together), consider creating a layer package.
ArcGIS Pro Style Files (.stylx)
Search for styles in ArcGIS Online, use the styles that are authored by Esri and included in the ArcGIS Pro installation, or create your own .stylx file in ArcGIS Pro.
To create your own style file (.stylx) in ArcGIS Pro, you must first install the add-in developed by Seequent.
Install the EsriExportSymbolToStyle Add-In:
-
Browse to the installation folder of your Geosoft Desktop Applications and expand the bin directory.
-
Navigate to the LayerX > AddinX folder and select the ESRI AddInX file (.esriAddinX) that is compatible with your version of ArcGIS Pro.
-
Double-click the file to launch the Esri ArcGIS Add-In Installation Utility.
-
Review the installation details and click Install Add-In to proceed.
After the installation completes, open ArcGIS Pro. If it was already running, restart the application to load the new add-in.
View the Add-In Manager:
-
Open the Settings page in one of the following ways:
-
From the start page, click the Settings tab.
-
In the side tab list, click Add-In Manager.
-
On the Add-ins tab, locate and click EsriExportSymbolToStyle to view details about the installed add-in.
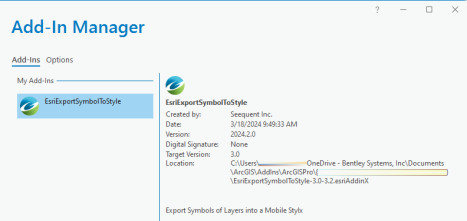
When you install an add-in using the installation utility, it is copied to the default location: %System Drive%\Users\<username>\Documents\ArcGIS\AddIns\ArcGISPro. Before copying the file, the utility checks whether a newer version of the add-in already exists in that location.
Export a Layer's Symbology to a Style File (.stylx)
A layer file retains many of the input layer’s properties, including symbology, labeling, and custom pop-ups. However, when working with layers that contain complex symbology, it’s recommended to use the EsriExportSymbolToStyle add-in to create a style (.stylx) file. This ensures the symbols are preserved and can be imported alongside the layer file into your map.
Steps in ArcGIS Pro:
-
In your ArcGIS Pro project, go to the Contents pane and select the layer from which you want to export the symbols.
-
Right-click the layer to open the context menu and choose Export Layer’s Symbols To Style.
-
In the Save As dialog, browse to a desired folder or accept the default location.
-
Provide a name for the style file and click Save.
You can now share the .stylx file the same way you share any other file.
Using the .stylx File in Oasis montaj or Target:
When importing your LYRX file into an Oasis montaj or Target project, include the .stylx file as the input Layer Stylx file. This helps ensure that the symbols in the added layer are interpreted correctly on your map.
The first map shown bellow illustrates the enhanced symbology applied when the LYRX file, identical to the one in the second map, is imported along with its corresponding style file.

Sharing Maps with LYRX Groups
You can share maps that include.lyrx files without requiring an ArcGIS Pro license or Map SDK. Map rendering is maintained.
Got a question? Visit the Seequent forums or Seequent support
Copyright (c) 2025 Bentley Systems, Incorporated. All rights reserved.
Privacy | Terms of Use