
Creating and generating reports
This topic describes the process of creating new report templates, generating reports on block model versions and working with the information in them. It is divided into:
- Creating a new report template
- Generating reports for block model versions
- Reorganising report columns
- Copying and exporting report information
Creating a new report template
Before you can generate a report on a block model version, you need to create a template for that report that specifies the columns you wish to use in reports. You can also:
- Set multiple cut-off values based on one of the model’s numeric columns
- Select a column to use for density or set a fixed value
- Choose the units to display in reports
- Set how null values and negative values are handled
- Change how block model column names are displayed in reports
To start, click on a block model’s Reports tab and then on Create Report. In the window that appears, start defining the report template.
Select the category column you wish to use and edit its display name, if required. Click Add Column to add it to the template.
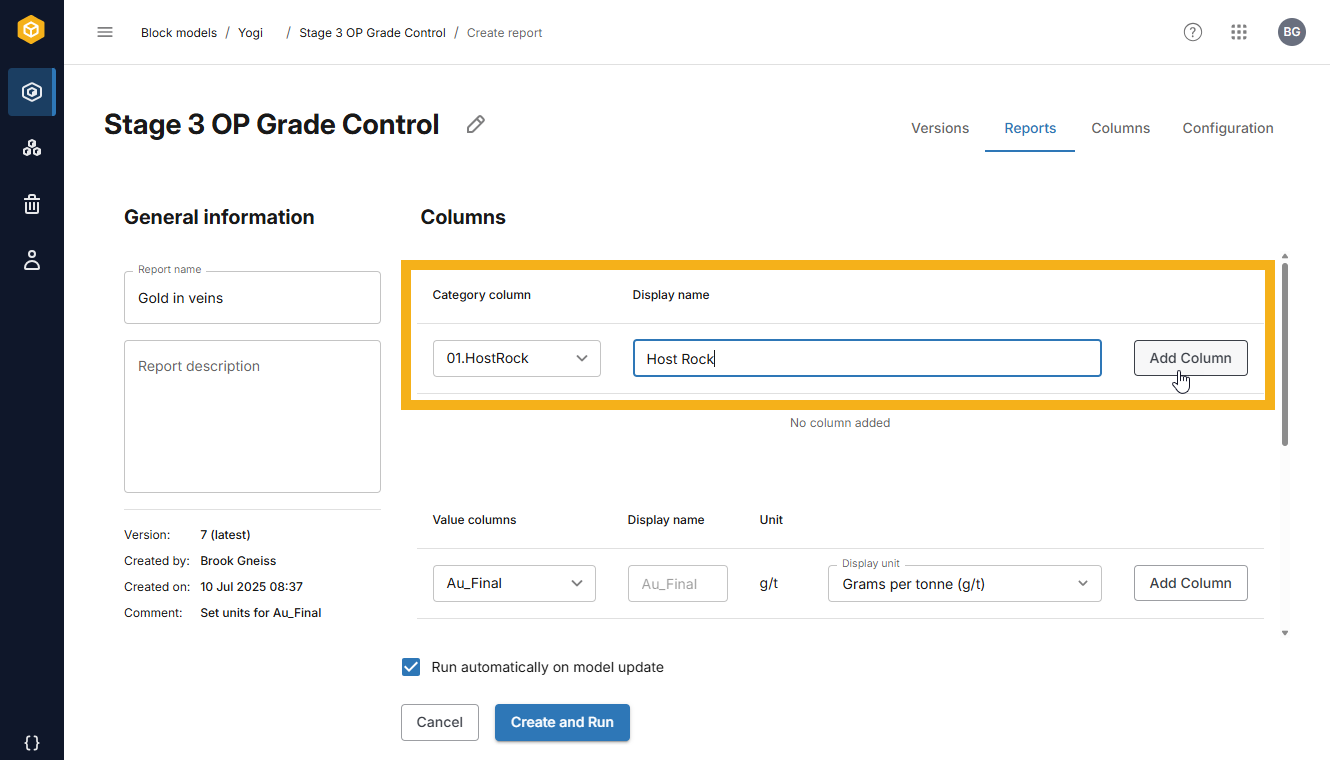
Repeat the process for the value column you wish to use, changing the display units and material content units used in the report, if necessary.
If you want to set a cut-off, choose one of the columns available, then specify the cut-off values to include by entering the values in the box and pressing the Enter key:
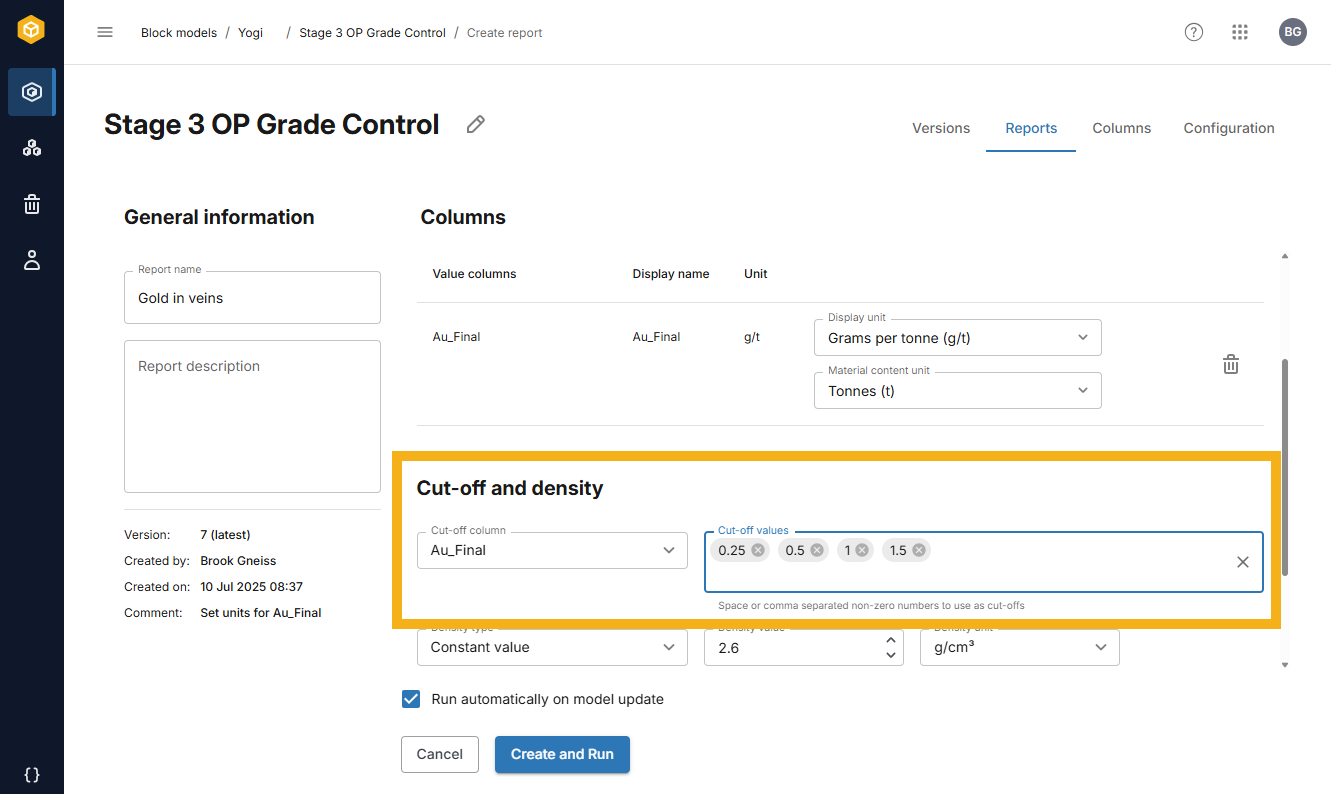
Choose whether to use a fixed value for density or one of the columns available, then set how null values and negative values are ignored.
Finally, if you want the report to be updated each time the block model is updated, be sure to enable Run automatically on model update.
Once you are no longer using a report, it is a good idea to disable Run automatically on model update, especially if the report is for a large block model.
Clicking Create and Run saves the template and generates the report for the latest version of the block model.
Generating reports for block model versions
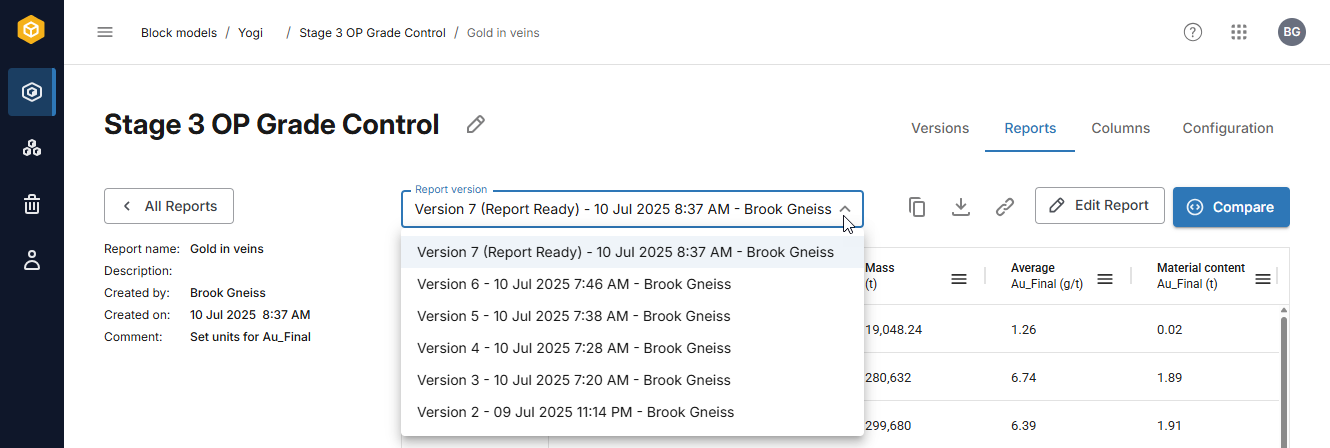
If you have created a report template for a block model that already has multiple versions, when you click Create and Run the report will only be generated for the latest version. For example, here a new report has been generated only for Version 7:
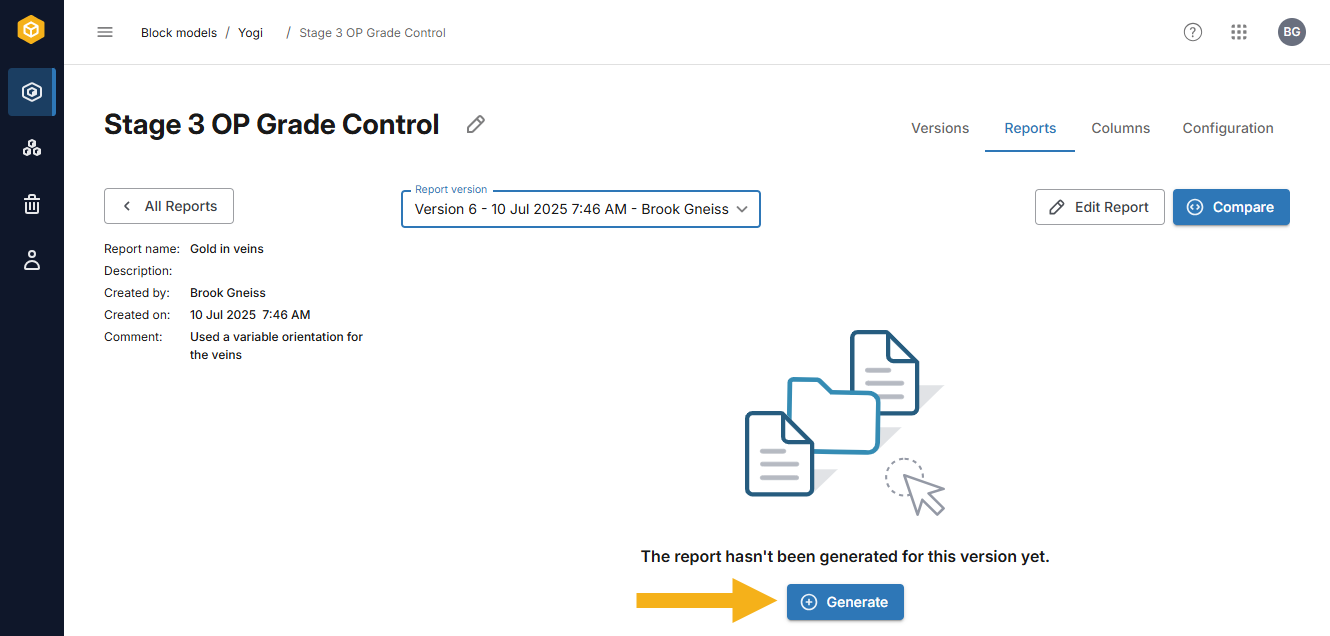
To generate reports for earlier versions, select them from the list and click the Generate button:
Reorganising report columns
Once a report has been generated for a block model version, you can reorganise the columns that are displayed.
- Columns can be resized by dragging their left or right margins.
- To move a column, click on its header and drag it.
There are also autosize options for the columns, which you can set by clicking on a column header:
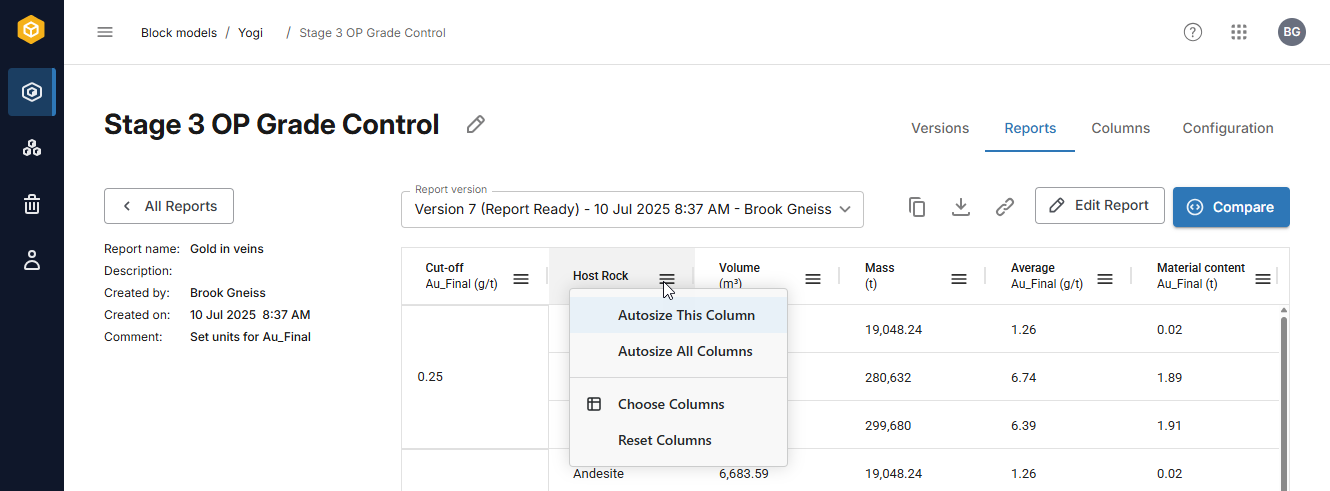
Autosizing columns overrides any manual column size changes you have made and sizes the columns according to their contents.
Choose Columns opens a list of the report’s columns and you can choose to hide some columns. You cannot, however, exclude the cut-off column or the category column.
Reset Columns restores any hidden columns and resets column sizing to that used when the report was first generated.
Copying and exporting report information
You can copy the information from the report for use in other applications. To do this, first select the rows and columns you wish to copy, then right-click on them:
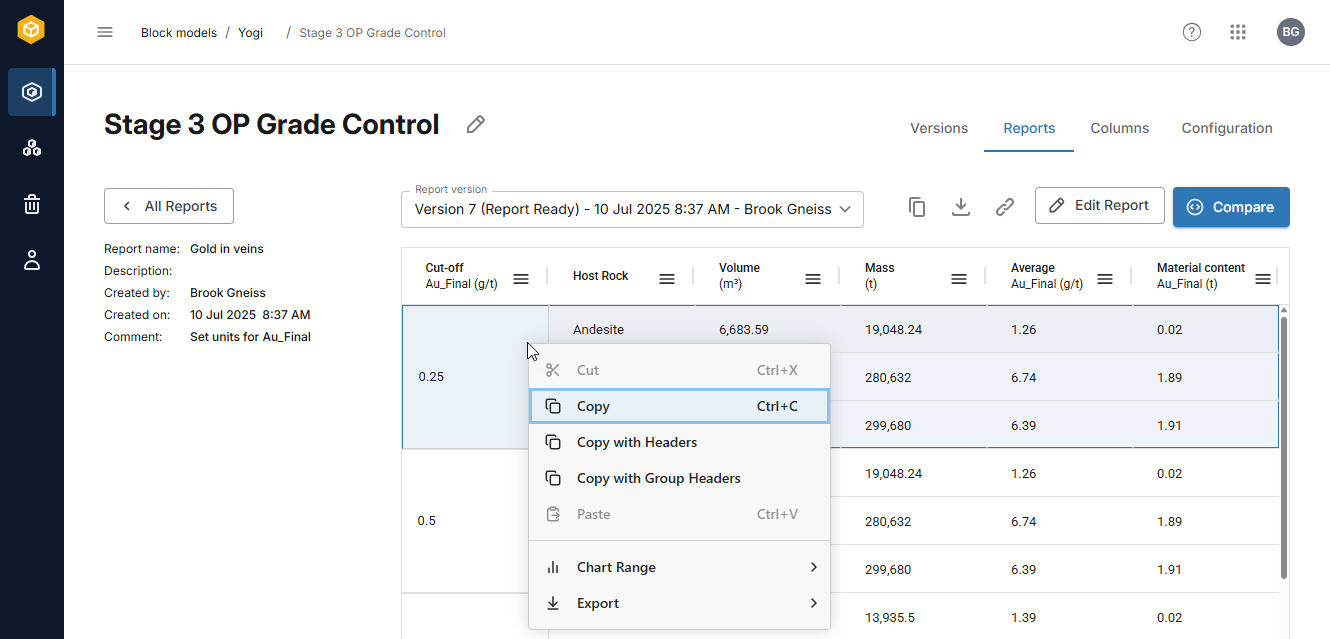
Copy simply copies the selected data to your computer’s clipboard and you can then paste it into another application.
Copy with Headers includes the headers for the selected rows.
If the data selected is part of a grouped column, Copy with Group Headers includes both the headers the grouped headers for the selected rows.
The Export option exports all data in the report in the selected format. There are two options, in *.csv format and in Excel *.xlsx format.
You can also create charts from the selected data, which is described in the Creating charts topic.