Imagery Type Definitions
Imagery types pull together image types, attributes and features and are the means by which these data definitions are added to datasets.
Imagery types can be made up of:
- Original image types, which are those captured using Imago Capture X or Imago Mobile
- Derived image types, such as cropped images and downhole reconstructions from the original image types
- Attribute definitions
- Feature definitions
The rest of this topic describes how to define imagery types and apply them. It is divided into:
- Imagery Type Considerations
- Defining Imagery Types
- Mapping Cropped Images
- Mapping Linearised Images
- Adding Imagery Types to Datasets
- Assigning a Label Definition to an Imagery Type
- Deleting an Imagery Type
Imagery Type Considerations
Before setting up an imagery type, it’s a good idea to list what image types will be needed. For example, if you’re setting up a Core Boxes imagery type, you could be capturing both dry and wet images and you will need to create image types for each. In addition, if you’re applying a cropping template to images, image types need to be defined for those, too.
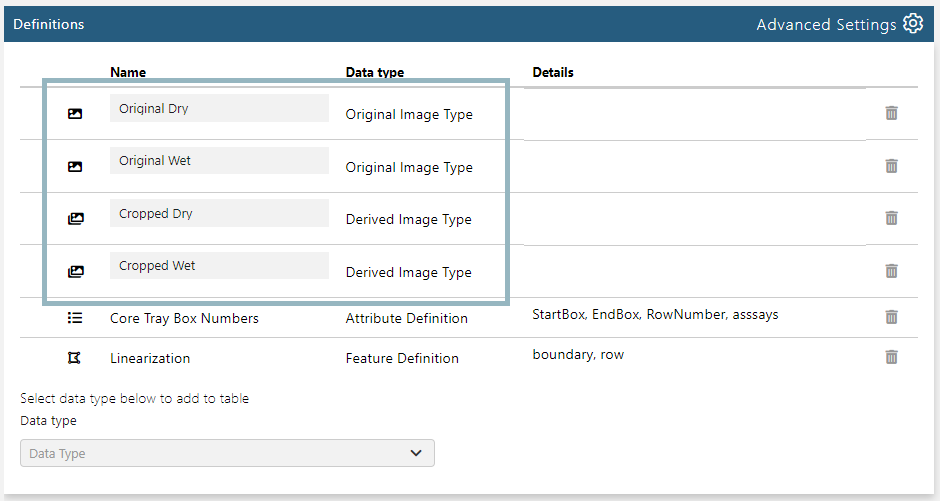
For the Core Boxes example below, the imagery type definition will cover both dry and wet images and original and cropped images. This means we need to define image types we will call:
- Original Dry
- Original Wet
- Cropped Dry
- Cropped Wet
Imago uses the term “original” for raw, unedited images. The term “derived” is used for images that are derived from an original image, such as images to which a cropping template has been applied or images that are linearized from a series of original images. So although for the set of image types above only two actual images will be captured, we need to define four image types.
Note also which image types you want downhole reconstructions for, as a separate imagery type will be required.
Defining Imagery Types
To define an imagery type, click on Data Definitions in the sidebar, then on Imagery Types. Enter a name for the new imagery type and press the Enter key.

In the Imagery Type window, the imagery type does not need a Category or a Description, but over time, you may find setting these fields useful for distinguishing imagery types from one another.
There are three Image Content types available for an imagery type, coretray, linear and image:
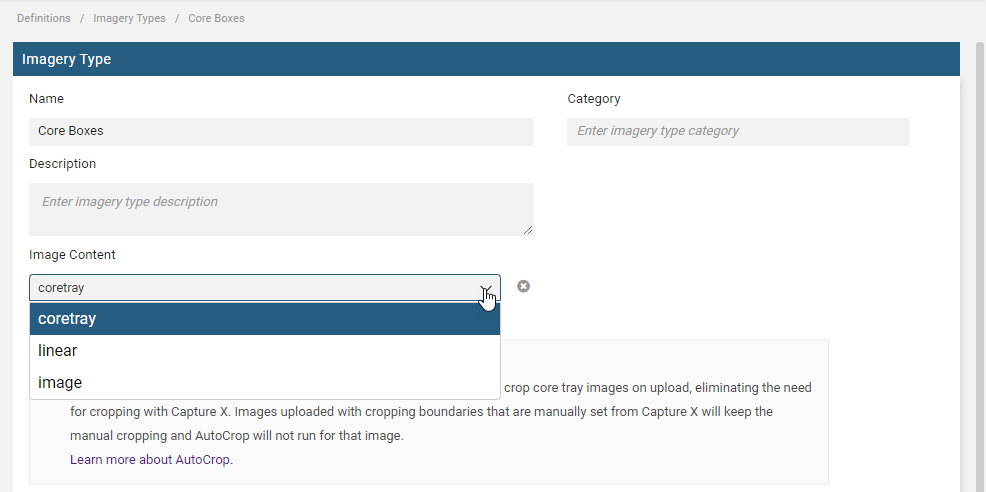
The coretray option can be used for core boxes and chip trays. It has three additional settings, AutoCrop, Linearize Core Tray and Store Box Numbers.
When the AutoCrop option is enabled, Seequent’s machine learning technology can be applied to images to automatically crop them.
See the AutoCrop for Core Tray Images guide for information on using AutoCrop.
When the Linearize Core Tray option is enabled, a downhole reconstruction will be made using the original captured images. Those downhole reconstructions need to have their own imagery type defined. See the separate Defining a Linearized Imagery Type topic.
Note that enabling Linearize Core Tray (A) results in a feature definition being added to the Definitions list (B):
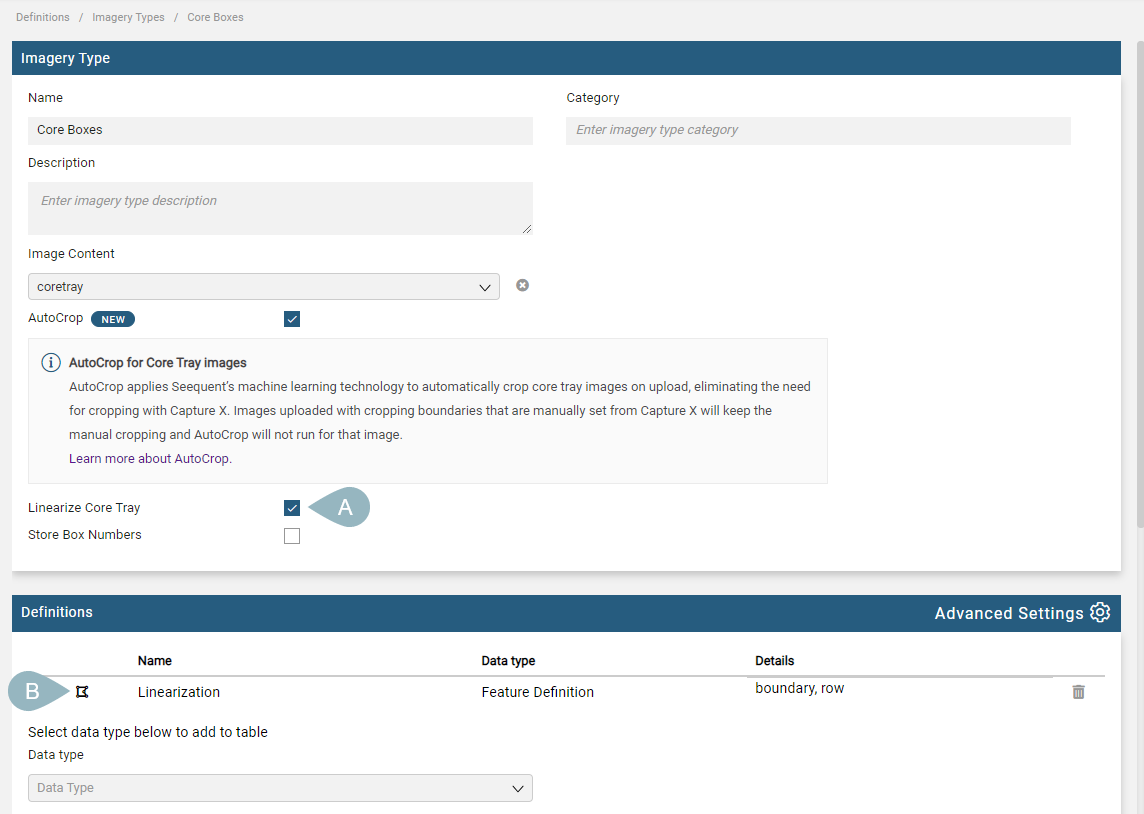
There are other settings required to create the downhole view; these are discussed in Imagery Type Definitions and Mapping Linearised Images below.
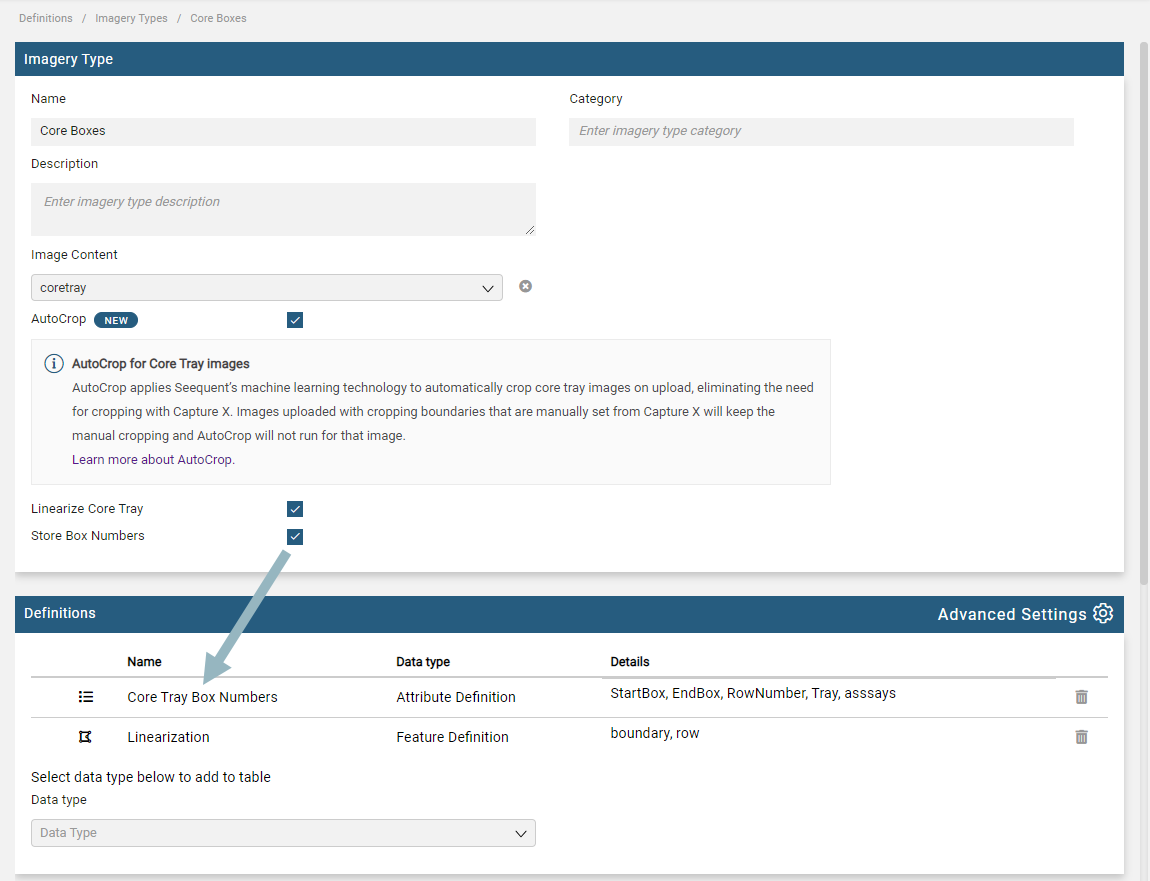
When Store Box Numbers is enabled, each box number will be saved. Again, enabling Store Box Numbers adds another item to the Definitions list, this time an attribute definition:
Next define the image types that will be in collections that use the Core Boxes imagery type. In this example, two images will be captured, called “Original Dry” and “Original Wet”, each entered as an Original Image Type. Cropped versions of these original images should be added using the Derived Image Type option.
Mapping Cropped Images
Images derived from original images, such as cropped images, need to be mapped to the original images. To do this, click on Advanced Settings in the Definitions list. For each original image type, there is a Crop To setting. Set this to the corresponding cropped imagery type for each original image type:

Mapping Linearised Images
As with cropped images, mapping to a downhole reconstruction to an original image type is carried out via the Advanced Settings in the Definitions list for the non-linearised imagery type. Select the linearised imagery type from the Linearise To list, matching the image types defined for the linearised imagery type to those defined for core boxes, e.g. wet and dry:

Adding Imagery Types to Datasets
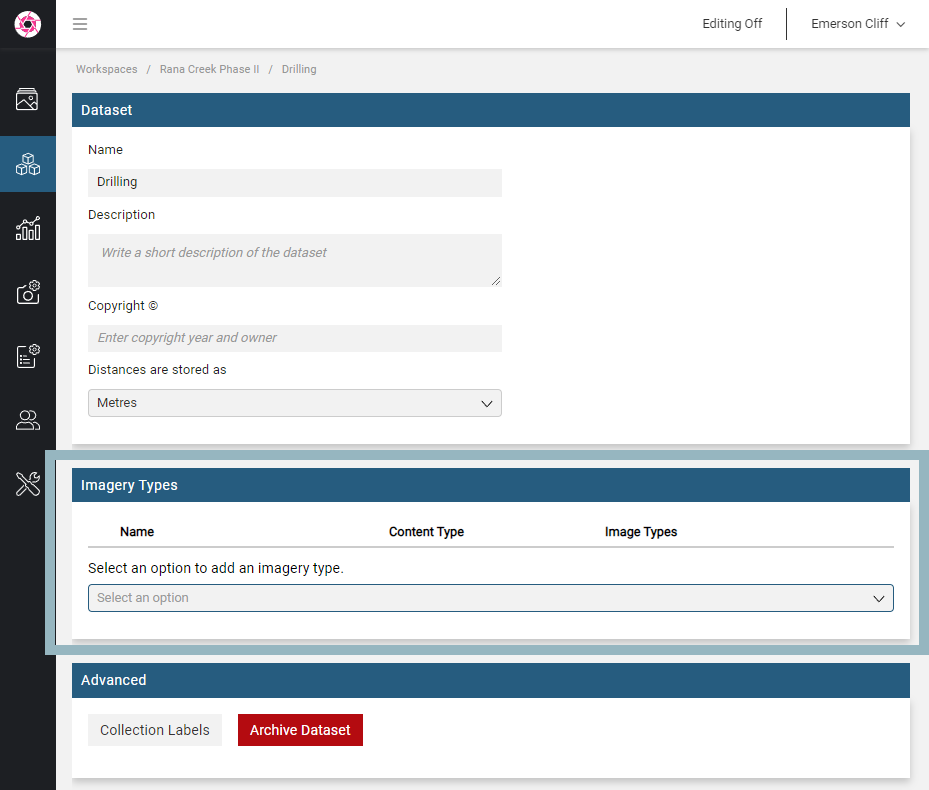
Before an imagery type can be used to collect data, it first must be added to a dataset. To do this, click on Workspaces in the sidebar, then on the workspace and dataset you wish to use the imagery type. In the Dataset window, chose the imagery types you wish to use in the dataset:
Assigning a Label Definition to an Imagery Type
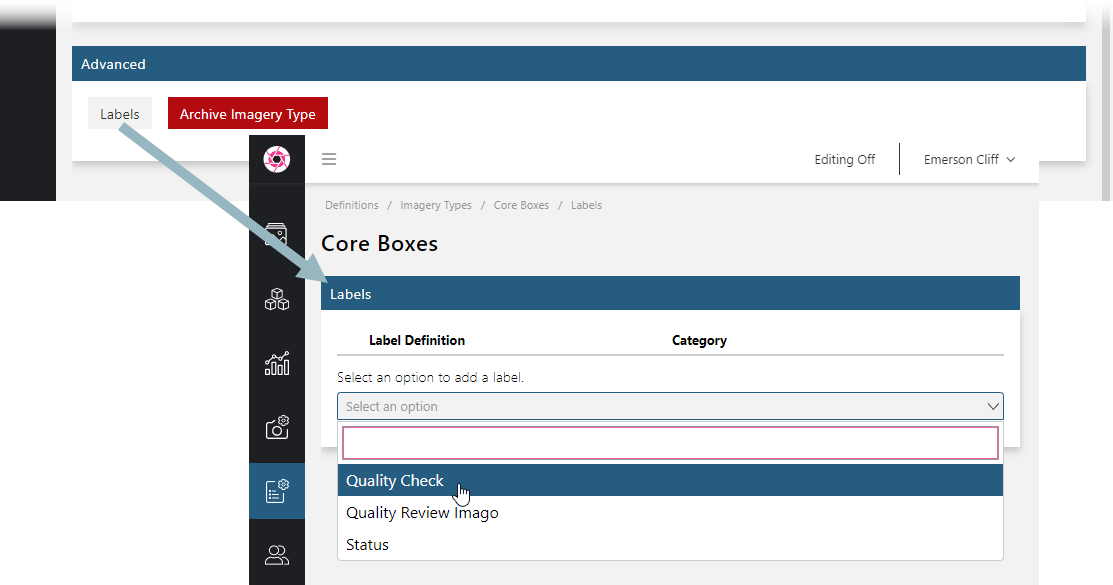
To assign a label definition to an imagery type, click on Data Definitions in the sidebar, then on Imagery Types. For the imagery type you wish to use the label definition, scroll down to Advanced at the bottom of the window and click Labels:
Deleting an Imagery Type
To delete an imagery type, you must first remove it from any datasets that use it. Once you have done this, open the imagery type and delete each of its definitions. You can then delete the imagery type by clicking Archive Imagery Type at the bottom of the Imagery Type window.
Got a question? Visit the Seequent forums or Seequent support
© 2025 Seequent, The Bentley Subsurface Company
