
Seeker - Manage Servers
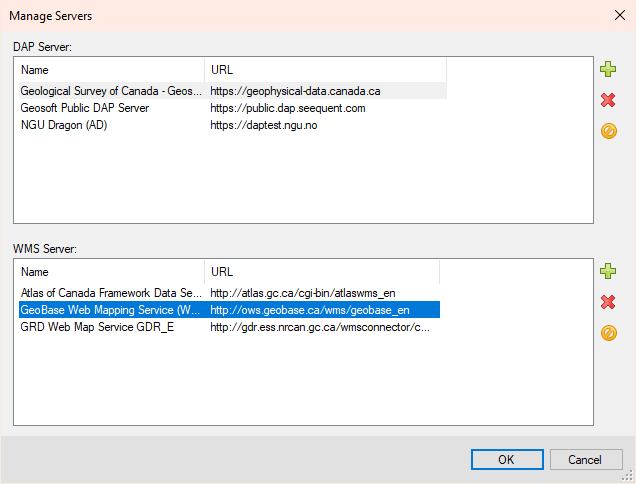
The Manage Servers dialog can be accessed by clicking on the  button located in the upper right corner of the Seeker window. The dialog displays the current DAP and WMS (Web Map Server) server connections and provides tools to add, delete, and disable DAP and WMS servers.
Add a New Server
-
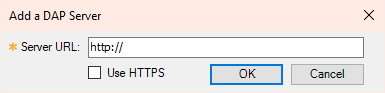
Depending on the type of server you want to add, click the Add button next to either the DAP Server or WMS Server lists .
-
Specify the server URL (http://server_name) and click OK.
-
The new server will be added to the appropriate list of servers.
In the Search page, the selected DAP server provides a customized browser map and region list, and advanced search values that can be used to narrow results by metadata.
In the Results page, you can select from the list of DAP and WMS servers. When you select a server, the number of results found per server are presented. The results statistics (the number of datasets that match the search criteria) are shown with the results.
Sign in with a valid Seequent ID is required in order to access public DAP servers provided by Seequent or government sites. If you are not signed in, these DAP Servers will be disabled. Close Seeker and sign in with your Seequent ID in order to access these DAP Servers.
Sign in is also requested if your DAP Server uses an Azure Maps browser map. When this server is selected, you will be required to sign in with your Seequent ID to use this feature in licensed Geosoft desktop applications. Otherwise, a default browser map appears.
See Also:
Got a question? Visit the Seequent forums or Seequent support
© 2023 Seequent, The Bentley Subsurface Company
Privacy | Terms of Use