
Working with Data Tables
Leapfrog Works has tools for importing, creating and working with many different types of data. Part of working with data in Leapfrog Works is working with data tables.
This topic provides an overview of how to work with data tables in Leapfrog Works. It is divided into:
- Data Tables in the Project Tree
- Viewing Table Data
- Deleting Columns
- Renaming Columns
- Evaluating Models
- Copying a Table Schema (Mesh Attributes)
Subsequent topics describe further aspects of working with data tables such as:
- Importing Data Tables
- Mapping to a Different Data Source
- Updating Tables
- Identifying and Correcting Data Errors in Leapfrog Works
Data Tables in the Project Tree
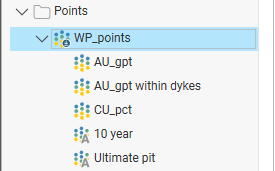
For most tables in a Leapfrog Works, you can view what columns it contains by expanding the table in the project tree. Here a points table contains three numeric data columns (![]() ) and two category data columns (
) and two category data columns (![]() ):
):
Some table columns are not shown in the project tree, such as text or URL columns that cannot be visualised in the scene.
For mesh and polyline attribute tables, the data columns are not shown in the project tree. To view the attribute columns, right-click on the table in the project tree and select Attribute Table.
Viewing Table Data
To view the contents of most data tables, double-click on them in the project tree. A window will appear showing all data in the table. To view the contents of attribute tables for objects such as GIS objects, meshes and polylines, right-click on the object and select Attribute Table.
Tools for working with tables include:
- Fixing errors (A) that have been detected in the table. See the Identifying and Correcting Data Errors in Leapfrog Works topic.
- Building or applying a query filter (B). See the Filtering Data topic for more information on how to build and use queries.
- Selecting rows and setting them to be ignored (C). If the Ignored column is ticked, then Leapfrog Works completely ignores that row, as though it has been deleted. This is useful for suppressing erroneous data from being processed.
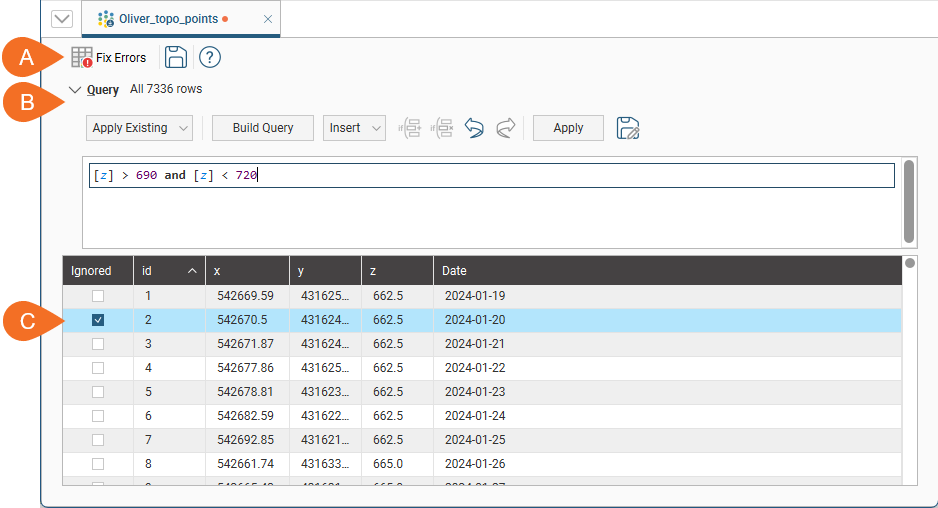
If a row in a collar table is ignored, then all other data associated with that hole (e.g. surveys and interval measurements in other tables) are also ignored.
Collar tables have a trench column that indicates whether or not the borehole is from a trench. When the trench column is ticked for a borehole, the trench will be desurveyed in a different manner from other boreholes. See The Raw Tangent Algorithm for more information.
Cells in a table are editable, apart from the id column, which Leapfrog Works uses as unique identifier. Double-click in a cell to edit it. If the cell you wish to edit is already selected, press the space bar to start editing.
When you edit a cell, the change will be indicated in bold text:
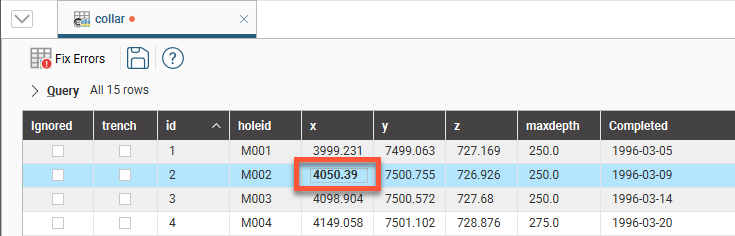
When you save the table, the edited text will no longer be displayed in bold.
Deleting Columns
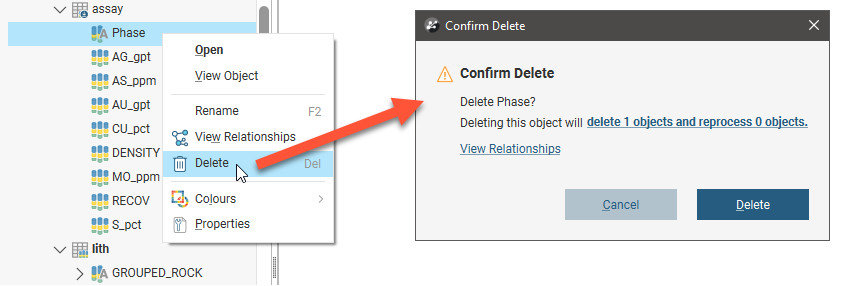
For column types that are displayed in the project tree, you can delete them by right-clicking on them in the project tree and selecting Delete. You will be asked to confirm your choice, as any objects in that project that have been created from that data column will also be deleted.
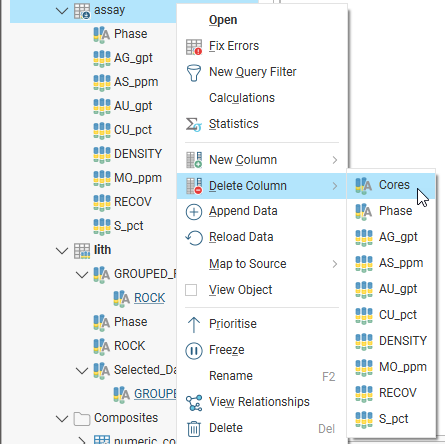
Some table columns are not shown in the project tree, such as text or URL columns that cannot be visualised in the scene. To delete one of these ‘hidden’ columns, right-click on the table and select Delete Column. All columns in the table will be listed, including hidden columns such as the Cores column here, which is a column of URLs:
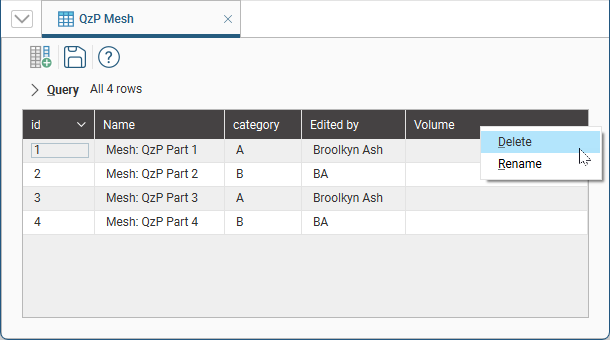
For mesh and volume attribute tables where the data columns are not shown in the project tree, you can delete or rename columns by first opening the table. You can then delete or rename a column by clicking on its header:
Renaming Columns
For most tables, you can rename columns by right-clicking on them in the project tree and selecting Rename. If you later export the table and wish to use your new column name in the exported table, make sure you untick the Use original column names option:

For attribute tables, open the table, click on the column you wish to rename, then select Rename.
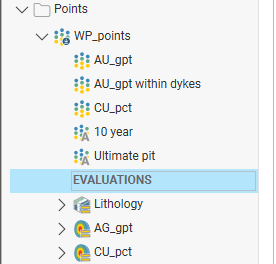
Evaluating Models
You can evaluate models onto data tables, as described in Evaluations. Evaluated models will appear under the table as a separate set of objects:
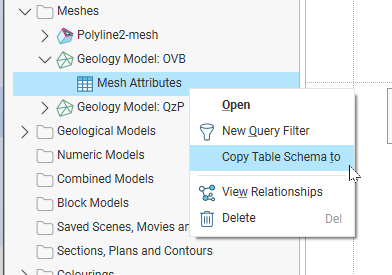
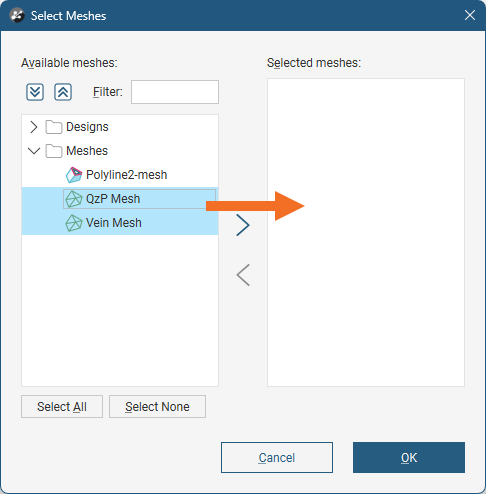
Copying a Table Schema (Mesh Attributes)
For some meshes, you can share the attribute table schema. This is useful when you have defined a set of attributes for a mesh and want to use those same attributes for other meshes in the project.
Only the table schema is shared, not the table data itself. Copying a table schema to another table does not link the two tables; changes made to the schema for one table will not affect the other.
In the project tree, right-click on the attributes table you wish to share and select Copy Table Schema to.
In the window that appears, meshes the table schema can be shared with are listed. Select those you wish to share your table schema to and move them into the Selected meshes list:
Click OK. The table schemas will be updated.