
Navigating in the 3D Viewer
This topic describes the basics of displaying geoscience data in the 3D Viewer.
Separate topics describe:
Arranged around the scene are controls for adding and removing data from the scene, changing how data is displayed and changing scene settings.
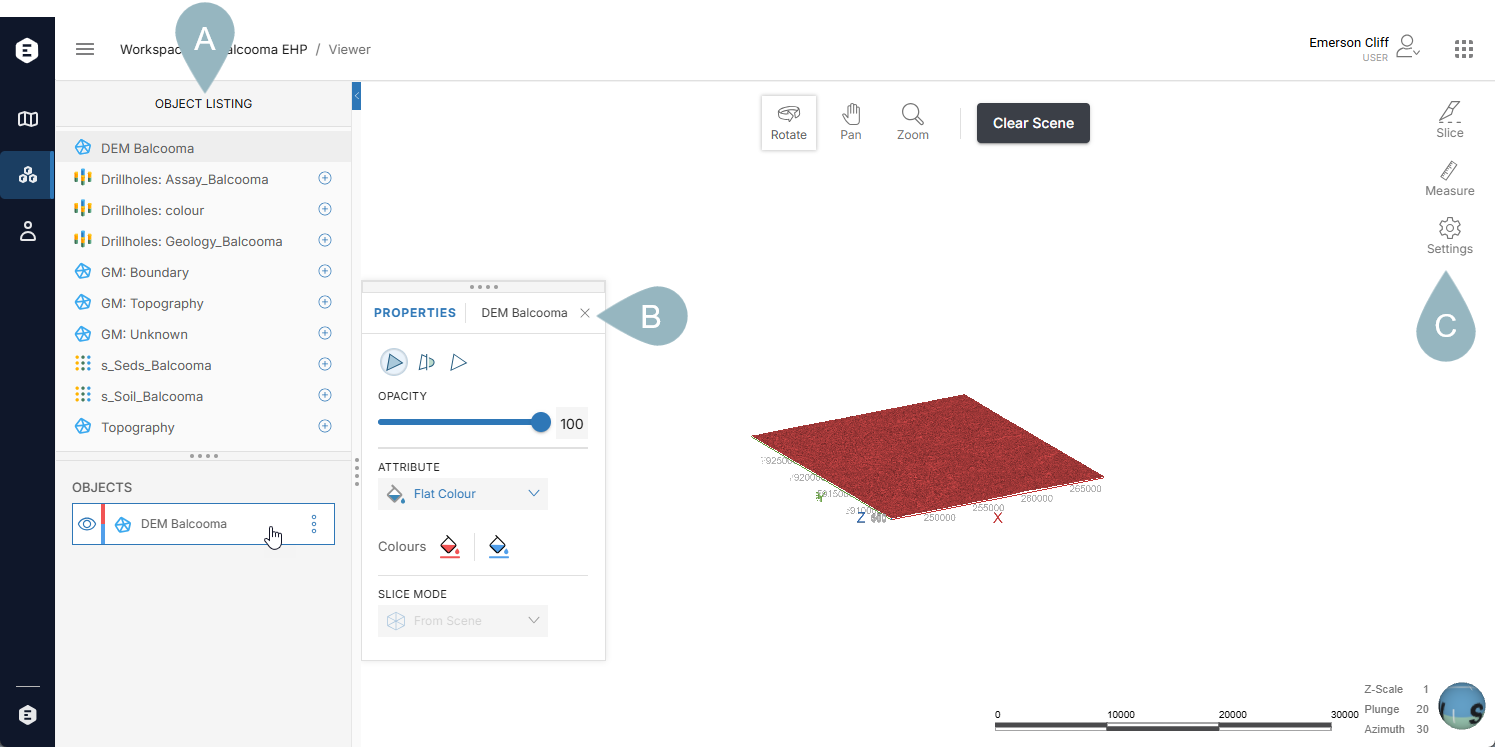
The Objects list (A) shows all the geoscience objects in the workspace that can be visualised in the 3D scene. Add objects to the scene by clicking the add button (![]() ) or by dragging them into the scene.
) or by dragging them into the scene.
The Scene manager (B) shows all objects currently in the scene. Clicking on an object opens a panel for changing how the object is displayed (C).
The tools in the toolstrip (D) are for slicing and measuring in the scene and changing scene settings. Clicking a tool opens a pop-out panel with more options.
Pop-out panels can be moved by clicking on the four dots along the top of a panel and dragging the panel to where you want to position it. You can also dock a pop-out panel to the right side of the window.
For more information on using the toolstrip tools, see:
Using the mouse
The controls above the scene determine how the mouse works in the scene.
Instead of switching between modes, you can stay in Rotate mode and pan and zoom in and out using the mouse buttons and the scroll wheel:
- Pan by holding down both mouse buttons.
- Zoom in and out using the mouse’s scroll wheel or by holding down the right mouse button.
The centre of rotation of the scene is the centre of the objects in the scene. To change the point of rotation, click with both mouse buttons down on an object in the scene.
Keyboard shortcuts
There are also keyboard shortcuts for quickly changing the view:
- To look down on the scene, press the D key.
- To view the scene from below, press the U key.
- To view from north, south, east or west, press the N, S, E and W keys.
To reset to the original view, press the Home key.