
User Groups (Enterprise Licence Only)
If you have an Imago Enterprise licence, you can create user groups to help you securely manage how much access users have to your Imago subscription. The advantage of setting up user groups is that you do not need to manage workspace permissions and profile assignments on a user-by-user basis. With user groups, you can instead assign multiple users to workspaces and profiles all at once.
When you have an Enterprise licence, there will be a Groups tab in the Users window. This topic describes how to manage user groups in the Imago Admin Portal. It is divided into:
- Creating a User Group
- Assigning User Groups to Workspaces
- Assigning User Groups to Profiles
- Deleting a User Group
See the User Roles, Application Access and Permissions topic for a description of how what effect the different options have on how users work with Imago.
Creating a User Group
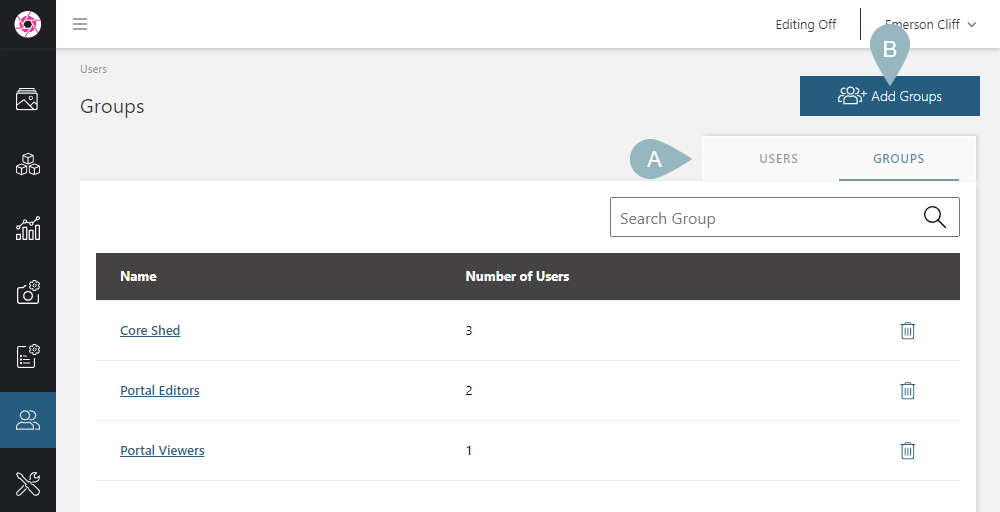
To add a new user group, click on Users in the sidebar, then on the Groups tab (A). Click the Add Groups button (B).
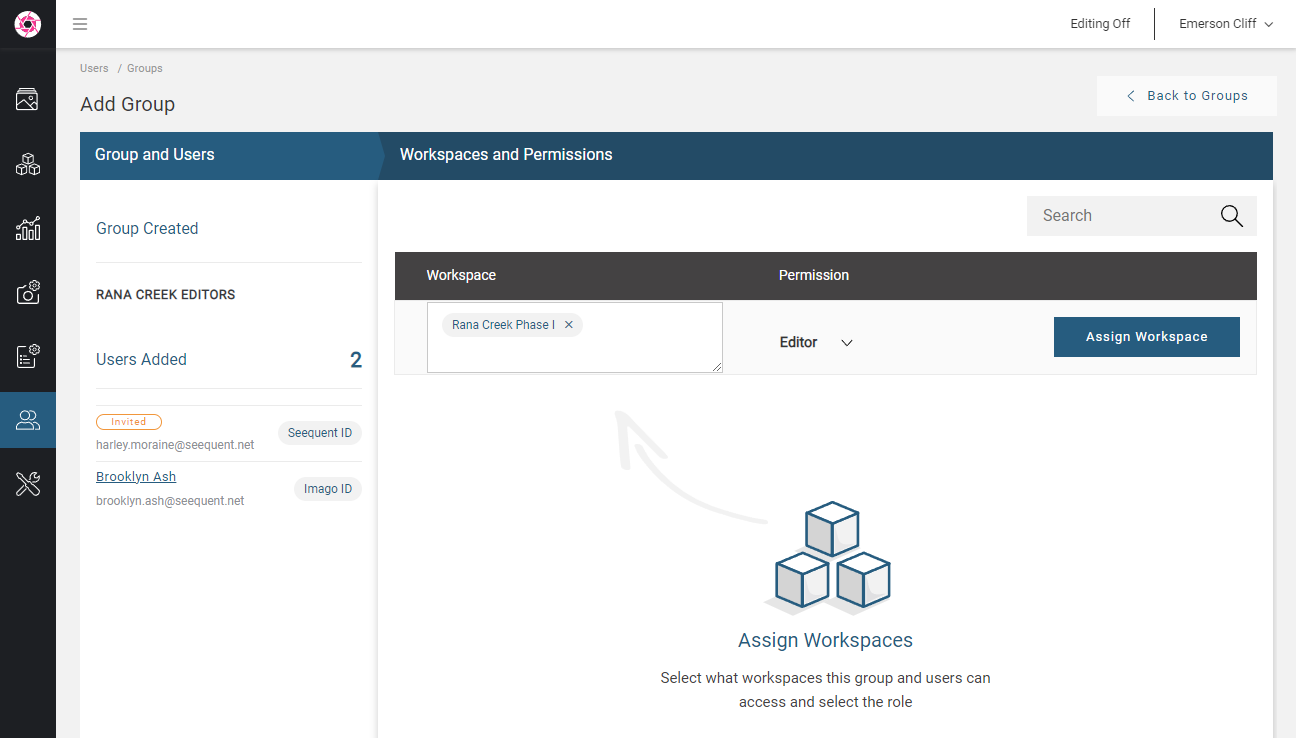
In the window that appears, enter a name for the group, then enter the users you wish to add to the group. Clicking the Add Group and Users button saves the group, and you can then assign workspaces and permissions to the group members.
Assigning User Groups to Workspaces
To assign a user group to a workspace, click on the workspace you want to assign a group to, then click on Advanced > Groups:

See Managing Workspace User Groups (Enterprise Licence Only) in the Workspaces topic for more information.
Assigning User Groups to Profiles
To assign a user group to a capture profile, click on the profile, then click on Advanced > Groups at the bottom of the window:

See Managing Profile User Groups in the Capture Profiles topic for more information.
Deleting a User Group
To delete a user group, click its delete button (![]() ) in the Groups list. You will be asked to confirm your choice.
) in the Groups list. You will be asked to confirm your choice.
Got a question? Visit the Seequent forums or Seequent support
© 2025 Seequent, The Bentley Subsurface Company