
Workspaces
In an Imago subscription, a workspace is the highest level of organisation. This topic describes how to set up workspaces and assign users to them. It is divided into:
- Workspaces Overview
- Adding a New Workspace
- Deleting a Workspace
- Using Workspace Folders (Enterprise Licence Only)
- Managing Workspace Users
- Managing Workspace User Groups (Enterprise Licence Only)
Once you have set up a workspace, you can create datasets, which is described in the Datasets topic.
Workspaces Overview
Workspaces and datasets are configured in the Workspaces part of the Imago Admin Portal. Click on My Workspaces in the user ID menu. This opens the Workspaces window, which you can come back to from the sidebar (A) while you are working in the Imago Admin Portal.

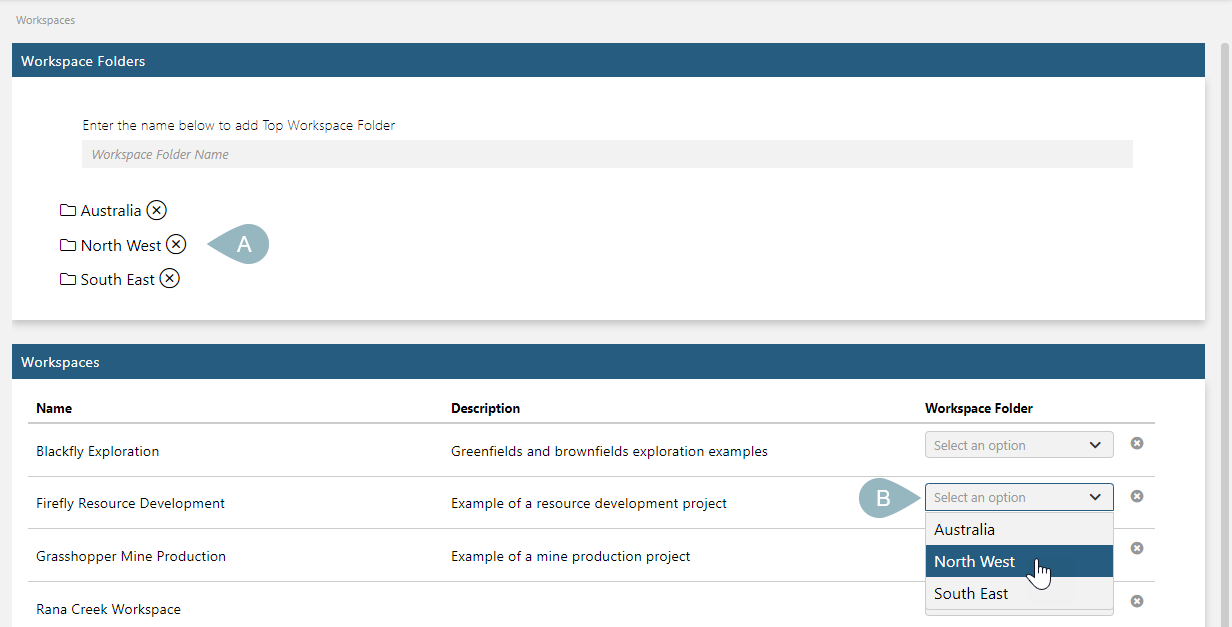
If you have an Imago Enterprise licence, you can create multiple workspaces and group them into workspace folders. In that case, there will be two lists in this window, the Workspace Folders list (B) and the Workspaces list (C). If you do not have an Enterprise licence, you will only have the Workspaces list.
Adding a New Workspace
Workspaces are often named for a region, locale or project.
To add a new workspace, enter a name in the box at the bottom of the Workspaces list and press the Enter key:

Pressing the Enter key or clicking outside the text box creates the workspace and opens a new page, which is organised into information about the workspace (A) and a list of datasets that belong to the workspace (B), which is empty at this point. The series of buttons along the bottom of the window (C) are options for managing the workspace.
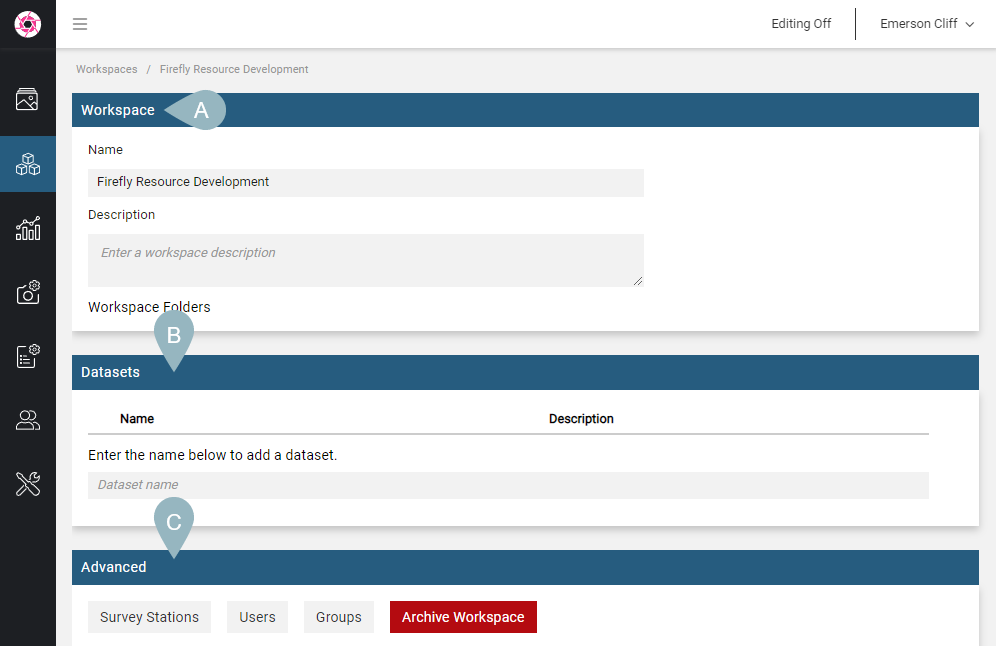
You can change the workspace name and enter a description, if you wish.
In the Imago Admin Portal, changes you make are saved automatically.
Once you have defined a workspace, you can start defining your datasets. See the Datasets topic.
Deleting a Workspace
If you need to delete a workspace, first ensure it contains no imagery.
To delete a workspace, click on it in the Workspaces list. Then click the Archive Workspace button at the bottom of the window:

You will be asked to confirm your choice.
Using Workspace Folders (Enterprise Licence Only)
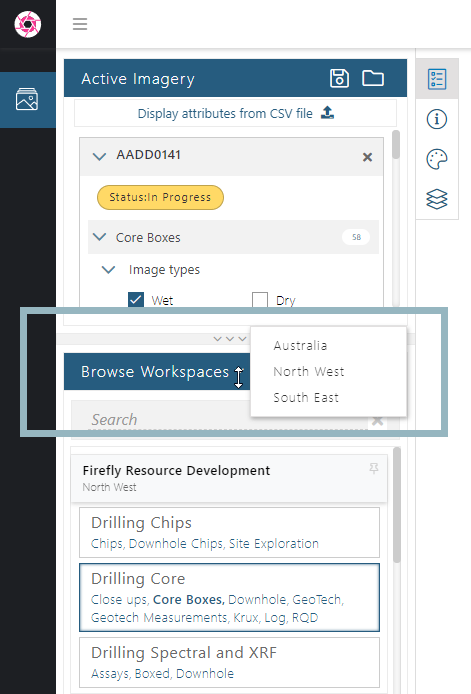
If you have an Imago Enterprise licence, you can create multiple workspaces and group them into workspace folders. That is the case for the Imago demo site, and by clicking on the Browse Workspaces title bar, you can view only the datasets in the selected workspace:
Workspace folders can be used to filter what workspaces are displayed in the workspace browser. For example, here two workspaces have been assigned to the South East folder (A) in the Admin Portal and they are the only ones listed in the workspace browser (B) when workspaces are filtered to show only those in South East:
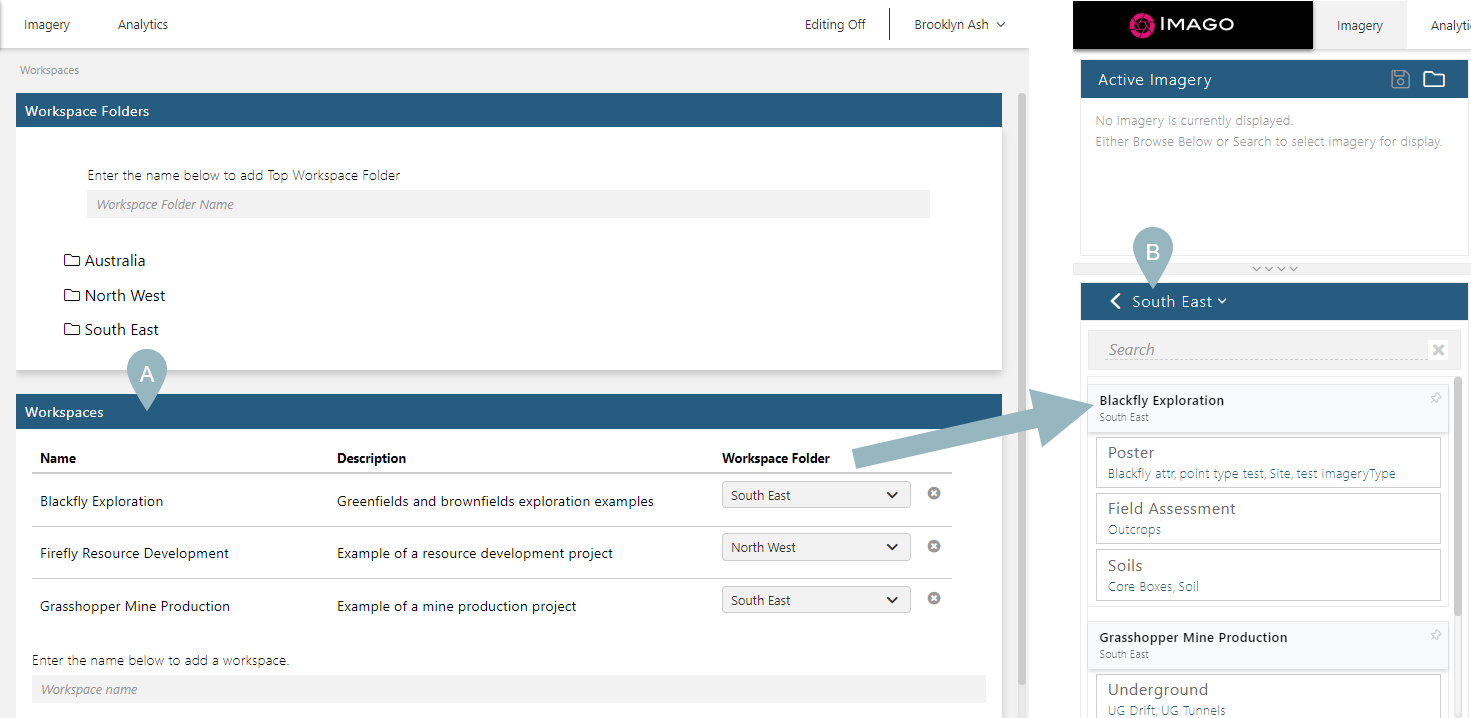
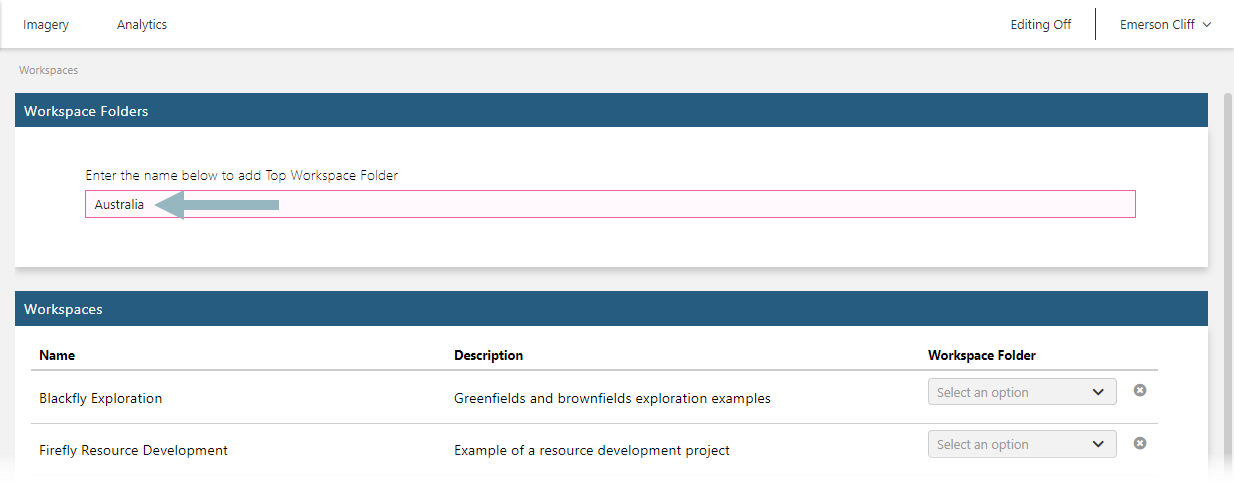
To create a workspace folder, enter a name for the folder in the box at the bottom of the Workspace Folders list and press the Enter key:
Each folder you create will be displayed in the Workspace Folders list (A) and you can then select which folder each of the defined workspaces will belong to (B):
Workspaces do not have to belong to a workspace folder.
Managing Workspace Users
A subscription’s users are set up in the Users part of the Admin Portal.
You can assign users to a workspace in two ways:
- From the Users list. See Assigning Users to Workspaces in the User Management topic.
- From workspaces themselves, in the Workspaces list. This is the process described below.
In the Workspaces list, click on a workspace, then on the Users button at the bottom of the workspace’s window.
Imago will load the list of users, divided into those who have already been assigned to the workspace and those who haven’t. Click the + sign for the user you wish to add to the workspace:
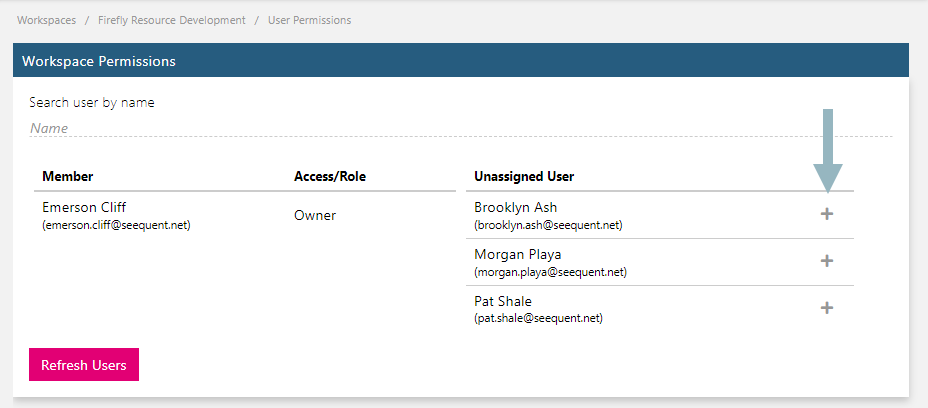
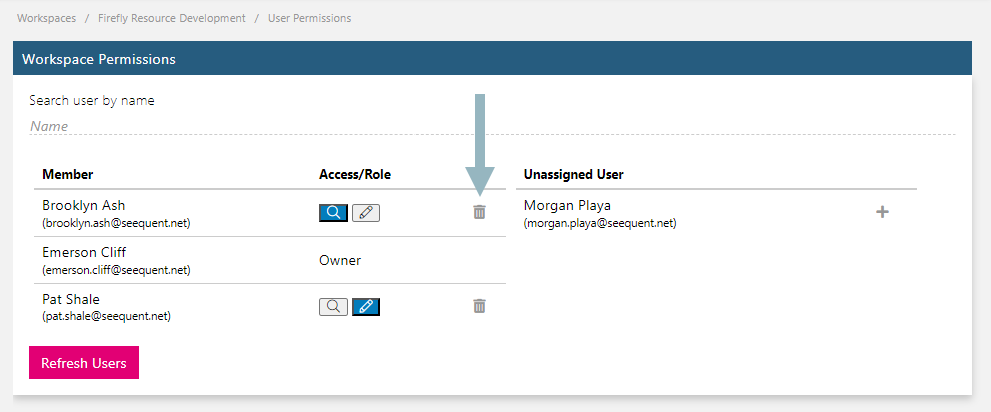
Once they have been added to the Member list, you can choose whether you want their role to be Viewer or Editor. For example, here Brooklyn Ash is a Viewer (A) and Pat Shale is a Editor (B):

If the list of members shows an assigned user as inherited, they are members of the workspace as the result of being part of an assigned user group that has been given access to that workspace. User groups are available for Enterprise subscriptions and are described inManaging Workspace User Groups (Enterprise Licence Only) below.
To remove a user from the workspace, click the delete button next to their name:
This does not delete them from the subscription; it simply removes them from the workspace.
Managing Workspace User Groups (Enterprise Licence Only)
If you have an Enterprise licence, you can use user groups to determine what users can access what workspaces. See the User Groups (Enterprise Licence Only) topic for an overview of user groups and their advantages.
To assign user groups to a workspace, click on the Groups button at the bottom of the workspace’s window.
Imago will load the list of groups already assigned to the workspace. To assign another group, pick from those available in the dropdown list:
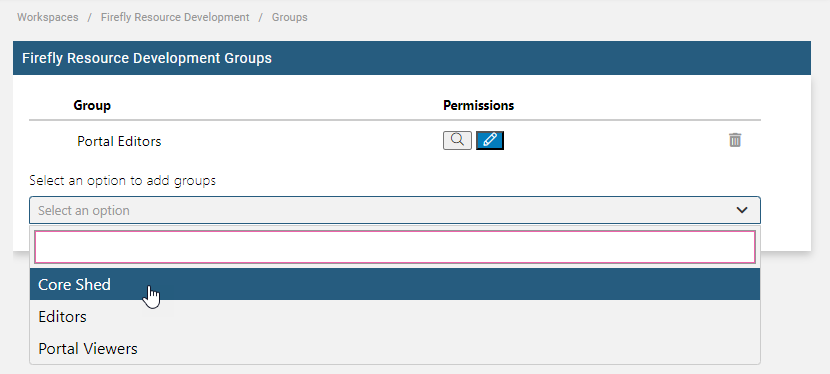
Once the group has been added to the list, you can choose whether you want the group members to be Viewers or Editors. For example, here the Core Shed group members are viewers (A) and the Portal Editors group members are editors (B):

To remove a user group from the workspace, click its delete button:

This does not delete the group from the subscription; it simply removes it from the workspace.
Got a question? Visit the Seequent forums or Seequent support
© 2025 Seequent, The Bentley Subsurface Company