
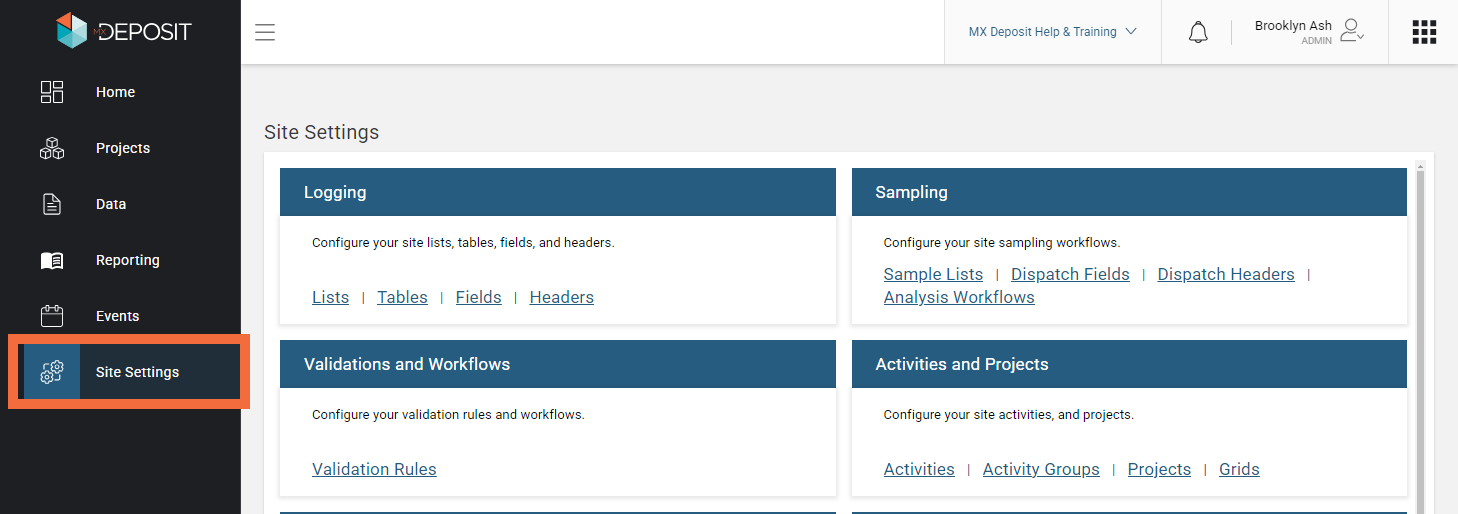
For MX Deposit Admins
This part of the help is for MX Deposit admins who are setting up teams and projects and configuring MX Deposit workflows for the wider team. All of this work is carried out from Site Settings page, which can be opened from the sidebar in MX Deposit:
The Site Settings page contains libraries of objects used in setting up the projects your team will be working in. The four libraries are:
- The Logging and Sampling collections are for building the sheets used in logging and sampling workflows. How to use these collections is discussed in the Logging Configuration and Sampling Configuration topics.
- Validations and Workflows collection are for building a validation process to help with data accuracy and reliability. See Creating Validations in the Validations topic.
-
With validations, you can build a validation process to help with data accuracy and reliability. This is done by creating validation rules in a formula creator and writing custom error messages for those rules.
- Activities and Projects collection relate to overall project definition and management, including what grid is used in a project and what team members have access to projects. See the Setting Up Projects and Assigning Users to Projects topics.
The collections under Integrations and Account relate to overall project definition and management. See the Integrations and Managing Users and Subscriptions topics and Collection Categories later in this topic.
The rest of this topic describes features common in the different collections in the Site Settings using Logging > Tables as an example. It is divided into:
Collection Filters and Properties
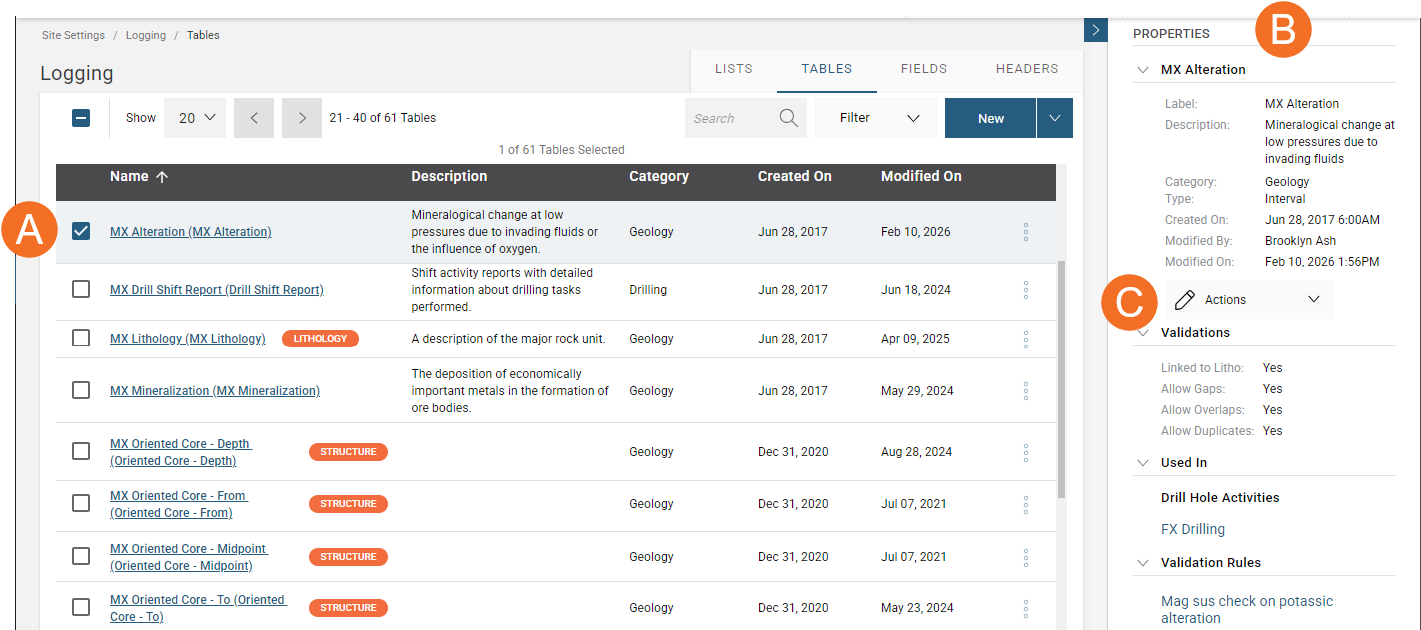
In the collection view, a summary of all the tables is displayed. You can sort by any of the column headers. Here, the Tables are sorted by the table Name:
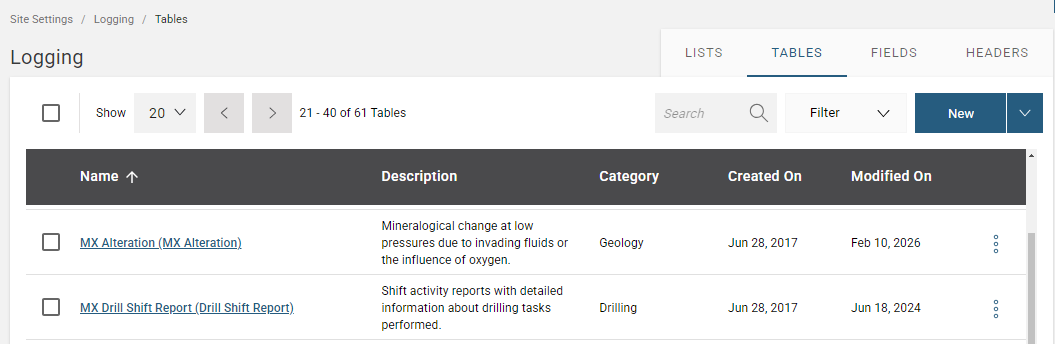
It is useful when creating a new table to include a description so you can see from the summary of tables what it is for.
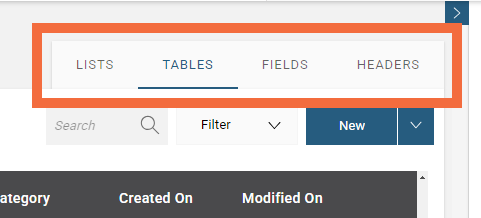
There are separate tabs for switching between the different collections in the Logging library:
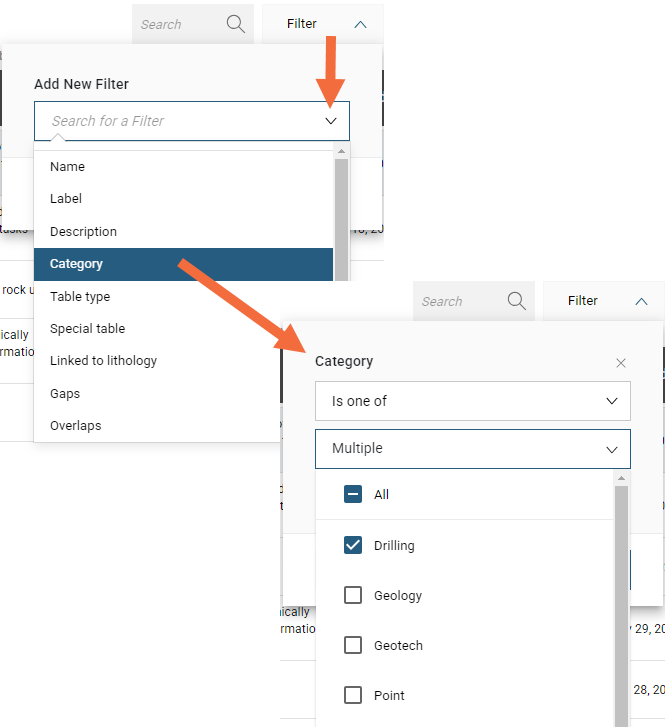
Collections can be filtered by characteristics of interest:
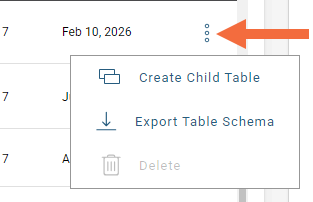
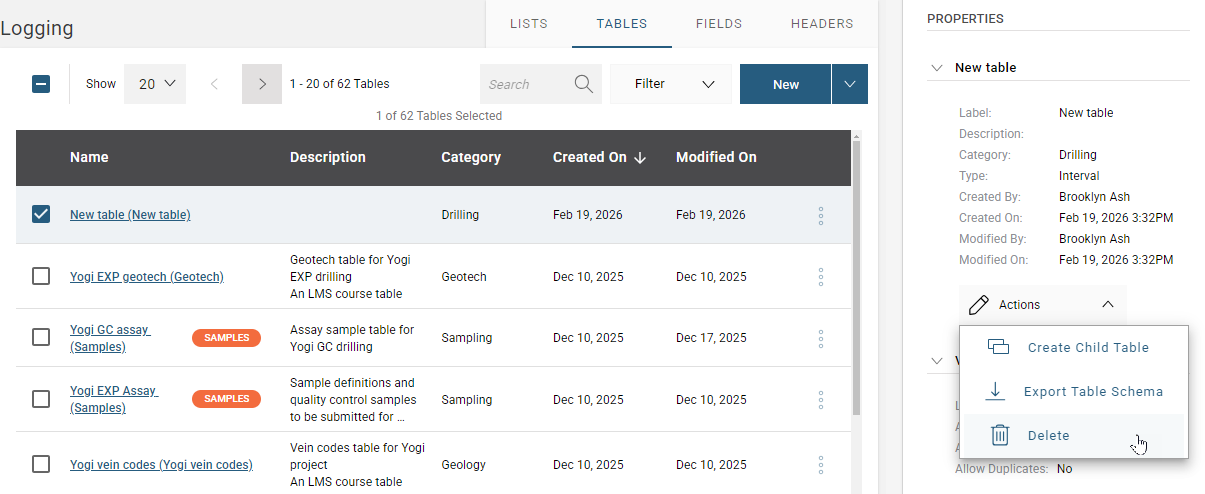
Select a table (A) to display its details in the Properties panel (B). The Actions menu (C) in the Properties panel includes the commands available for a table:
The same options can also be accessed from the overflow menu.
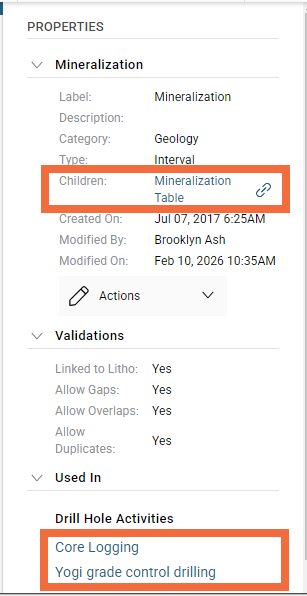
Where there are links to other items in your account, you can click through to the linked item from the Properties panel. Here, there are linked child tables and activities where this table is Used In:
Collection Categories
You can organise collections into categories, which can, over time, be helpful in organising your site.
Collections that can be organized into categories are:
- Activities
- Dispatch headers
- Headers
- Lists
- Tables
- Validations rules
To create a new category, go to Site Settings > Account > Categories and click New:
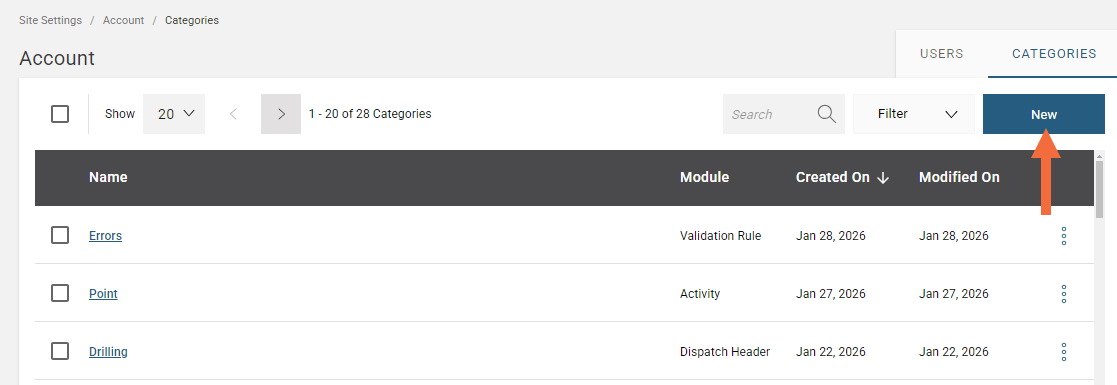
In the Add Category window, give your category a name and select the Module it will apply to. More than one module can be selected. In this example, the category will be available to lists, tables and activities.
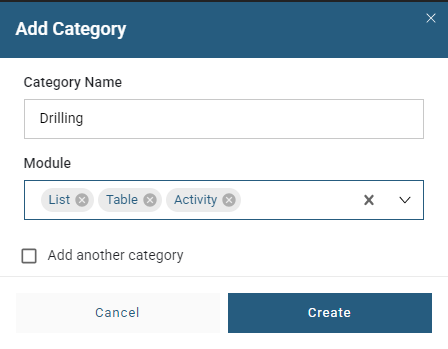
Enable Add another category if there are additional categories to create.
Click Create; the newly added category will be available as an option to select for the modules it applies to.
Creating New Items
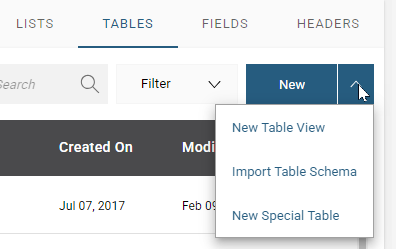
In each collection, there is a button you can use to create a new item for that collection. You can click on the button to simply start creating a new item, or on the dropdown list to view other options:
When creating new items, MX Deposit will step you through the process, with progress shown in the bar along the top of the window. In this example, the table builder shows the different steps in creating a table:
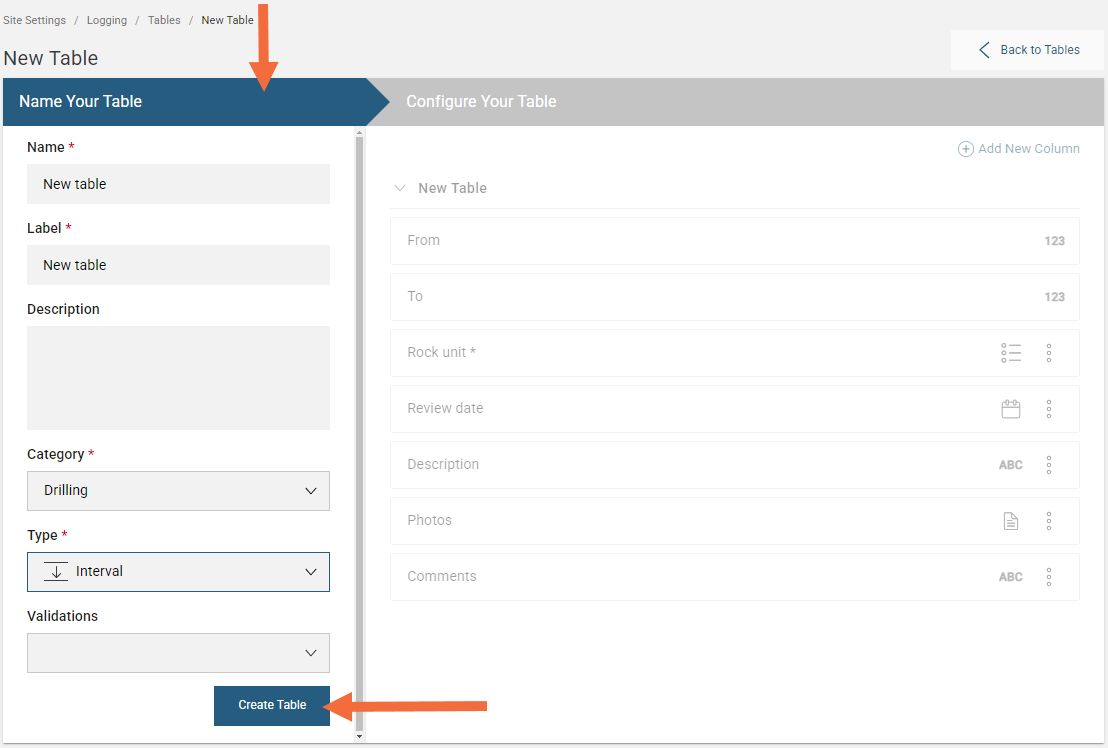
When you have finished defining the table and you are ready to add columns, click Create Table. From this point onward, any changes you make will be saved automatically.
Deleting Items
Any item in a collection can be deleted as long it is not used elsewhere in MX Deposit.
To delete an item, use the Actions menu in the Properties panel:
You will be asked to confirm your choice.