Creating Workspaces and Datasets
In an Imago subscription, a workspace is the highest level of organisation. Once you have defined a workspace, you can start defining datasets for the workspace that will be used to group collections of captured imagery. You can then add imagery types to the dataset.
This topic describes how to set up a workspace, create a new dataset and add imagery types to that dataset. It is divided into:
- Adding a New Workspace
- Adding a New Dataset
- Adding Imagery Types to the Workspace/Dataset
- Learning More
- Next Steps: Adding Users and Assigning Them to Workspaces
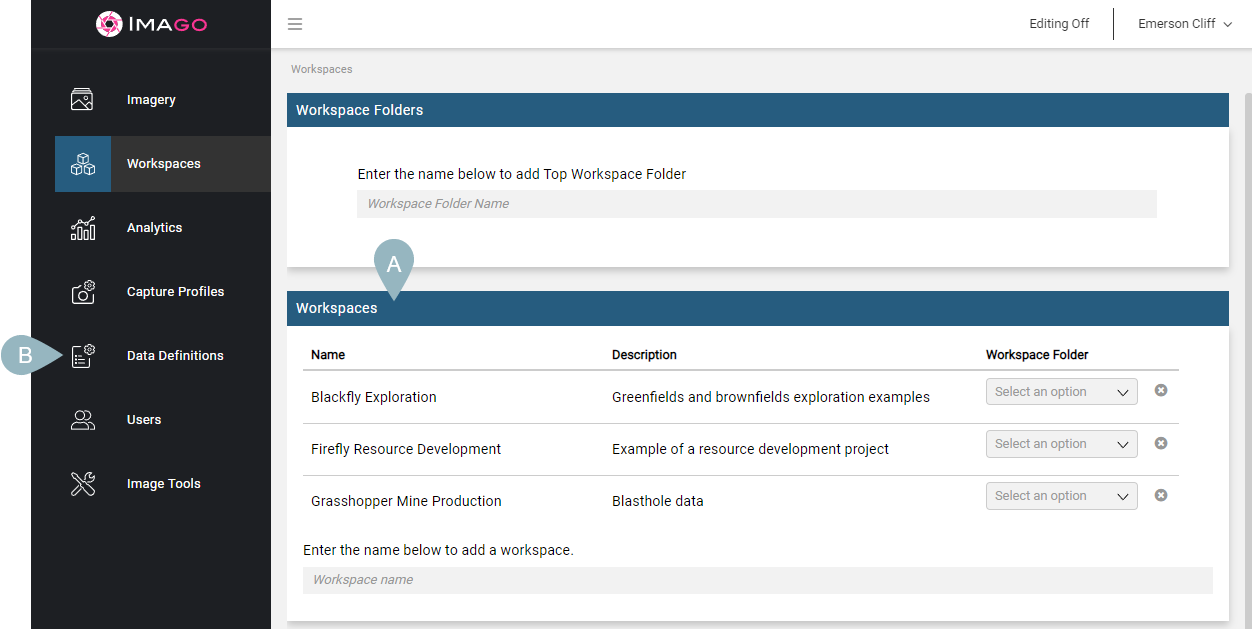
In an Imago subscription, workspaces contain datasets that store collections of images. Workspaces and datasets are configured in the Workspaces part of the Imago Admin Portal, which you can access from the main Imago Portal by clicking on My Workspaces in the user ID menu. This opens the Workspaces window, which you can come back to from the sidebar (A) while you are working in the Admin Portal.

If you have an Imago Enterprise licence, you can create multiple workspaces and group them into workspace folders. In that case, there will be two lists in this window, the Workspace Folders list (B) and the Workspaces list (C). If you do not have an Enterprise licence, you will only have the Workspaces list.
Adding a New Workspace
Workspaces are often named for a region, locale or project.
To add a new workspace, enter a name in the box at the bottom of the Workspaces list and press the Enter key:

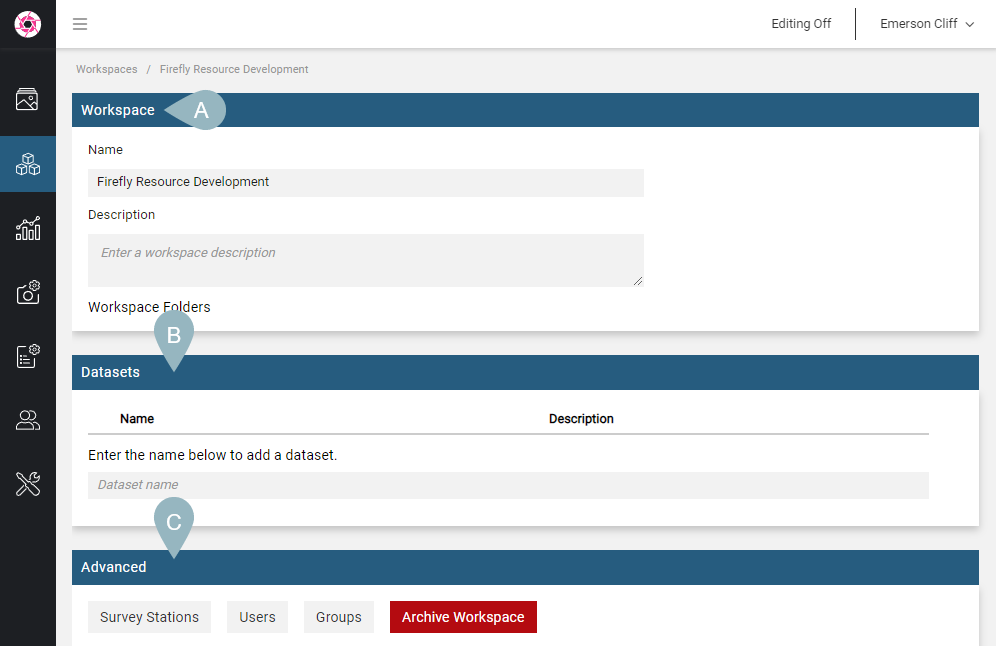
Pressing the Enter key or clicking outside the text box creates the workspace and opens a new page, which is organised into information about the workspace (A) and a list of datasets that belong to the workspace (B), which is empty at this point. The series of buttons along the bottom of the window (C) are options for managing the workspace.

You can change the workspace name and enter a description, if you wish.
Adding a New Dataset
Datasets group collections of captured imagery and so often are named for the sampling or operation type, e.g. diamond drilling, RC drilling, drill site inspections, stockpile inspections, dig face inspections, etc.
Once you have defined a workspace, you can start defining your datasets. To do this, enter a name in the box at the bottom of the Datasets list and press the Enter key:

The new dataset will be added to the list:

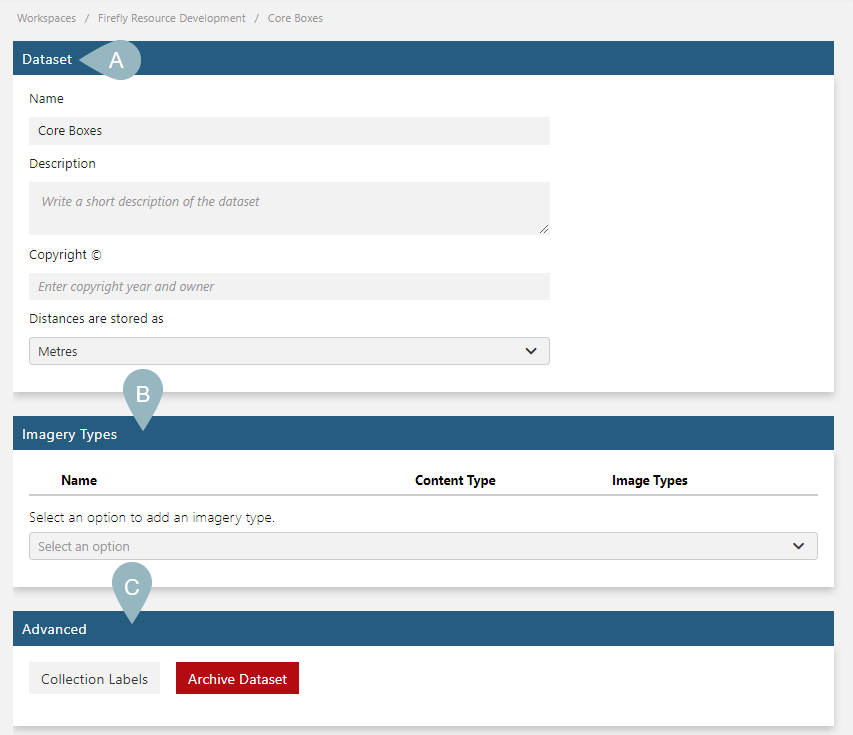
Click on the dataset in the list to set its basic information. This opens a new window that is organised into information about the dataset (A), a list of imagery types the dataset will be using (B) and buttons along the bottom of the window (C) for using labels with the dataset and archiving/deleting the dataset.

Adding Imagery Types to the Workspace/Dataset
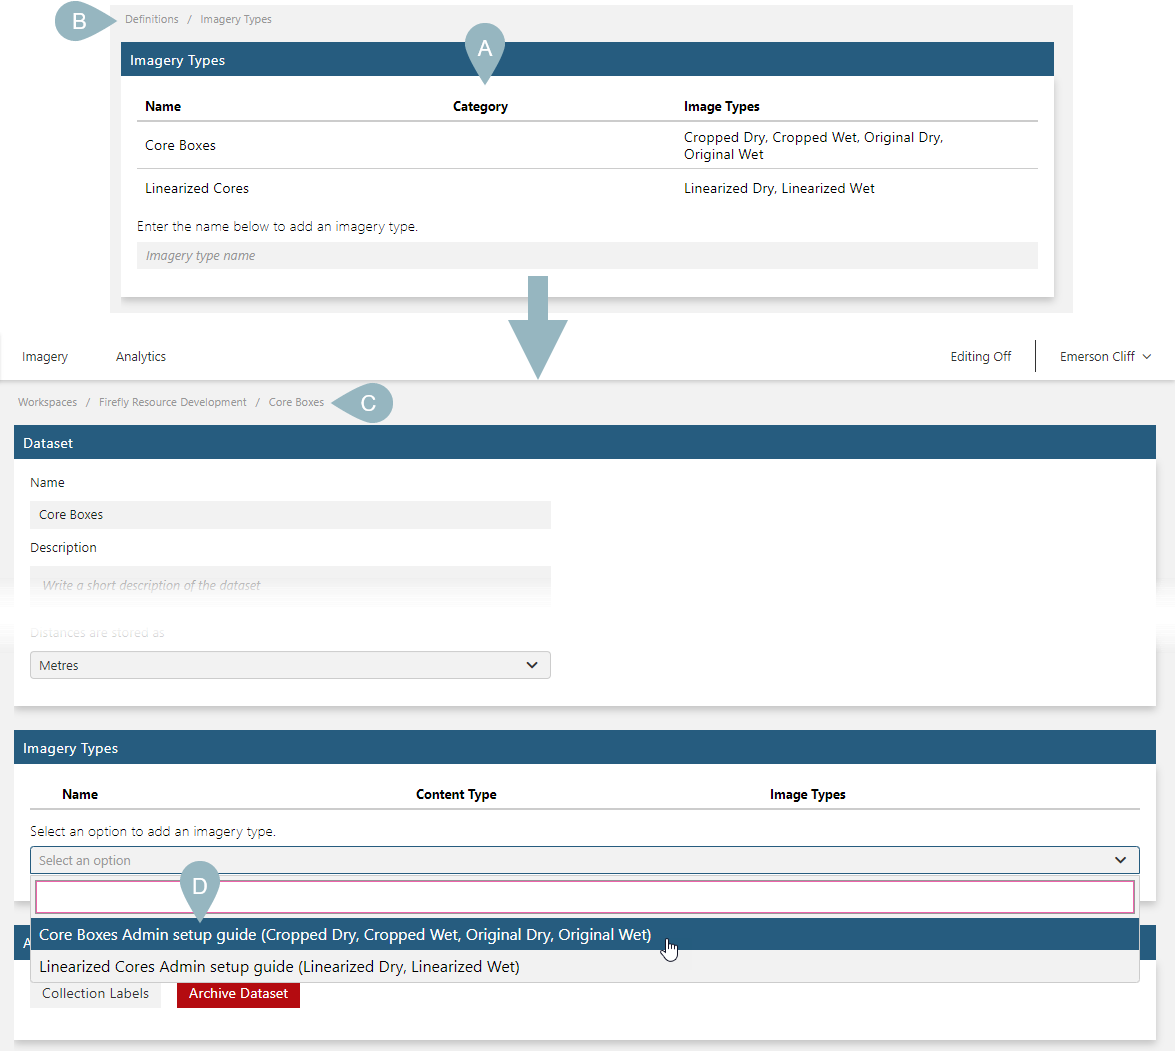
From the dropdown imagery type box, you can select from any of the imagery types defined for your subscription.

If you define categories (A) for your imagery types (B), they will be displayed in the dataset window (C) when displaying the list of imagery types D.

This will help you distinguish between your different imagery type definitions over time.
Once you have added the imagery types you wish the dataset to use, your list will show the content types A and image types B in use:

Learning More
To learn more, see the following topics in the Admin Reference Guide:
Next Steps: Adding Users and Assigning Them to Workspaces
Once a workspace/dataset has been defined (A), we can add users to the subscription and assign them to workspaces:

This is described in the Adding and Managing Users topic.
Got a question? Visit the Seequent forums or Seequent support
© 2025 Seequent, The Bentley Subsurface Company
