
Creating a New Activity
An activity is built by adding logging and sampling elements already defined in your MX Deposit library, then customising these elements to suit the activity. Building an activity involves:
- Adding a header and tables for the loggers to fill out. This is described in Configuring Logging for an Activity.
- Adding sampling elements which data managers will fill out for managing samples to and from the lab. This is described in Configuring Sampling for an Activity and Using Ranked Columns.
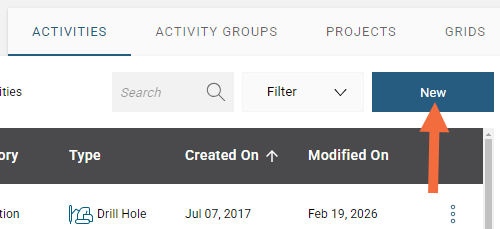
To create an activity, select New in the Activities collection.
Choose the activity Type, either drill hole or point, give your activity a Name and choose what Category you want it to be in. You can add a Description; as your collection of lists grows, the description can help you know at a quick glance what this activity is for.
When you select a drill hole activity type, you can optionally include a Target Depth and specify how a negative survey dip is to be treated.
By default, MX Deposit assumes that negative dip values point up. If this is not the case, enable Negative survey dip points down.
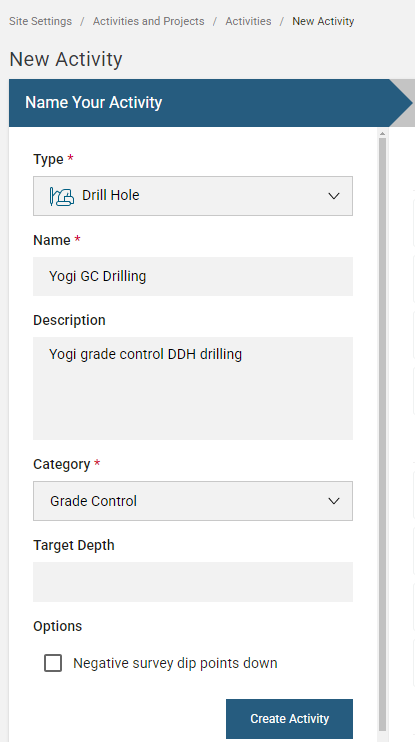
When you have finished, click Create Activity to save and continue configuration. From this point onward, any changes you make will be saved automatically.
Configuring Logging for an Activity
The header and tables used by loggers are set up once the initial parameters of the activity are defined.
There is also an option in this window to define groups who can access the different logging tables. This is optional; it is a way of achieving finer control over who has access to what data during the logging process. See Defining Activity Groups for more information.
The activity builder shows the tables expected. There are spaces for a Header, a Lithology table, a Samples table and a Survey table:
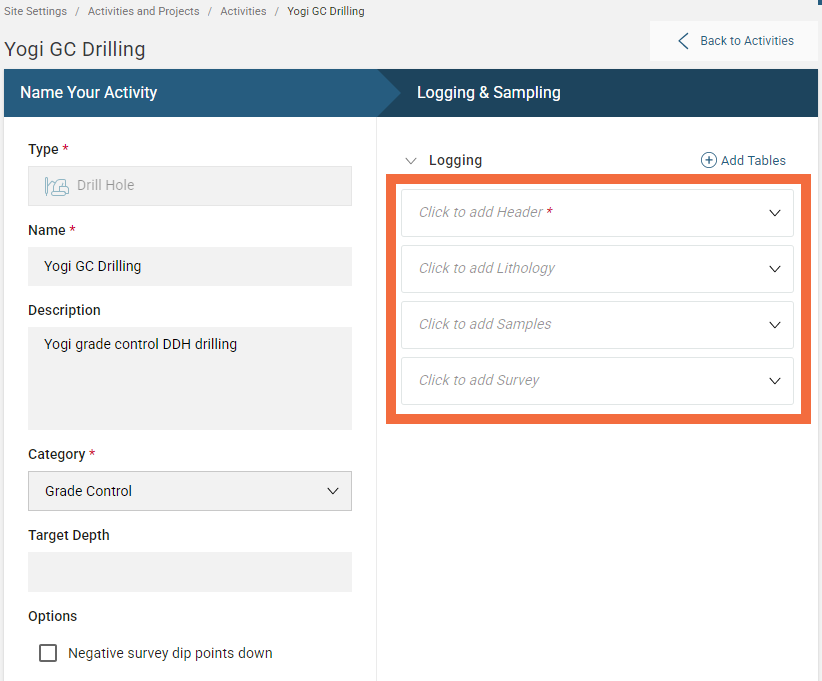
Click on a space to select a table from the drop down menu.
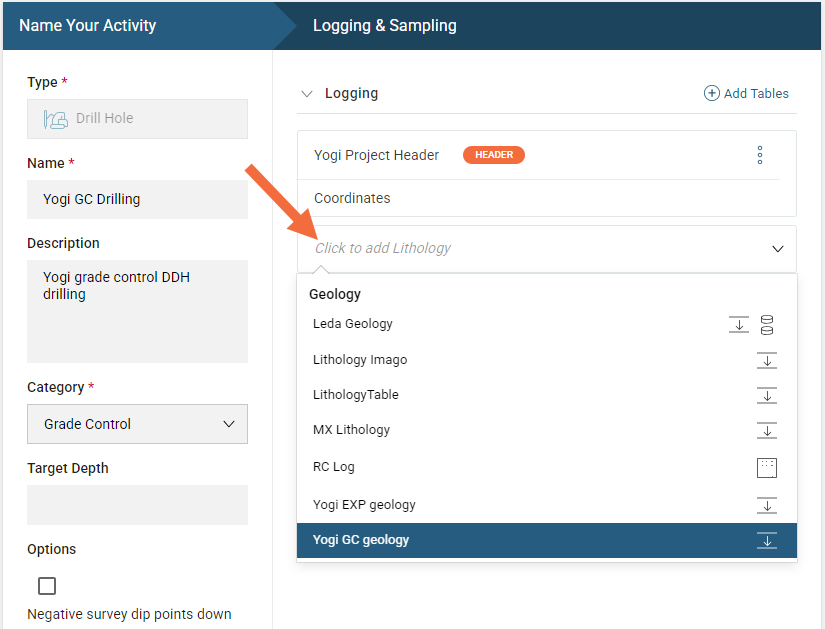
The tables displayed when you click on a space will be the special table types available for that space.
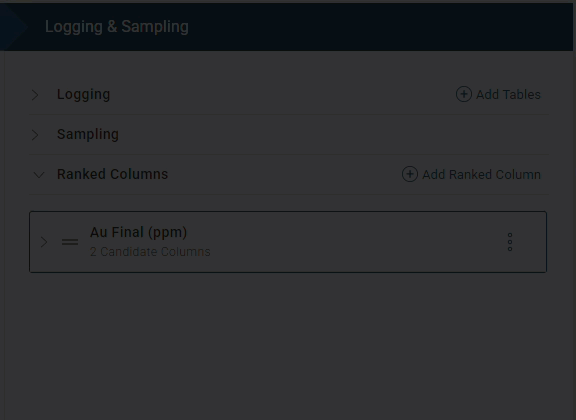
Once you have added a samples table, the Sampling and Ranked Columns sections will appear. It is not necessary to add a samples table. See and for more information on setting up these sections in your activity.
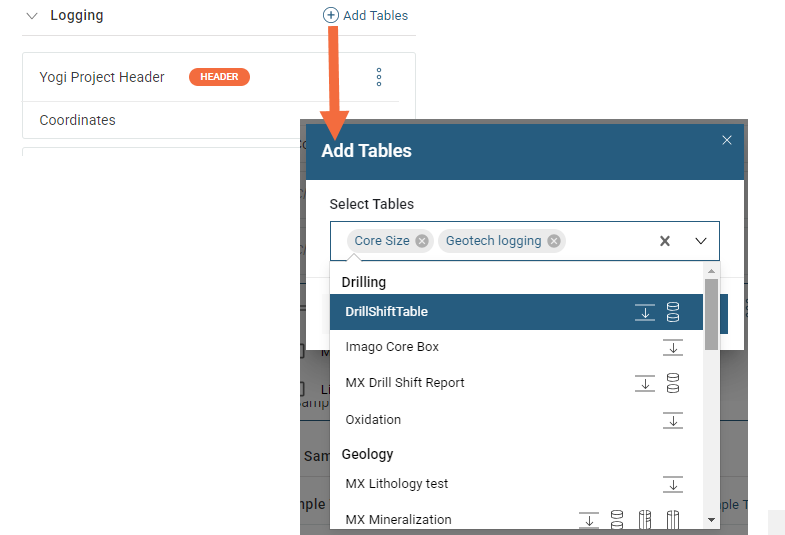
You can add more tables to your activity by selecting the Add Tables option; the tables are organised into the different table categories. Here, multiple tables are selected:
For each table you have added to the activity, there are settings you can change to customise how those tables and the lists within the tables are used in the activity. See the following topics for more information:
Once you have set up the logging tables, you can either:
- Assign one or more activity groups to different logging tables. This is optional; it is a way of achieving finer control over who has access to what data during the logging process. This is described in a separate topic, Defining Activity Groups.
- Move on to configuring sampling for the activity. Configuring Sampling for an Activity is described below.
Configuring Sampling for an Activity
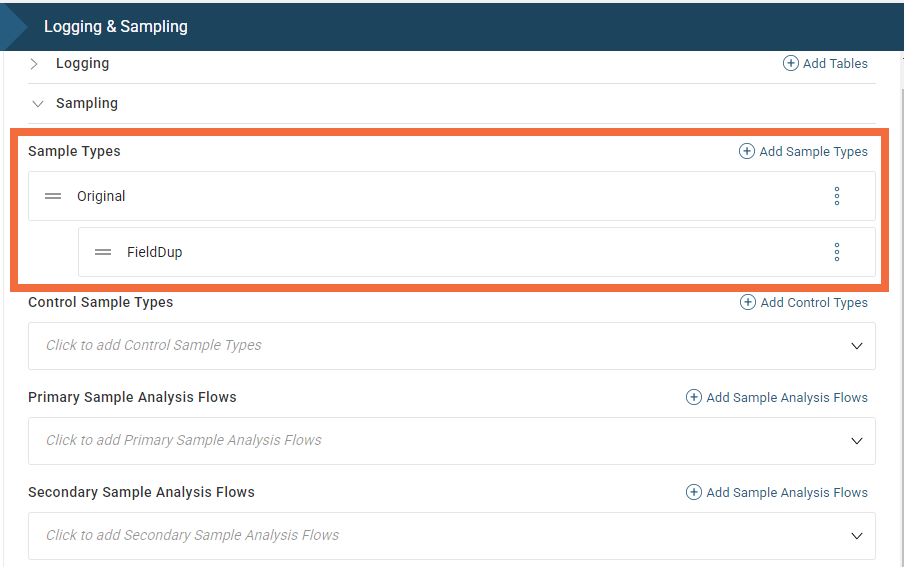
Once you have added a sample table in the Logging section of your activity, a Sampling section will appear below it.
The activity builder shows the sample elements expected. There are spaces for Sample Types, Control Sample Types and Primary and Secondary Sample Analysis Flows:
Adding Sample and Control Types
Click on an empty space to add sample types.
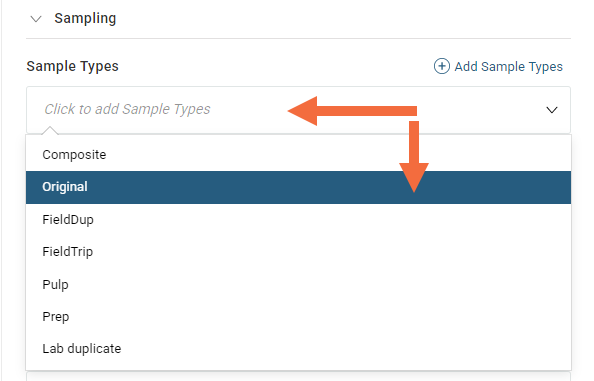
If the sample type you wish to use is not available, you can create a new sample type. See Sample Types in the Sample Lists topic for more information on how to do this.
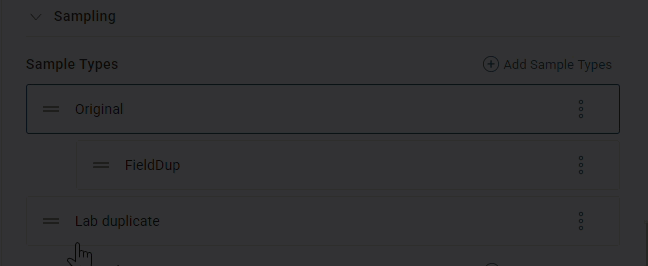
You can nest a sample type by selecting Add Child Sample Type from the overflow menu:
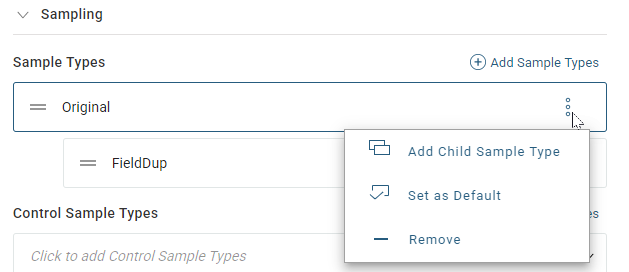
In the above example a FieldDup sample type was added; this allows the logger to log field duplicates. The field duplicate is nested below the Original sample type. This will mean the logger can only take field duplicates from an original sample type. The field duplicate will inherit properties from the original and it also associates a parent sample number.
You can also drag and drop the sample type to nest or reorder it:
In the same way, click the empty space to add control sample types. You can also select Add Control Types to add your reference material. In the window that appears, you can add multiple control types at once. You can search by scrolling or typing to dynamically filter as you type. Here we have added a blank and some standards:
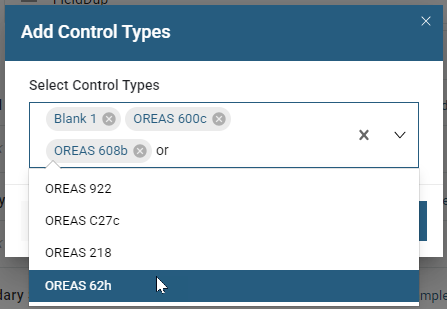
Click Add to add the control sample types to the activity.
Adding Sample Analysis Workflows
It is not required to use a sample analysis workflow. If you choose to add one, click on the empty sample analysis flow space to display the available options to choose from.
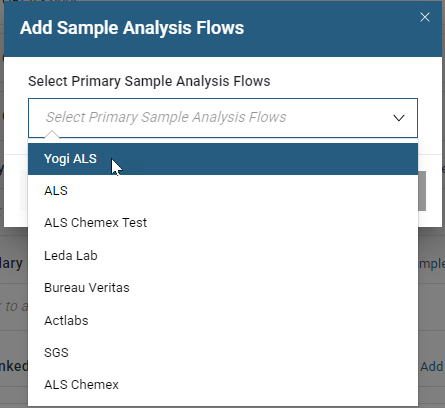
Each analysis workflow would normally represent a different laboratory. You can have multiple primary workflows and multiple secondary workflows, although it is recommended to use just one or two.
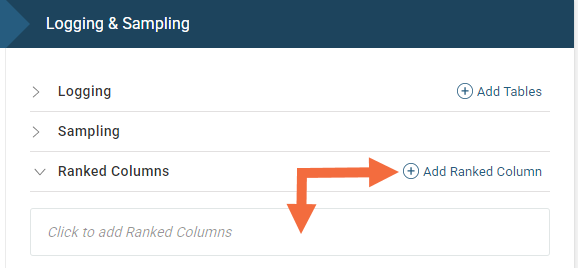
Using Ranked Columns
After you have added the sample analysis workflows to the activity, you can then configure one or more ranked columns based on those analysis workflows.
Ranked columns can be used to, for example:
- Specify a final value for a sample result. This gives you the ability to reconcile results coming from different methods or even different labs.
- Set the order in which results should be considered to derive a final value. For example, you can set over-limit methods with a higher rank than regular methods, such as setting gravimetric results over atomic absorption results.
- Specify the desired output unit of measure for the ranked result. Once specified, MX Deposit will do the required unit conversions automatically. For example, you can specify that you want any results received as ppm to be displayed as percentage.
This topic describes how to use ranked columns when configuring sampling for activities. It is divided into:
Creating Ranked Columns
To add a ranked column click on the open space or select Add Ranked Column
In the window that appears give your ranked column a name and select the desired unit of measure for this ranked result. The selected unit of measure will determine the list of available candidate columns as only convertible results can be considered.
Next, select one or more candidate columns to be considered when determining this ranked result. The list of results shown for you to choose from represent the expected results that are part of the sample analysis workflows added to this activity.
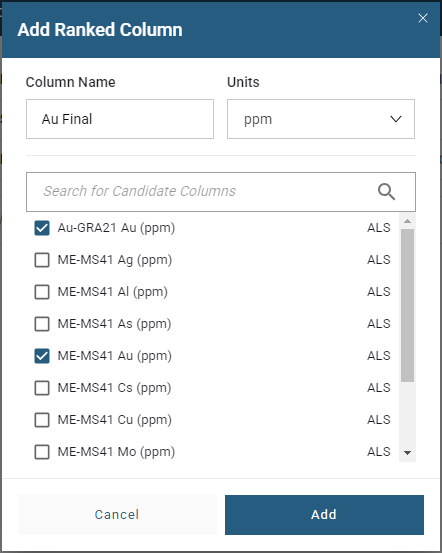
Select Add to create the ranked result column.
Changing Ranking, Editing or Removing Ranked Columns
To edit a ranked column, select Edit from the overflow menu of the ranked column.
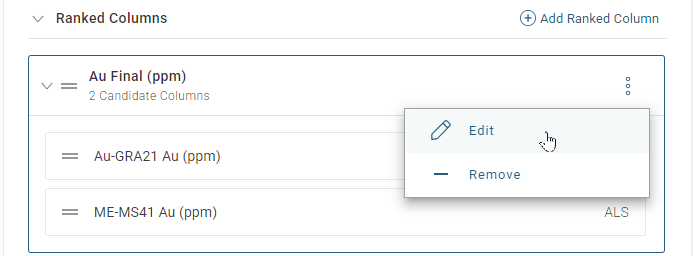
To change the ranking expand the ranked column and change the ranking by using the column handles to reorder the ranking to what is needed.
The ranking works top down where the highest ranking results are at the top.
To edit or remove ranked column select Remove from the overflow menu. You will be asked to confirm your choice.