
Defining Imagery Types
The best approach to setting up your Imago subscription is to first define the imagery types for the images your team will be collecting. This topic describes that process and is divided into:
- Overview of Imagery Types in Imago
- Imagery Types Checklist
- Setting Up a ‘Core Boxes’ Imagery Type
- Setting Up a Linearised Imagery Type
- Learning More
- Next Steps: Adding Imagery Types to Datasets
In the examples used in this guide, data is organised to mimic the setup of the Imago demo site. Click here to view the Imago demo site. This will open the Imago Portal with the demo dataset displayed.
Overview of Imagery Types in Imago
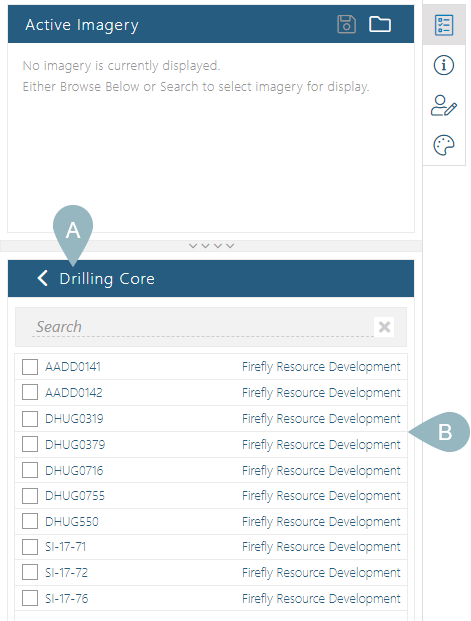
Collections of captured images are organised into different imagery types that contain one or more image types. We can see this when we select a collection in the Imago Portal; for example, here in the demo dataset, we can see that the Drilling Core dataset (A) has collections (B) that are individual drillholes, e.g. AADD0141, AADD0142:
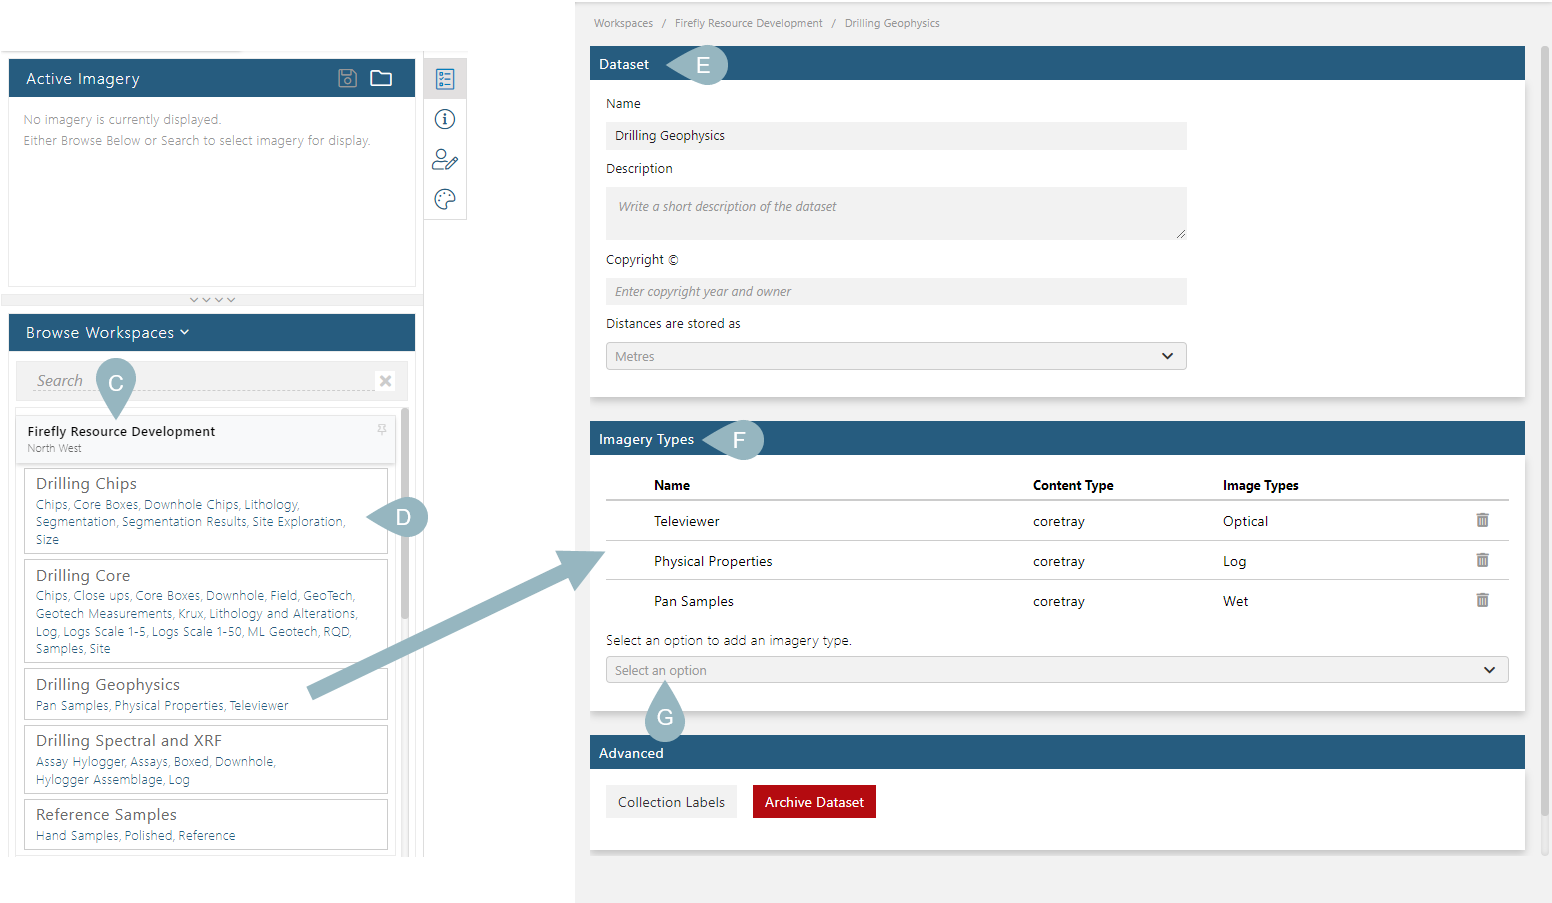
Going back in the workspace browser, we can see that the Firefly Resource Development workspace (C) contains five datasets, called Drilling Chips, Drilling Core, Drilling Geophysics, Drilling Spectral and XRF and Reference Samples, and the different imagery types (D) each dataset contains. On the right is the page in the Imago Admin Portal where the Drilling Geophysics dataset (E) is defined. The imagery types already assigned to the dataset are listed (F), together with a dropdown list (G) that can be used to add other imagery types to the dataset.
Imagery types can also be used to capture additional data such as assay and lithology data that can then be alongside images.
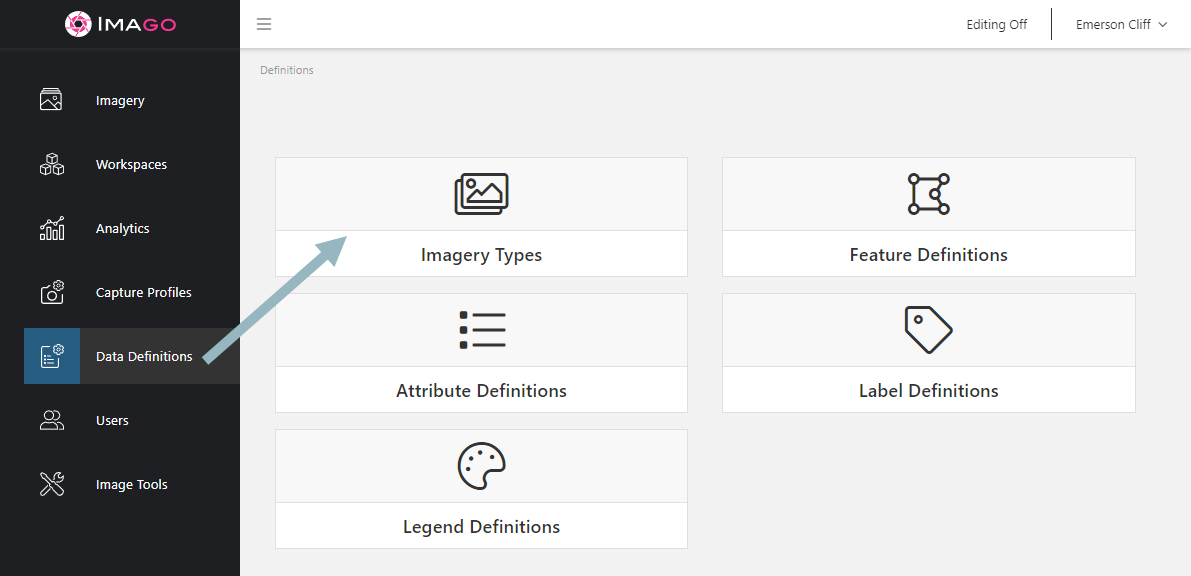
In the Imago Admin Portal, imagery types are set up in the Definitions window:
Clicking on Imagery Types opens the list of imagery types that have been defined for a subscription. For example, here we can see the list of imagery types (A), including three that are used by the Drilling Geophysics dataset (B):

The Category column in the Imagery Types table does not indicate which workspaces/datasets are using that imagery type. Category is an optional field that can be set for each imagery type, which, long term, may be useful in distinguishing similar imagery types set up for different workspaces/datasets.
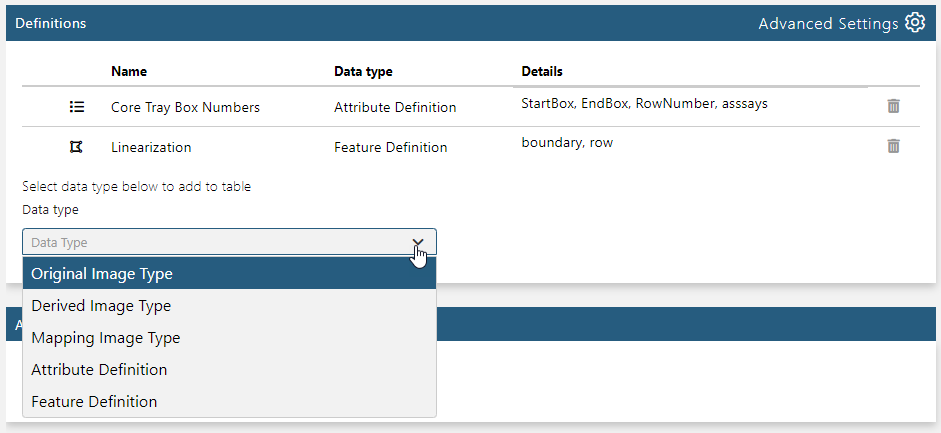
The box at the bottom of the Definitions > Imagery Types window (C) is used to start defining a new imagery type. Entering a name and then pressing the Enter key opens a window in which you can set up the image and data types that belong to the imagery type. See Setting Up a ‘Core Boxes’ Imagery Type below for detailed information on using this page to set up an imagery type.
In the Definitions > Imagery Types list, clicking on an imagery type displays more information about it in a page that is divided into three parts:
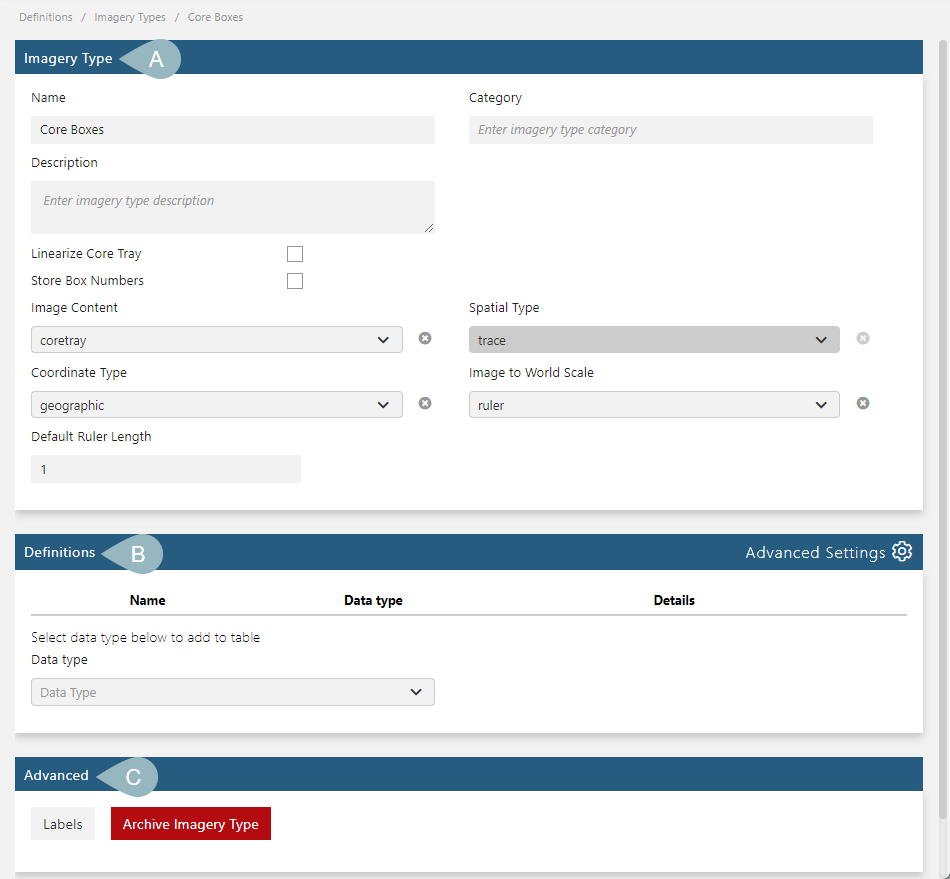
The first part (A) contains basic imagery type settings; these settings are described in Defining Imagery Types below.
The Definitions list (B) shows the different data types that are collected for an imagery type.
The data types we will focus on in this guide are original images and derived images.
The Advanced part of the imagery type window (C) is not discussed in this guide, but it is important to note that Archive Imagery Type deletes the imagery type from your subscription, which you will not be able to do if the imagery type is used by any datasets.
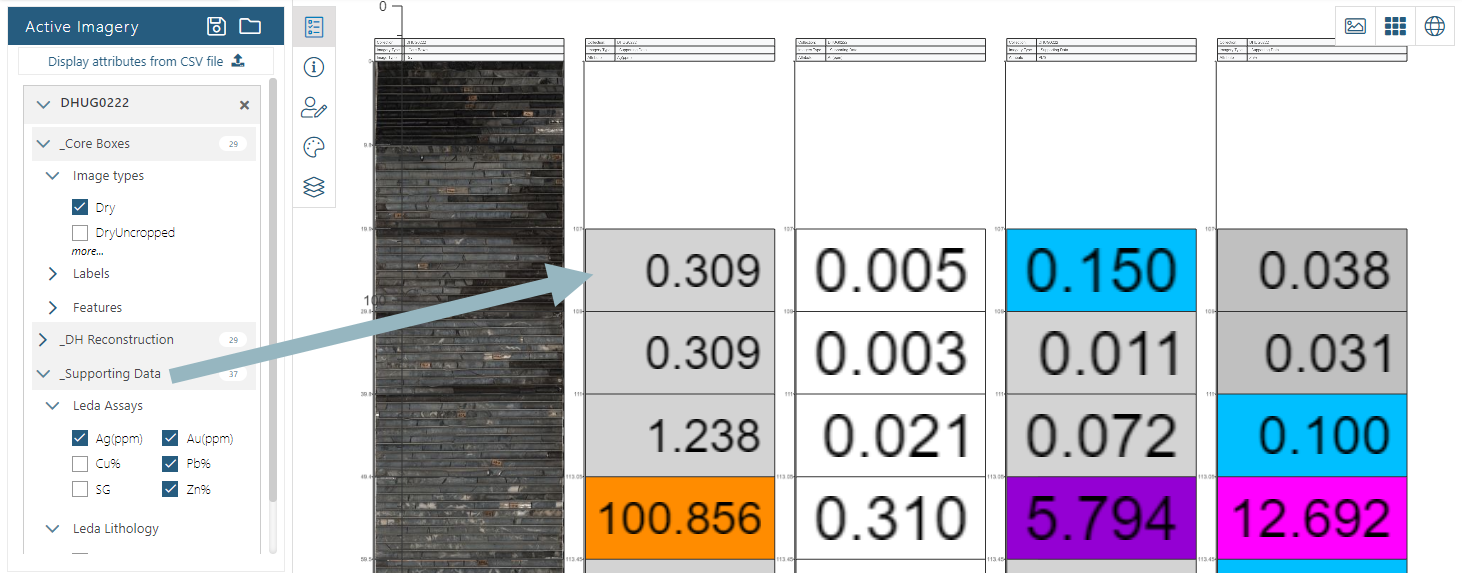
Before we start discussing the details of setting up imagery types, it is important to understand how the Definitions list determines the information that is collected when imagery is captured and that is displayed in the Imago Portal when working with captured imagery. This example from the Imago demo site shows the Definitions list for an imagery type called Downhole (A). In the Imago Portal’s Active Imagery panel (B), we can see how each definition appears, as an image, attribute or feature that can be displayed:

Attributes and features are used to collect more information about captured images, but are not discussed in detail in this guide.
Imagery Types Checklist
Before setting up an imagery type, it’s a good idea to list what image types will be needed. For example, if you’re setting up a Core Boxes imagery type, you could be capturing both dry and wet images and you will need to create image types for each. In addition, if you’re applying a cropping template to images, image types need to be defined for those, too.
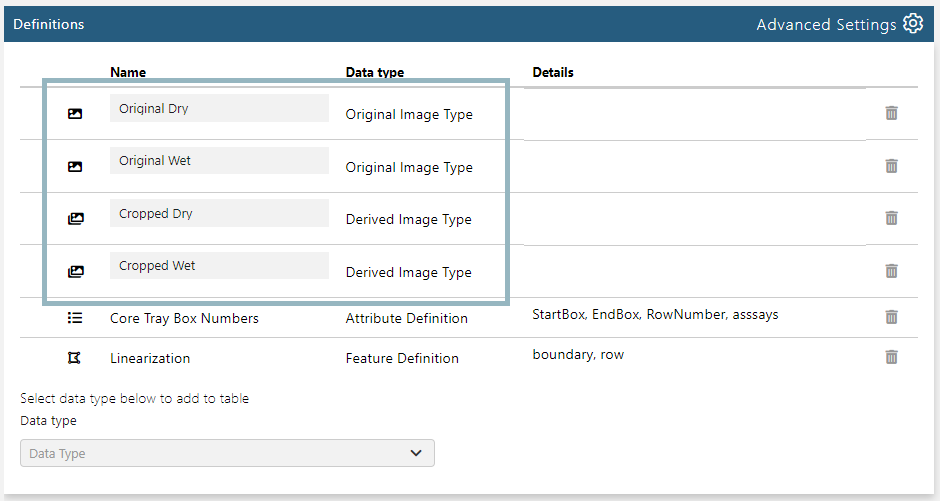
For the Core Boxes example below, the imagery type definition will cover both dry and wet images and original and cropped images. This means we need to define image types we will call:
- Original Dry
- Original Wet
- Cropped Dry
- Cropped Wet
Imago uses the term “original” for raw, unedited images. The term “derived” is used for images that are derived from an original image, such as images to which a cropping template has been applied or images that are linearized from a series of original images. So although for the set of image types above only two actual images will be captured, we need to define four image types.
Note also which image types you want downhole reconstructions for, as a separate imagery type will be required.
Setting Up a ‘Core Boxes’ Imagery Type
The process of setting up an imagery type starts in the Definitions page in the Imago Admin Portal. From the main Imago Portal, click on either My Workspaces or My Account in the user ID menu. Then click on the Definitions > Imagery Types. If your Imago subscription is new, this list is likely empty. In the box at the bottom of the list, enter a name for the new imagery type, which in this example is ‘Core Boxes’:

Pressing the Enter key or clicking outside the text box creates the imagery type and opens a new page, which is divided into the three parts described in Overview of Imagery Types in Imago.
Your imagery type does not need a Category or a Description, but over time, you may find setting these fields useful for distinguishing imagery types from one another.
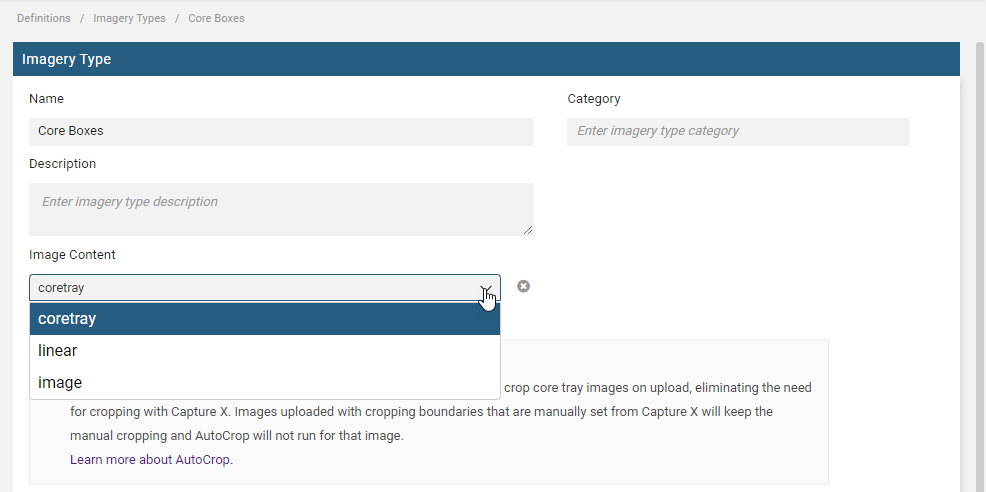
There are three options for Image Content, and the default, coretray, is the right option for this Core Boxes imagery type.
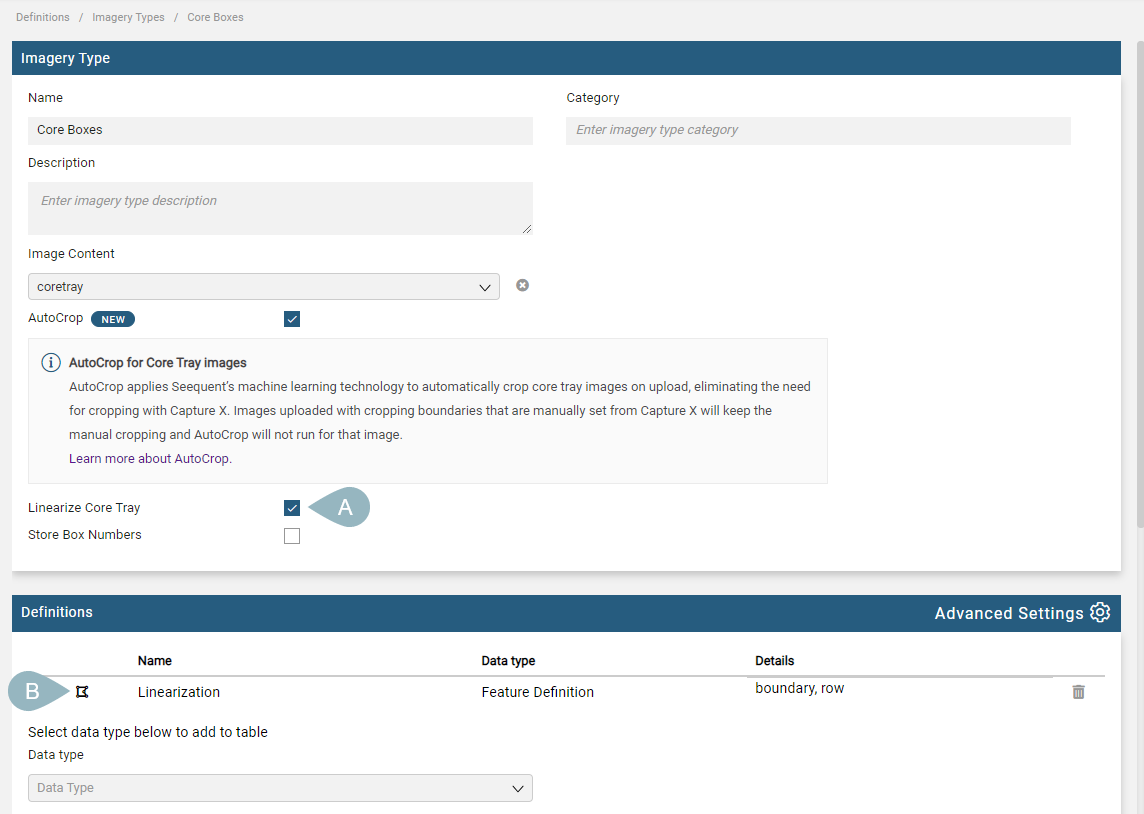
The coretray option has two additional settings, Linearize Core Tray and Store Box Numbers that are not available for the linear and image options.
When the Linearize Core Tray option is enabled, a downhole reconstruction will be made using the original captured images. Those downhole reconstructions need to have their own imagery type defined, which we will describe in Setting Up a Linearised Imagery Type later in this topic.
Note that enabling Linearize Core Tray (A) results in a Feature Definition being added to the Definitions list (B):
There are other settings required to create the downhole view; these are discussed in Setting Up a Linearised Imagery Type and Adding the Linearized Option to the Core Boxes Imagery Type below.
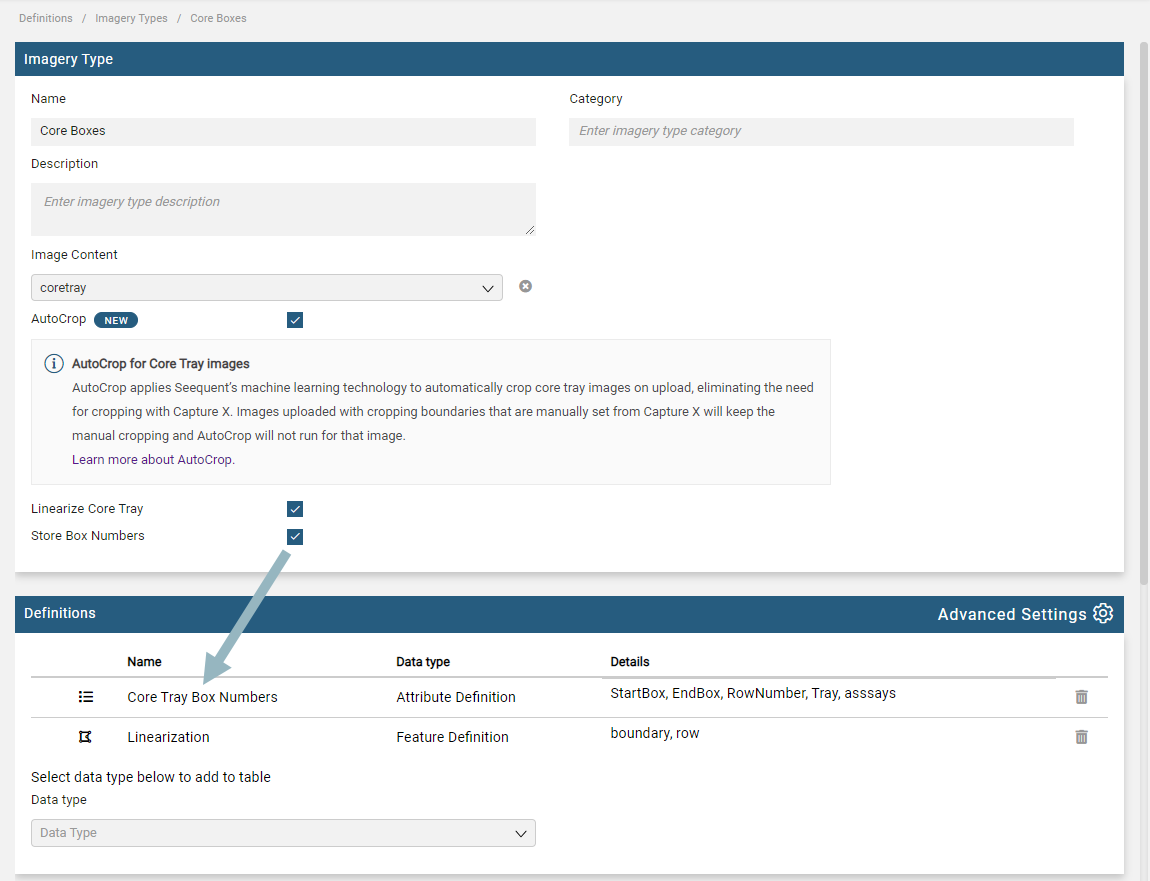
When Store Box Numbers is enabled, each box number will be saved. Again, enabling Store Box Numbers adds another item to the Definitions list, this time an attribute:
Next we need to define the image types that will be in collections that use the Core Boxes imagery type.
To define the first, which we’re calling Original Dry, select Original Image Type from the Data type dropdown list:
Enter the name you’re using for the image type and either press the Enter key or click outside of the text box.
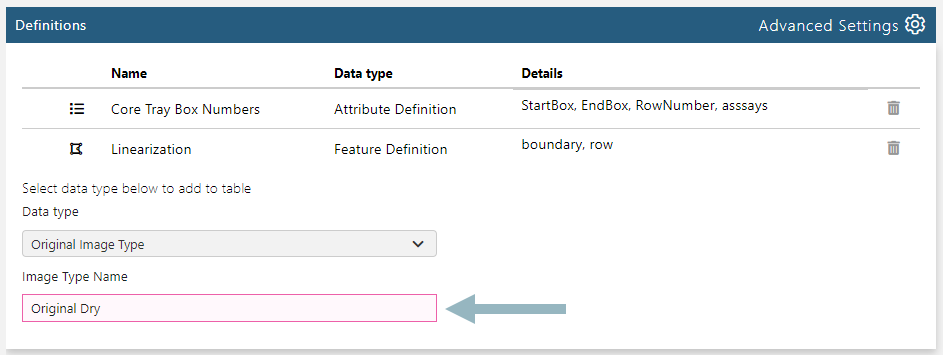
The image type will be added to the Definitions list (A):

There are two ways to view the Definitions list; clicking Advanced Settings (B) gives you more options, including the Linearise To option that we will discuss once we have define a linearised imagery type.
If you’re going to capture wet imagery, add another Original Image Type and name it accordingly.
For cropped images, use the Derived Image Type option.
The cropped images will be derived from the original images, so it is necessary to specify which original images are related to which derived images. To do this, click on Advanced Settings. For each of the original image types, there is a Crop To setting. Set this to the corresponding cropped imagery type for each original image type:

There is nothing more to do in the Core Boxes imagery type page until the linearised imagery type has been defined. Then we can come back to the Core Boxes definition.
Setting Up a Linearised Imagery Type
When setting up an imagery type that has Image Content set to coretray, there is a Linearize Core Tray option that, when enabled, creates a downhole reconstruction using the original images captured. Those downhole reconstructions need to have their own imagery type defined.
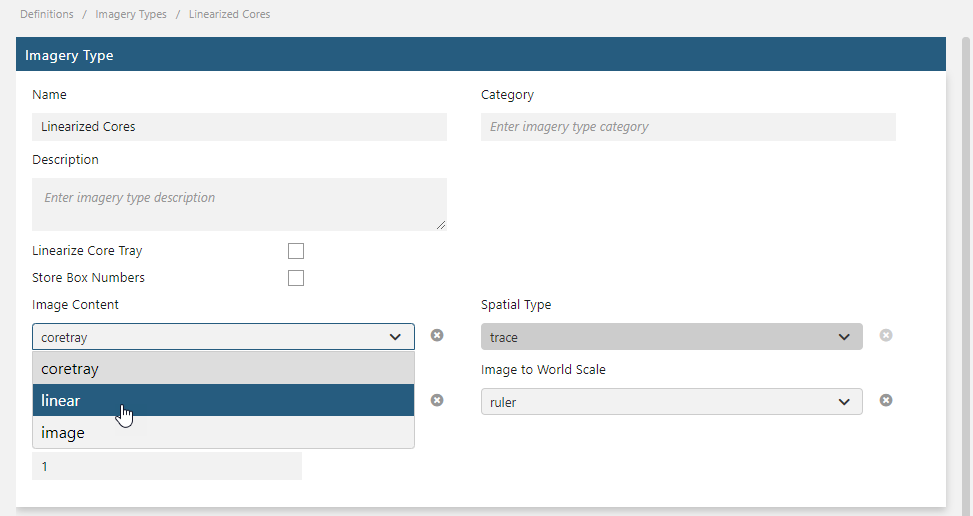
Back in the Definitions > Imagery Types list, create a new imagery type, which in this example is ‘Linearized Cores’. Set Image Content to linear:
In the Definitions list, we need to add definitions for each type of image that will be linearized, so in this example there is one for dry images and one for wet images. To define these, use the Derived Image Type option in the Data type dropdown list:

Once the two image types have been defined, we can go back to the Core Boxes imagery type.
Adding the Linearized Option to the Core Boxes Imagery Type
Now that the Linearized Cores imagery type has been set up, we need to add it to the original image types we set up for Core Boxes. To do this, return to the Core Boxes page and click on the Advanced Settings option for the Definitions list. Then select Linearized Cores from the Linearise To list, matching the image types defined for Linearized Cores to those defined for Core Boxes, e.g. wet and dry:

Note that once you have selected the Linearized Cores/Linearized Dry for Original Dry (A), that option cannot be used again (B):

Now that the Core Boxes imagery type has been defined, it can be added to datasets.
Learning More
To become more familiar with imagery types and other data definitions, see the following topics in the Admin Reference Guide:
- Data Definitions
- Imagery Type Definitions
- Feature Definitions
- Attribute Definitions
- Label Definitions
- Legend Definitions
Next Steps: Adding Imagery Types to Datasets
At this point, with three imagery types defined (A), we can create a workspace/dataset (B) to use them in.

This is described in the Creating Workspaces and Datasets topic.
Got a question? Visit the Seequent forums or Seequent support
© 2025 Seequent, The Bentley Subsurface Company